Part of a spacing test on old FP4 stock for a Reflex-Korelle SLR from the 1930s this one looks good!
|
by TRA How do I avoid uneven spacing and do a spacing test?
How do I avoid uneven spacing? This question has always puzzled me, as spacing (or overlapping frames) has not been a problem with any of my Pentacon Six cameras; however, it appears to be a big problem for some people or for some cameras. There are three things to try if you get uneven spacing with your Pentacon Six or Exakta 66:
In most cases, that should totally solve your spacing probems forever. An important detail of the loading process is keeping the film tight: you need to hold the supply spool with a finger or thumb, and as you advance the film to the start mark you should be able to see the tooth marks of the film spacing roller at the top and bottom of the of the backing paper. Just in case there is ever a problem with that web link, essentially, Mr Baiers procedure involves the following: After firing the shutter in the normal way, before winding on, press the shutter release fully down (it wont fire again), and hold it down while activating the advance lever only until the lever is in a straight line with the front of the body. (If you feel some additional resistance when advancing the film, slightly reduce the pressure on the shutter release button.) Then take your finger off the shutter release and continue moving the advance lever to the end of its travel. Guide it back to its rest position with your thumb, as always (never let it swing back on its own). I have never tried this procedure, as I have never had a spacing problem with any of my cameras, but I am told that it can help in some cases.
Hand it over to a specialist repairer who knows these cameras. You will find details of repairers here. OR send it to Rolf-Dieter Baier in Germany for repair, and installation of his Film Advance Control, which gives a visual indication when the film has advanced far enough. I have also not had this advance control installed on any of my cameras, as I have not needed it, however, I have bought other items from Mr Baier and find him extremely knowledgeable on the Pentacon Six and Exakta 66, and extremely reliable. I recommend him. This involves sacrificing a film you may have a spare out-of-date film that you dont mind using for this purpose. 1. Load the film in the normal way (as shown on this website!), close the back and wind and fire to the first frame.You will immediately be able to see if the camera is spacing the frames correctly or not. |
|
Part of a spacing test on old FP4 stock for a Reflex-Korelle SLR from the 1930s this one looks good! |
|
Click the following link to see
the spacing test video that I have made:
I uploaded this as a High Definition
video, but YouTube seems by default to make it available in its usual low
definition format.
However, it does show you in just
under 6 minutes how to do this.
But then, I would have expected
that, as I had followed my own loading instructions, which
are on this website here and on YouTube
following this link:
Please excuse the slight slip of the tongue at the end of the spacing test video: the film was definitely not perfectly exposed, as I said, but it was perfectly spaced, as I meant to say! :) With correct loading, as described on the links above, your Pentacon Six will give well-nigh-perfect spacing! |
|
|
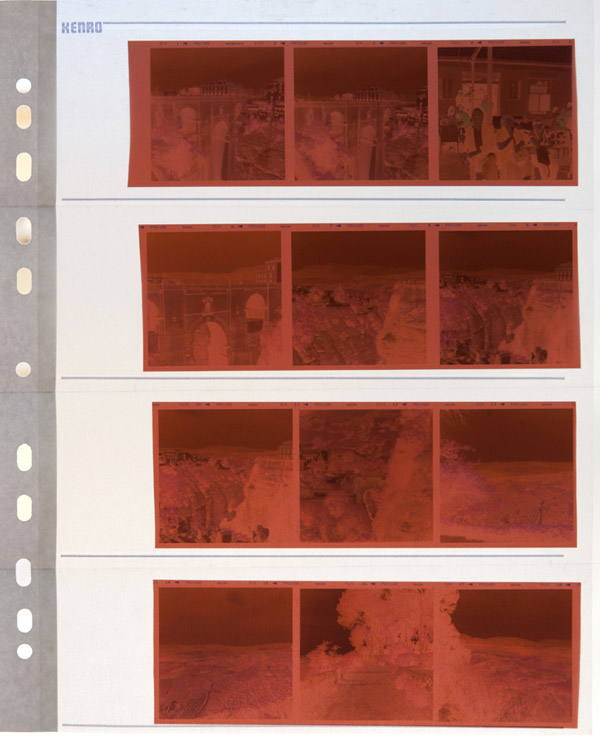
| Below, I show a film as received from the lab, in the
filing sheet in which it will be stored in a ring binder, in film number
order. Even though there is some slight width variation in the gaps
between some frames, this is well within specifications and every bit as
good as the spacing that I get on various Hasselblad cameras, for instance.
You should get spacing as accurate as this with your Pentacon Six. (Naturally, the frosted paper of the filing sheet reduces the resolution and the contrast of the negatives in this picture. They need to be removed from the page for insertion into an enlarger or a scanner.)
|
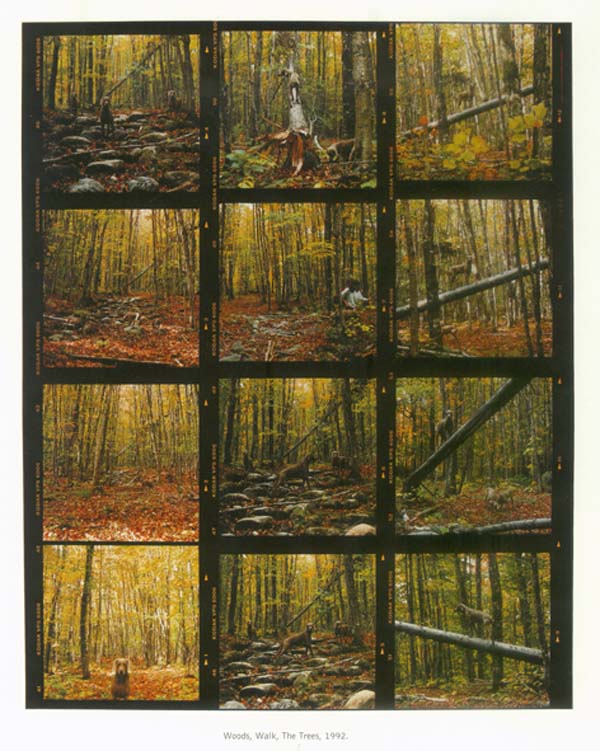
Sometimes, Hasselblad publications show sample
contact sheets. Here is one such example, presumably of slide film,
published in "Hasselblad Forum: 50 Jahre Hasselblad Kamerasystem", which
was published in 1998.
It is one of three contact sheets in that publication,
and all show variations in frame spacing. In fact, the Pentacon Six
frame spacing shown on the left is at least as good, if not better than
the Hasselblad spacing that they have chosen to show as an example of the
quality of the results obtained with the Hasselblad system.
|
| We are here, of course, dealing with the movement of physical components, and each manufacturer will have specified acceptable tolerances. Both of these cameras show camera spacing that is at least acceptable (with in particular just two frames on the Hasselblad film closer together than would be desirable if cutting the frames to mount them for projection). I would define the Pentacon Six spacing seen here as at least very good. In fact, "excellent" would be justified, with very minor variations in frame spacing. |
To go back to the Frequently-asked Questions front page, click here.
To contact me, click here.
© TRA November 2005
Latest revision: April 2013