The Pentacon Six
System
by TRA
“Waist Level” Finders
& Magnifier Heads
Each of the cameras has its own “waist level”
finder. This misnomer goes back to the days when cameras
were routinely mounted on a tripod, which was presumably set at
approximately waist level. One might more appropriately
call these “chest level” finders, but the abbreviation WLF has
made it into common usage.
Pentacon Six
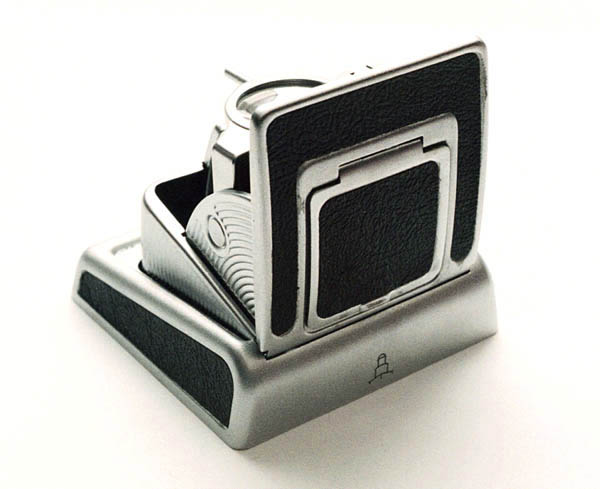
[C309-34] The Pentacon Six WLF
|
|
The original or standard Pentacon Six
viewfinder is the least good of the “waist level”
finders. Its main advantage is that it weighs a
lot less than the metering prism, and I happily used one
for about a year until getting my metering prism.
I then put it away and have not missed it! This
finder has a fold-up magnifier that assists with
focussing.
Without a prism, all cameras provide a
laterally-reversed (i.e., back-to-front) image, and this
is particularly disconcerting with moving objects.
However, one can push up a flap on the front of this
finder, and pull up a frame at the back of it, to
provide a direct vision “sports finder” that has no
optical elements. One is of course then no longer
looking through the lens – surely the raison d'être
of the SLR, so one is no longer checking focus. It
works, but I would not say that it is good.
|
Exakta 66
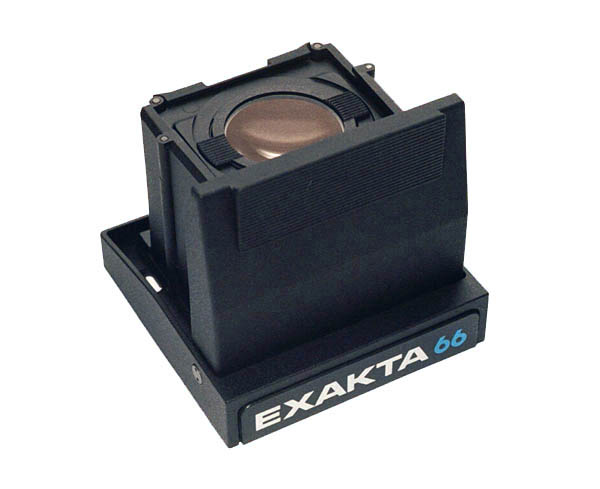
[C311-20] The Exakta 66 WLF |
|
The Exakta 66 WLF is an
improvement on the Pentacon Six model, although it does
not offer a sports finder option. It flips up very
neatly, is well shielded to keep out stray light, and has
a large magnifier, which can be exchanged for magnifier
lenses with different diopter values to meet the needs of
the user. For studio use, landscapes, architecture
or other objects that move little or not at all, it is a
good light-weight and free alternative to the expensive
Exakta 66 TTL prism.
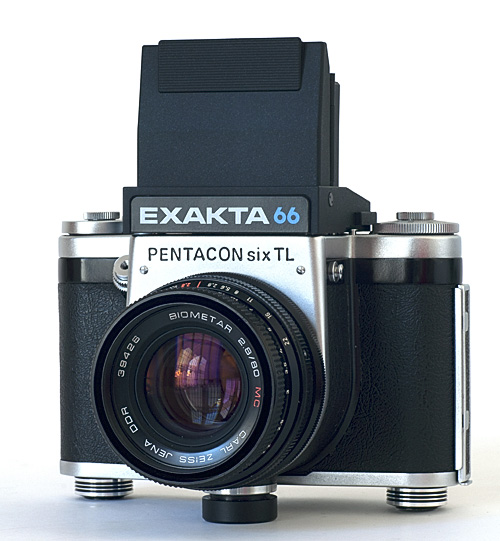
It is also possible
to use the Exakta 66 Waist Level Finder on the
Pentacon Six, without any adapter or modification,
and I know one person in Germany who does just
this, as the Exakta 66 finder is a great
improvement on the original Pentacon Six finder –
though I think it looks a little unusual.
It has the “Exakta 66” logo, which therefore
appears just above the “Pentacon Six (TL)” name.
[e66diopt01.jpg]
|
|
[p6e66wlf.jpg]
|
|
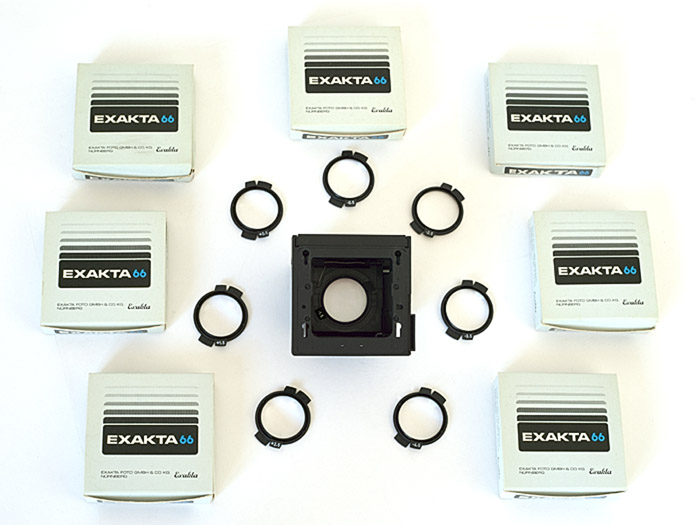
| One of the
advantages of the Exakta 66 waist level finder is that it
is easily possible for the user to change the magnifier
lens within it, to match his/her eyesight. According
to the Exakta 66 price list printed in November 1989 and
still current at least a year later, the full range
goes from -4.5 dpt to + 2.5 dpt in one-diopter steps.
In this image, clock-wise starting bottom
left (at “7 o’clock”) are: +2.5, +1.5, +0.5, -0.5, -2.5,
-3.5, -4.5. This particular waist-level finder,
which I bought new, was supplied with a -1.5 diopter
correction lens fitted. It is in place in the
waist-level finder in this image. According to the
camera instruction manual, this was the default value
that was fitted as standard.
The right diopter lens for any particular
person will depend on their eyesight, and this is best
determined by an optician or ophthalmologist.
I have been told (2018) that Baierfoto
unfortunately no longer has a selection of these
lenses. However, they do occasionally appear for
sale on the internet.
|
Kiev 60
Sometimes Arsenal really does
get something right! This is without a doubt the
best “waist level” finder of the lot. Clearly inspired by
the Rollei TLR viewfinder, this “waist level” finder is
very versatile. Flip up the top, and the sides come
up, providing a very well shaded view of the focussing
screen. Do you want to take pictures of something or
someone special, but crowds of tall people got there in
front of you? Hold the camera upside down above your
head, and see to frame with this finder!
For precise focussing there is an excellent
magnifier. If you are trying to follow a moving
object, this WLF has the best “sports finder” of the lot:
push in the front of the finder, and it will click into
place. At the same time, the magnifier drops
slightly to provide good shading. Use this direct
vision finder by viewing through an opening on the back
wall of the finder. Now to the good bit: lower your
eye by a quarter of an inch or so to another opening on
the back of the finder, and you are “magically” looking
through the lens to check your focussing! – all
achieved by a mirror within the finder that swings into
place when you push in the front wall. See it on a
camera, along with more important information on using
this finder with a Pentacon Six, here.
|
|
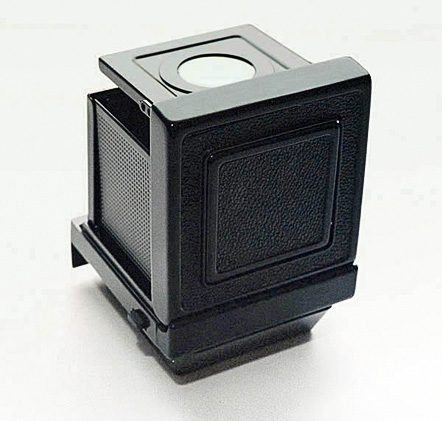
[C309-33] The Kiev 60 WLF |
Kiev 88-6 (Kiev “B.i.G.-Six”)
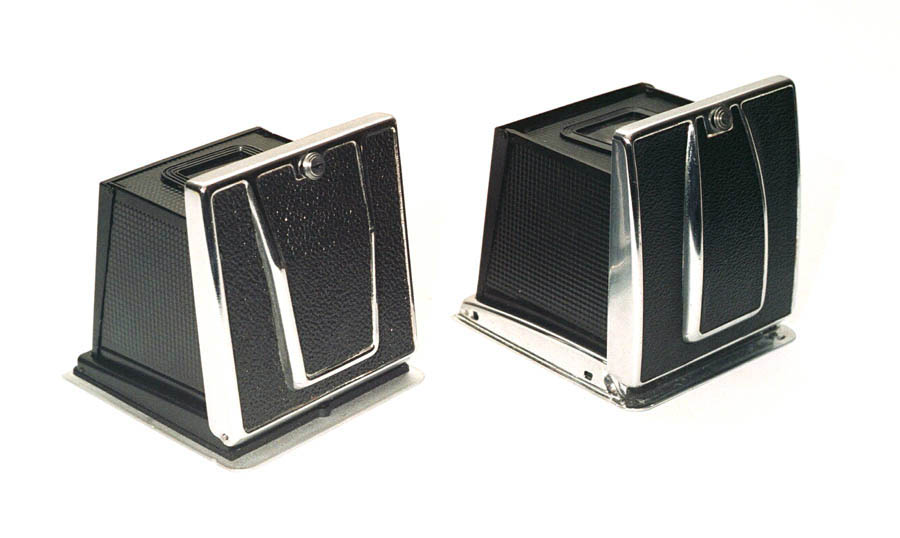
[C311-11] On the left: the Kiev 88 WLF; on the right: the
Hasselblad 500C WLF
|
|
The Kiev 88 “waist level” finder looks
remarkably like the earlier version of the Hasselblad
finder – but then so does the camera!
Unfortunately, over a number of years these finders were
manufactured with an incorrectly calculated lens in
them! When the image looks sharpest through the
magnifier lens, it is not quite sharp on the focussing
screen or the film!! Either get a replacement
lens, or take Sam Sherman’s advice and stick some wedges
to each side wall of the finder, so that they catch the
magnifier about 1/8" before it reaches fully
horizontal. It looks odd, but is then at the
correct point of focus. But do check yours before
changing anything. It might just be right!
No Kiev 88 waist level finder
can be mounted on a Pentacon Six and I do not
believe that any adapter exists to make this
possible.
|
The Pentacon Six Magnifier Head
The Pentacon Magnifier Head enlarges the whole
image to facilitate precise focussing, which is particularly
critical with close-up photography.
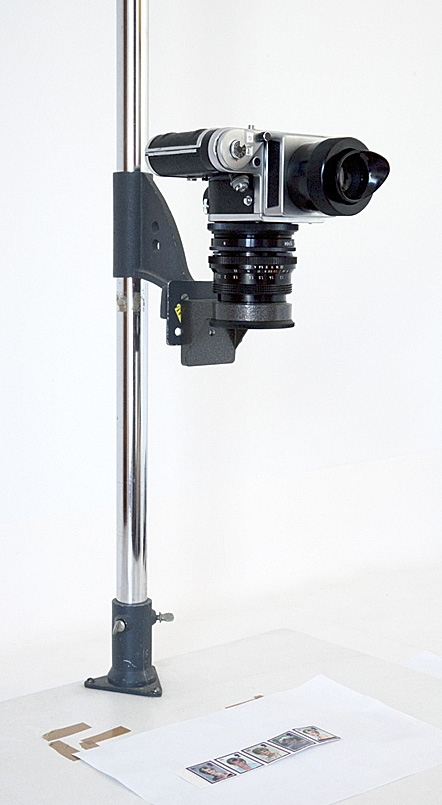
|
The Magnifier Head enables
very precise focussing and very comfortable working,
especially when the camera is vertical for copying flat
originals. Here, the Pentacon “copying arm”
copying bracket has been mounted onto a home-made
copying stand. The 49mm to 58mm adapter ring has
been screwed onto the copying arm, and the standard
Pentacon Six 80mm Biometar lens has been screwed onto
this adapter ring (which is obviously not visible in
this image). It is possible to read more about
this copying arm bracket and adapter ring in various
brochures on Pentacon accessories. See, for
instance, the illustration from a 1973 brochure, and my
explanation, here.
To copy these postage stamps, the 15mm extension tube
has here been used with the 80mm Biometar lens, in order
to be able to focus closer to the subject.
View of the
focussing screen when using the Magnifier Head
When the Magnifier Head is mounted on
the Pentacon Six, I can see the whole of the
focussing screen with it, with the
magnifier not far off the 0 diopter setting. The
focussing movement extends quite high, and
significantly lower, for some other settings, so I
don’t know if some people will experience slight
cut-off of their view of the corners of the screen,
depending on their eyesight. Using the Magnifier
Head also results in a much brighter viewfinder image
than that which is obtained via the Pentacon Six
metering prism, of course.
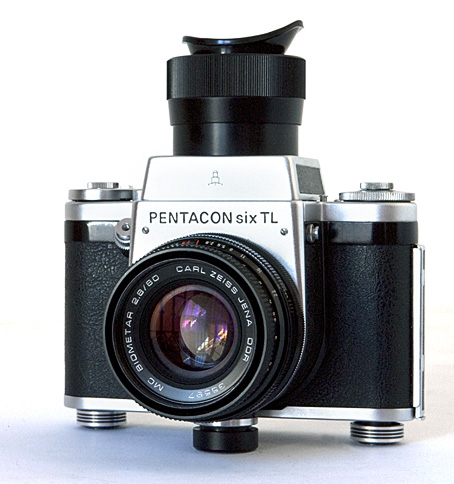
The Magnifier Head mounted on the camera |

[C309-26] The Pentacon Six magnifier head
There is also a wide range of diopter
correction to enable users to work without spectacles.
|
|
Does the Pentacon Six
Magnifier Head fit on the Exakta 66?
It does indeed.
Perfectly.
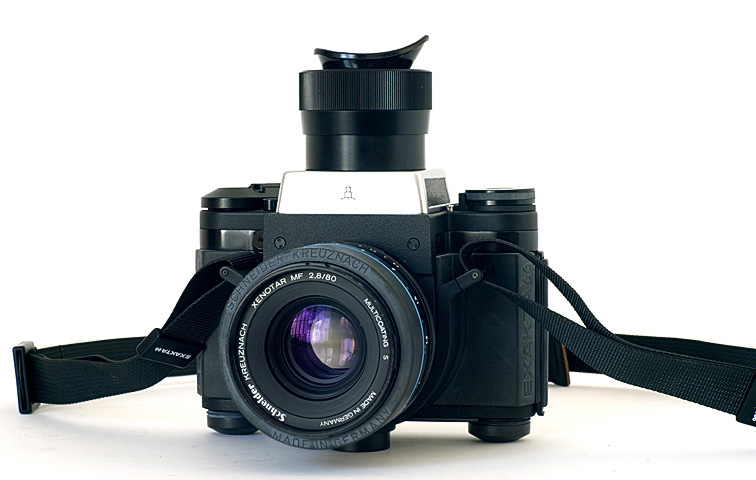
[maghde66_1.jpg]
It offers a full view of the focussing
screen on all versions of the Exakta 66, including Mk
II and Mk III (Mod 2, Mod 3), which have a larger
focussing screen.
|
|
The only question was this: will the
strip of shutter speed electrical contact points that
are to be found between the shutter speed dial and the
viewfinder mount get in the way?
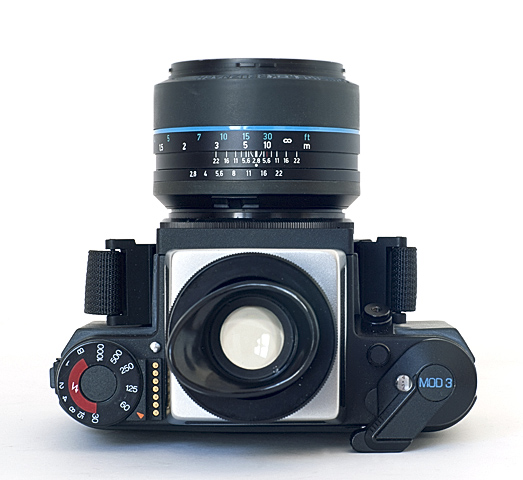
[maghde66_2.jpg]
The answer is “no” – but the points do
remain uncovered when using the magnifier head.
This does not result in any operational problems for
the camera, but it is best to avoid unnecessary
contact between fingers and these points, as natural
grease on the hands could result in poor contact
between these points and the sensors on the metering
prism when it is put back on the camera.
|
|
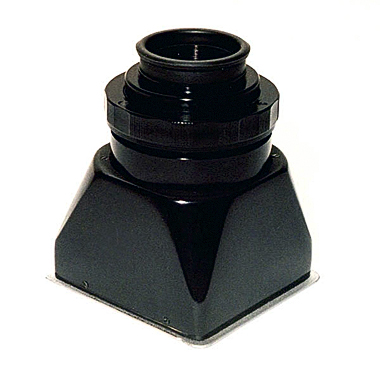
The Kiev 88 Magnifier
Head
The Arsenal Magnifier Head fits the Kiev 88 (and
Hasselblad!) and provides extreme image enlargement (the Kiev
literature states that it is 4×) to facilitate precise
focussing, which is particularly critical with close-up
pictures. It incorporates diopter correction.
|
[C311-28] The Arsenal Magnifier Head for the
Kiev 88
|
|
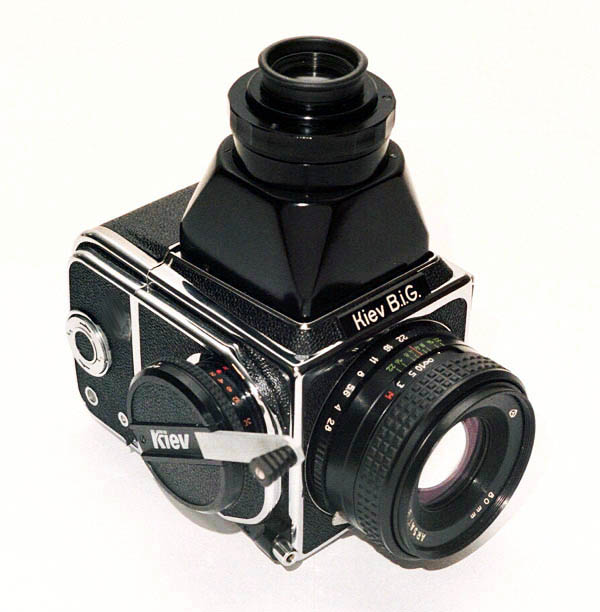
[C311-30] The Arsenal Magnifier Head in use on the
Kiev “B.i.G.” version of the Kiev 88
|
The Arsenal magnifier head can also be used with
the focussing back. See the section on viewing aids. No Kiev 88 magnifier head can be
mounted on a Pentacon Six and I do not believe that any
adapter exists to make this possible.
To go on to the next section, click below.
Next section (Pentaprisms)
To go back to the beginning of the Accessories section, click
below and then choose the accessory that you want to read about.
Back to beginning of the Accessories section
Home
© TRA February 2002,
Latest revision: February 2024


