The Pentacon Six System
by TRA
The Pentacon Six Case & Straps for the Pentacon Six and the Exakta 66 The Pentacon Six Ever-Ready Case |
|
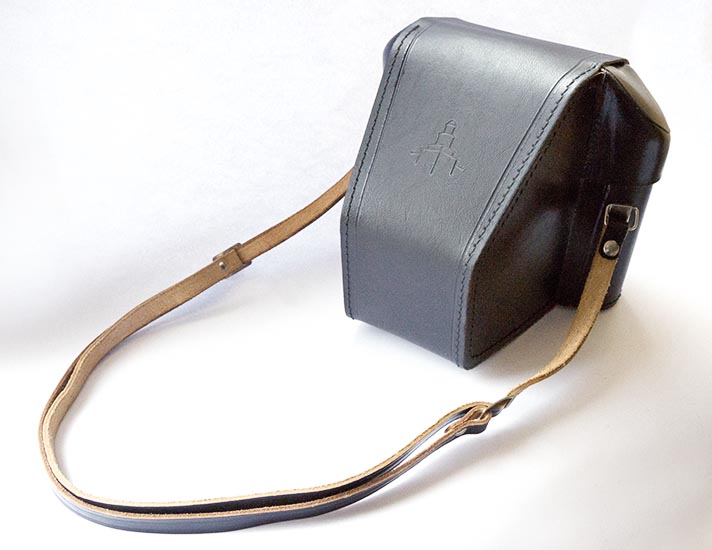
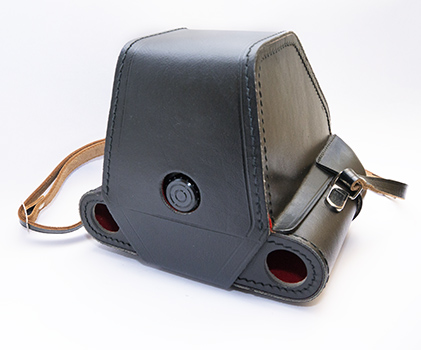
The Pentacon Six was usually supplied
with a large leather case, designed to accommodate the
camera complete with its metering prism, and I keep my
case permanently on my camera whenever I am using
it. As well as providing a strap and protecting
the camera, it gives me a place where I can slip a piece
of paper (between the camera back and the case) with
notes on what I have photographed and exposure
information (lens used, shutter speed and aperture).
In this image you can see the Ernemann Tower Pentacon Symbol on the front of the case. |
|
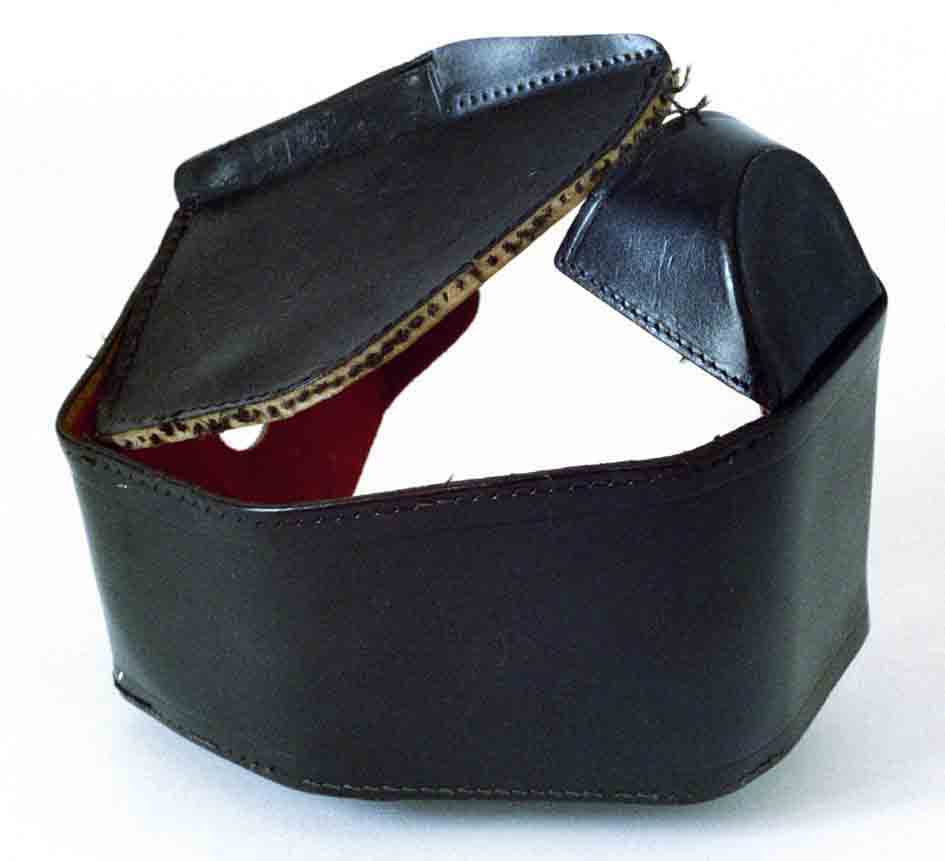
The only defect of this case is that
after a number of years the stitching
disintegrates. Re-stitching the case (using the
original holes!) is the only solution – a laborious and
finger-hurting exercise!
Here is the worst case (!) I have seen – one of mine! (subsequently re-stitched by me and now stronger than when new!)
|
Getting a perfect
fit
In 2015 I bought a new
Pentacon Six case. This was for one of my Pentacon
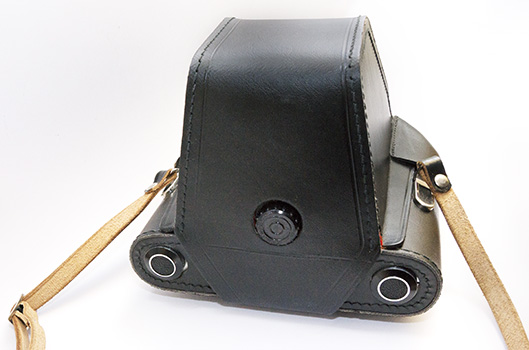
Sixes that came without a case when I bought it. The new case was, indeed, clearly brand new, but getting the camera into it was difficult. Why? Firstly, Pentacon Six camera cases are quite stiff when new. My favourite case is the oldest one that I have. It is scuffed and marked, but through use it has become softer and easier to handle. But that couldn't account for the whole of the problem, so let's look closer, at the underside of the case: [case02.jpg] |
[case01.jpg]
|
On the underside of the case
there are two large holes, designed to accommodate the two
spool-holder knobs that protrude below the base of the
Pentacon Six. In fact, most versions of the
predecessor to the Pentacon Six, the Praktisix, did not
have these knobs, and the case was originally
designed for the Praktisix! -- and made out of
brown leather, in accord with the style of the day. You can see
one of those cases here.
When later Praktisix II cameras were made (see here), with the spool
lugs during the later production of the camera, holes were
punched into the base of the case to accommodate
them. That case became the Pentacon Six case, made
with a black finish. On this particular new case, the holes appeared to be in the wrong place -- slightly too far to the right, when looking at the case from this angle. This seems to be an uncommon problem, although in nearly forty (!) years of buying and using Pentacon Sixes I have encountered it on just one previous occasion. |
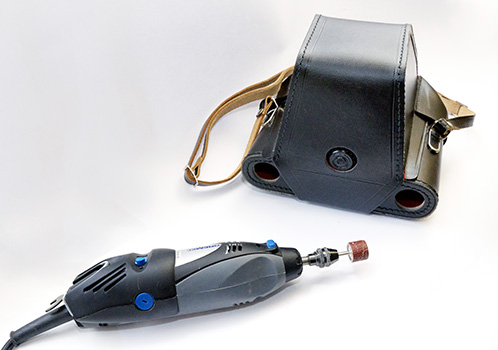
The best solution seemed to
be to use a sanding wheel on a small craft tool to grind
out the holes in the base of the camera case a little so
that they aligned neatly with the spool-holder knobs in
the base of the camera. To avoid any danger of widening the wrong side of each hole, I made some pencil marks first, with the camera in the case, and then removed the camera and placed it where the dust that would inevitably be created could not reach it. Widening the holes was the work of a few moments. Then with a craft knife I trimmed the edge of the plush, soft red cloth that lines the case, and the job was done! [case04.jpg] |
[case03.jpg] |
Straps
|
Should you not have, nor not wish to
use, the ever-ready case, a strap is available to fit in
the lugs on the front of the Pentacon Six body.
However, I was told by someone that the metal can cut
into the lugs, eventually causing them to fail. I
welcome a refutation of this from anyone who has used
one of these straps on the body lugs for years.
In practice, I prefer to carry the
camera permanently in the bottom of the case, which
has its own strap and has the advantage of protecting
the camera body and eliminating any chance of catching
the back-opening lever on anything and accidentally
opening the back.
|
||
No case was ever
marketed for the Exakta 66, although their first
glossy brochure shows a suitcase-style metal case with
the name “Exakta 66” printed on it. A Billingham
soft leather case bearing a cotton or nylon tab with
the name “Exakta 66” was sold on eBay, but Billingham
never seem to have had a case with this label in their
official product range. The designers of the
Exakta 66 reasoned that with its heavy rubber coating
(inspired, apparently, by military binoculars), no
case was necessary.
|
|
The strap lugs are missing from the
throat of the Exakta 66, as they would foul the casing
of the metering prism. However, Exakta GmbH came
up with a brilliant solution: a tough carbon fibre
cradle to which a broad woven strap is attached.
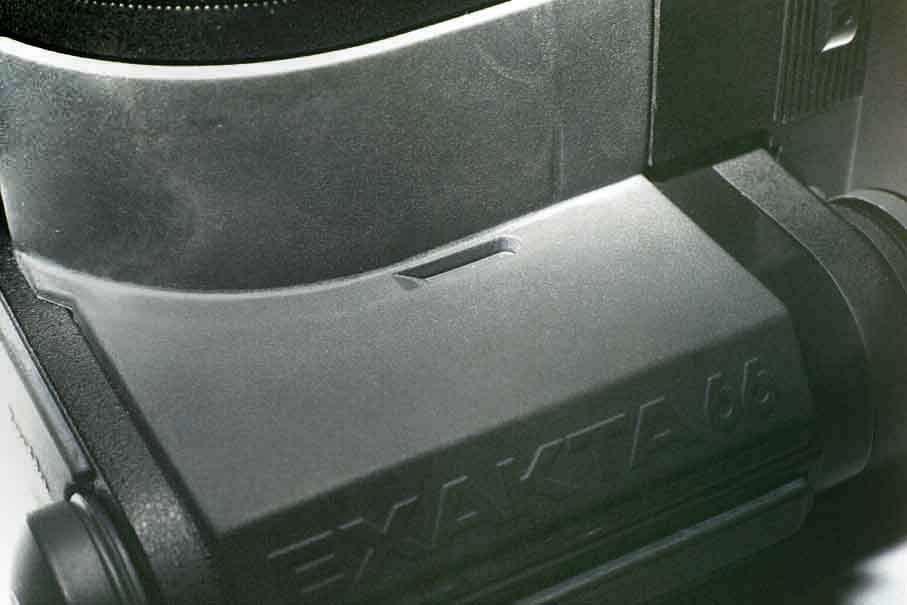
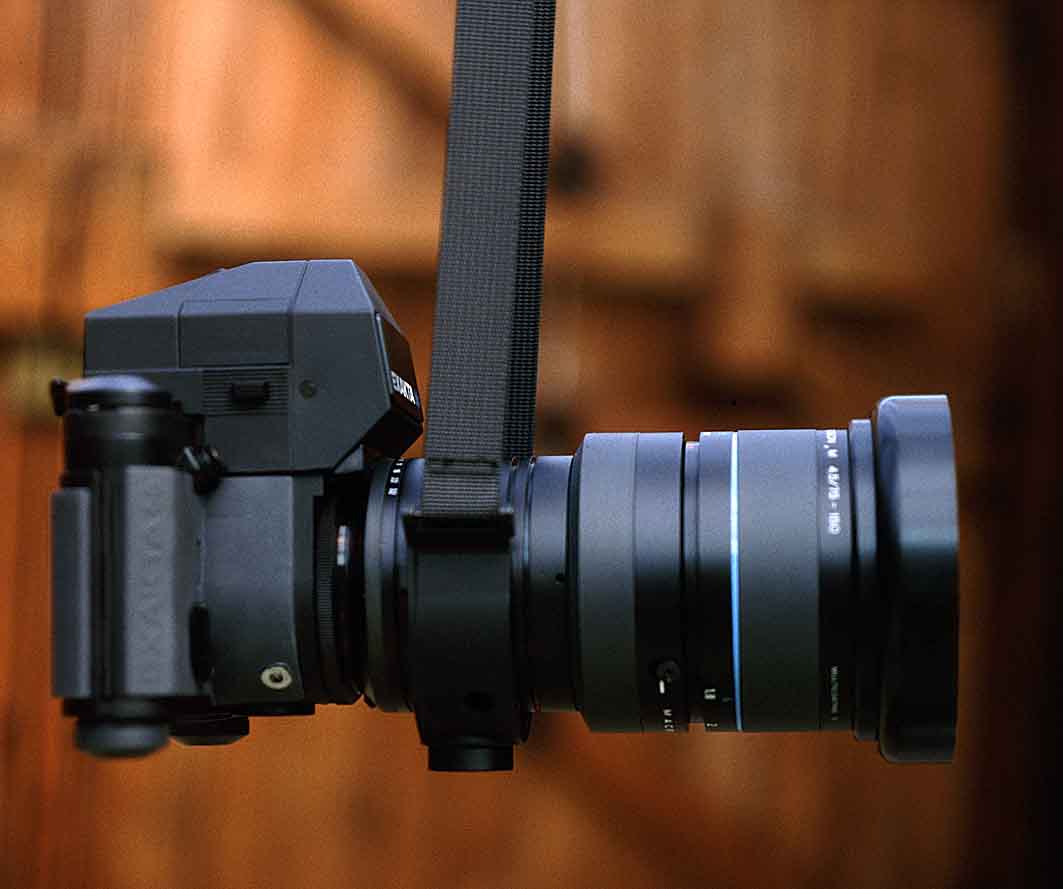
The cradle fits to the curved front of the camera, and is held in place by a strong metal nut that screws into the tripod mounting socket and has its own socket underneath. Lugs in the cradle fit tightly into a slot on each side of the camera throat. One of these slots is visible in this image. In practice, this has proved totally reliable, in my experience over the past 18 (!) years with my Exakta 66. |
[Balance.jpg] |
Another clever feature of the Exakta 66
strap – pictured on the left here – is that the two
Variogon zoom lenses have been designed with a diameter
identical to that of the camera throat at that point on
the lens where mounting the strap onto the lens instead
of the camera results in the combination of the camera
and the lens being perfectly balaced, as in this
photograph – a stroke of genius by the designer!
Under the strap in this photograph you can see the retaining nut, which acts as a third “foot” (with the two retractable spool holders), enabling the camera to be placed flat on any horizontal surface. The retaining nut screws through the cradle into the ¼ inch tripod socket on the base of the camera. On its base it has the larger 3/8 inch socket, into which you can screw an adapter bush if required. See more details on tripod bush adapters here. There is only one loss to the camera
design with this cradle: the flash socket locking
wheel of the Pentacon Six has had to be sacrificed, as
it would not be accessible – although a hole in the
cradle facilitates easy insertion of the flash
cable. (In reality, I have never known a flash
cable to come out of a flash socket, which is probably
why no other cameras that I am aware of ever had a
flash socket locking wheel.) |
in front of the waist level finder, to give an indication of scale |
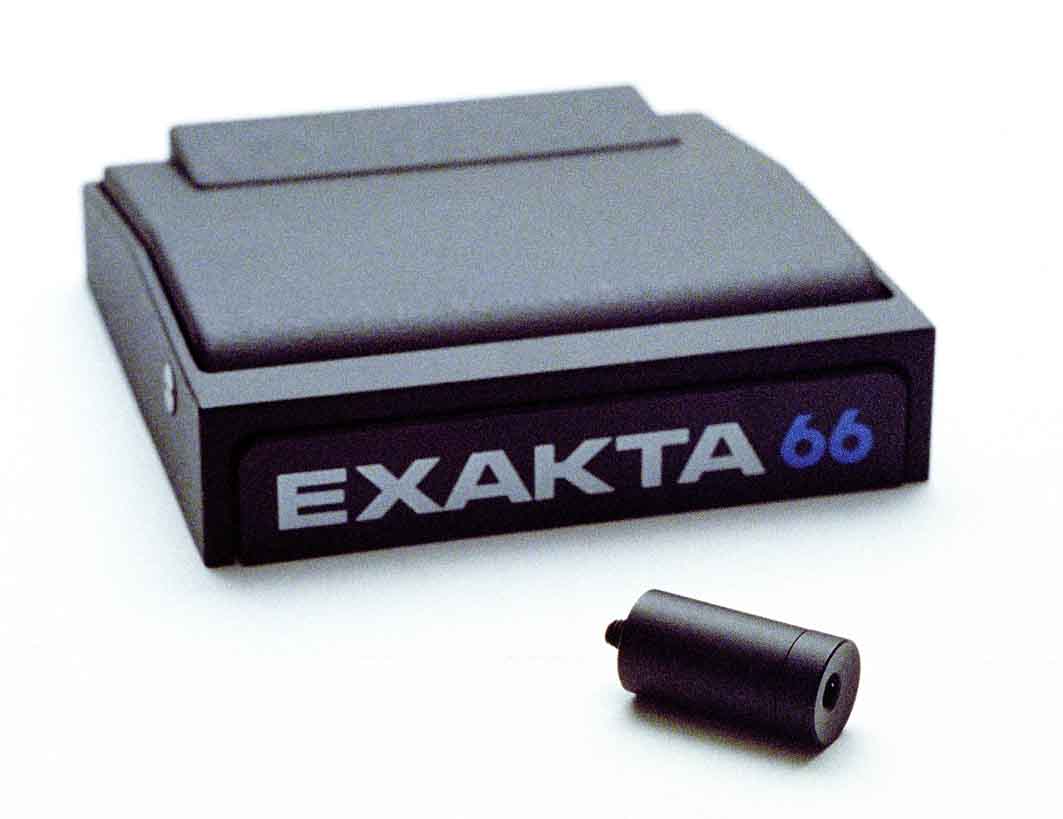
The designers of the Exakta 66 system
decided that the strap cradle might make access to the
shutter difficult, so they designed an optional shutter
release extension – a little black tube that screwed
into the shutter release and could be easily pressed
with the forefinger. Another careful detail that
was thought of was that this shutter release extension
had its own cable release socket. I have one of
these extensions, but in fact do not find that the
position of the carrying strap cradle causes a problem. You can see more pictures of the Exakta 66 shutter release extension here. |
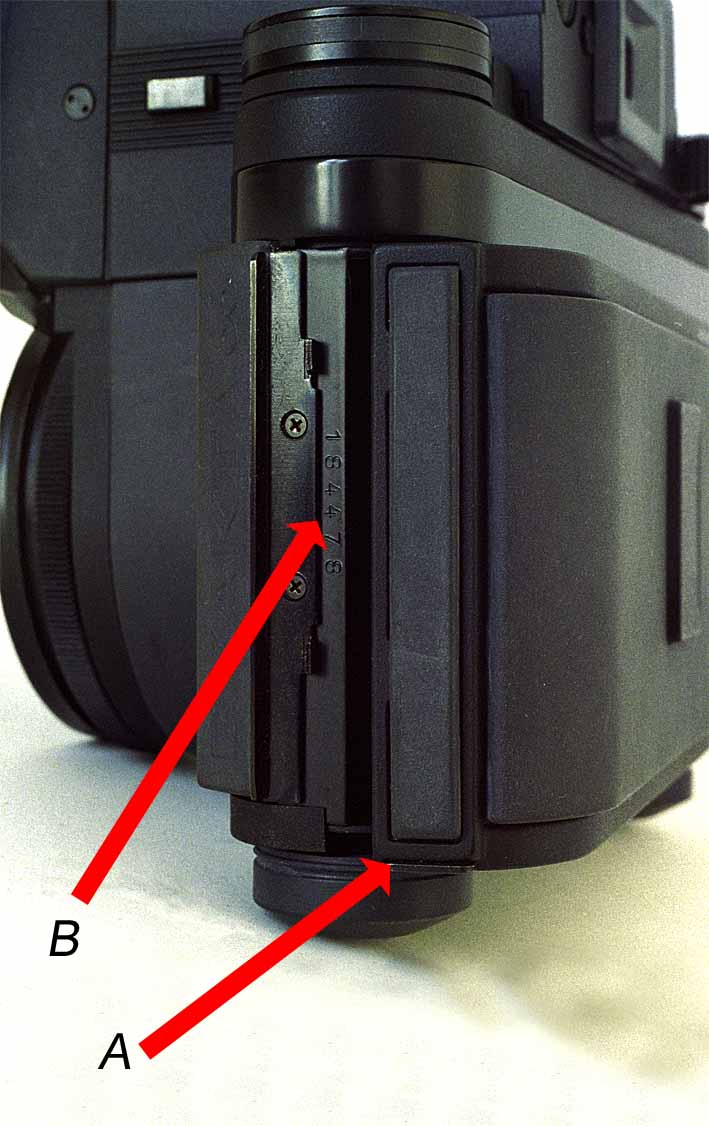
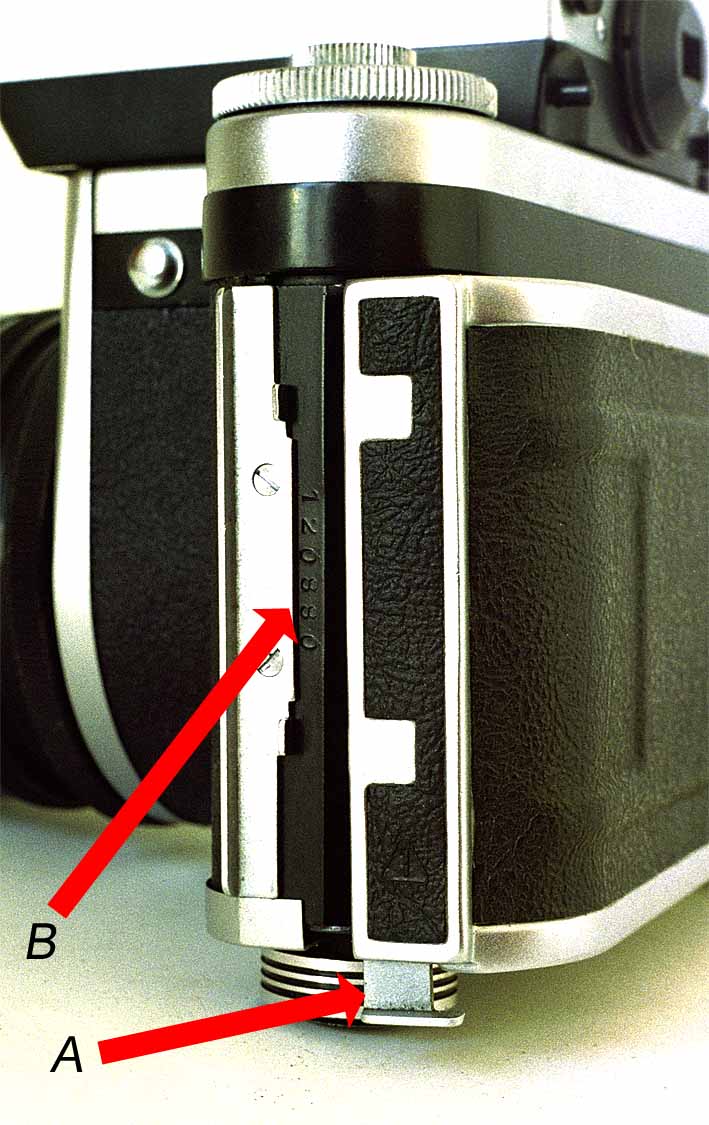
A few people (apart from me!) must have
occasionally caught the little catch that opens the
back, when removing their Exakta 66 from a soft bag, as
Mk II of the camera added a spring to the back opening
catch, making accidental opening somewhat more unlikely.
In the images on the right, “A” shows the camera back release catch. With the back open on the Pentacon Six, the catch is in the “down” position, whereas a spring within the locking mechanism of the Exakta 66 Mk II and Mk III back maintains the catch in the “up” – locked! – position. It is unfortunately not possible just to add a spring to the existing catch; a whole new back is needed, which is why my Pentacon Sixes do not have the spring. However, as I always carry my Pentacon Sixes in at least the base portion of the case, this prevents the back opening catch from getting caught on anything.
|
|
|
|||
Location
of Serial number
In passing, “B” on the same images above shows where the serial number is located on the body of the Pentacon Six and the Exakta 66. Note that with the
Praktisix, Praktisix II and Praktisix IIA the serial
number is not located here. Open the back and
look underneath the camera. You will see the
serial number on the bottom of the base plate in a
position that is covered when the back is
closed. With the II and IIA the number is
usually filled with white paint, which makes it easier
to see.
|
To go back to the beginning of the Accessories
section, click below and then choose the accessory that you want
to read about.
Back to beginning of
the Accessories section
To return to the instructions front page, click here.
© TRA February 2002 Latest revision: April 2024