The Kilfitt 90mm
Makro/Macro-Kilar
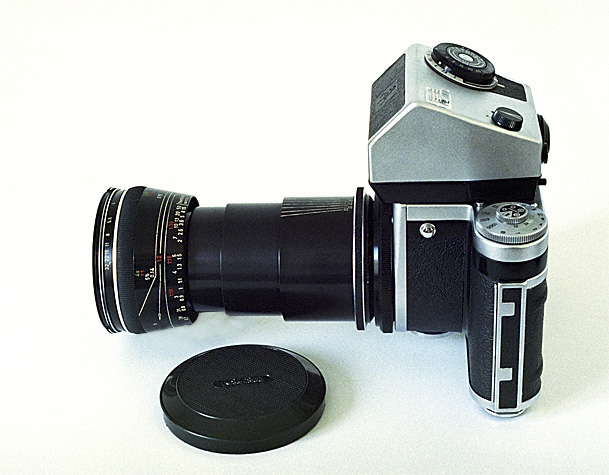
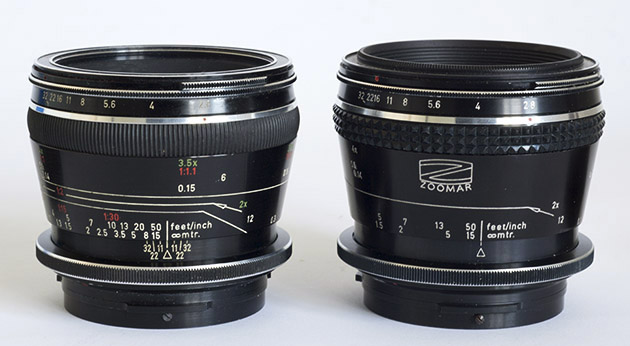
When focussed at infinity, the 90mm Makro-Kilar looks like a reasonably normal, if rather large, standard lens. [C444-4] |
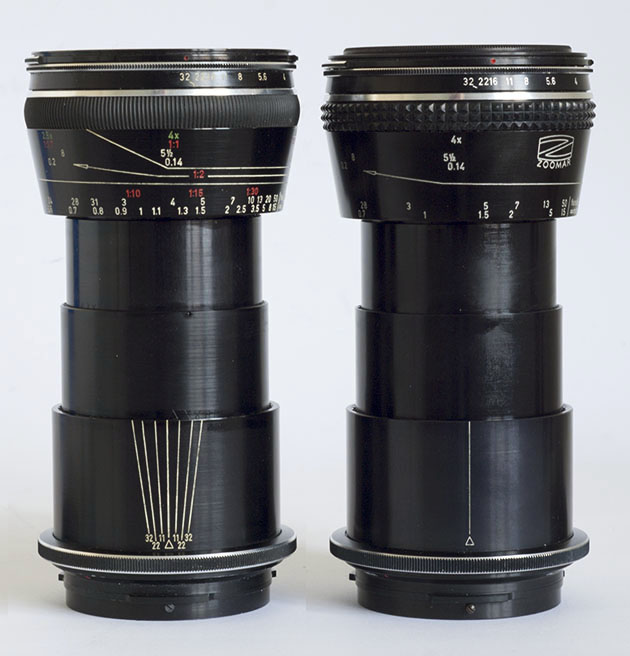
However, when at its closest focus setting, it looks quite remarkable. No extension tubes have been added here; this massive degree of extension is obtained with the lens alone. [C444-5] |
[mk90_1956_01.jpg]
|
|
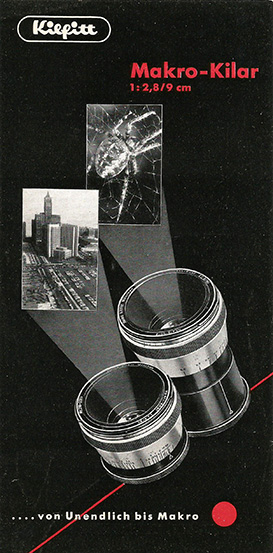
This publicity brochure produced by Kilfitt
appears to have been published in 1956, possibly in
February of that year, as it is marked “II. 56”. It
shows the first version of the 90mm Macro (or “Makro”)
Kilar, which, in keeping with the style of the time is
largely chromed metal (“silver”-coloured). It shows
the lens at infinity setting, with a sample image, and
then extended (although not fully!) for macro
photography. (To have taken that photograph of a
spider, greater extension would have been required,
although it was probably within the range of the
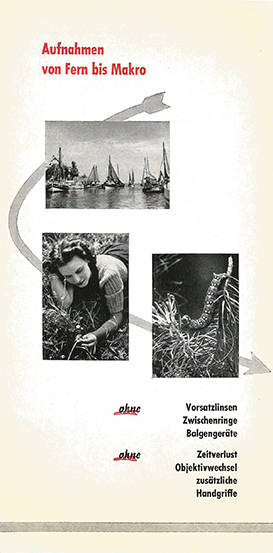
Makro-Kilar, at least for a larger-than-average spider!) The German text “... von Unendlich bis Makro” means “... from Infinity to Macro”, a phrase that was re-used, slightly changed, by Schneider-Kreuznach nearly 30 years later (see here) – although their lenses required the use of bellows and possibly extension tubes, and even then were not quite as flexible as was claimed. Kilfitt’s publicity emphasised the ease with which one lens could be used for vitually all photographic requirements, without needing any accessories such as extension tubes, bellows or close-up filters, without losing any time and without changing lenses. In Schneider’s case, in the 1980’s, bellows were required in order to achieve this range. The 90mm Makro-Kilar was apparently the second Makro-Kilar produced by Kilfitt. The first one had a focal length of 40mm and only covered the format of 35mm cameras (24 × 36 mm). It is interesting that for the 40mm Makro-Kilar, Kilfitt chose a focal length that was a little shorter than that of standard lenses for 35mm cameras (50mm), and that their literature made a point of emphasising the benefits of what they called “a fine wide-angle effect”. However, for their medium format Makro-Kilar, they chose a focal length that was a little longer than that of standard lenses for 6×6 medium format cameras (80mm). |
|
[mk90_1956_02.jpg]
|
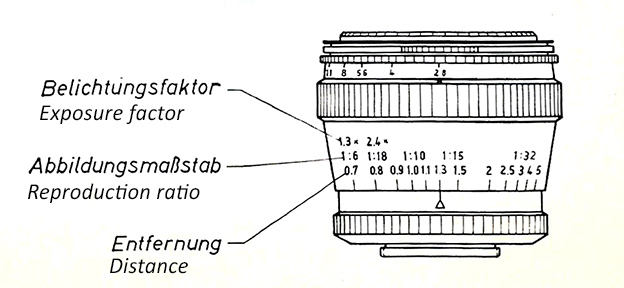
The illustration to the right, which is in
the same Kilfitt brochure, shows the meaning of the
numerals that are engraved in white, red and green on the
main barrel of the Mk 2 version of the lens, white for
distance (in feet and metres), green for the exposure
factor that must be applied to a reading from a hand-held
meter or other non-TTL-metering source, and red to
indicate the reproduction ratio. I have added the
English under each German caption. (I have no
information on the colours used on the Mk 1 version of the
lens.) The brochure also points out that the deeply-recessed front element is protected in what it calls “a permanent lens shade” – the deep front of the lens. It states that the lens is a modern high-performance type consisting of four elements that give high “Brillanz” (colour saturation/colour contrast) and fine resolution. The angle of view is given as 28° in 24×36 format and 48° in 6×6 format. |
|
[mk90_1956_03_pt.jpg]
|
[mk90_1956_04_pt.jpg]
|
|
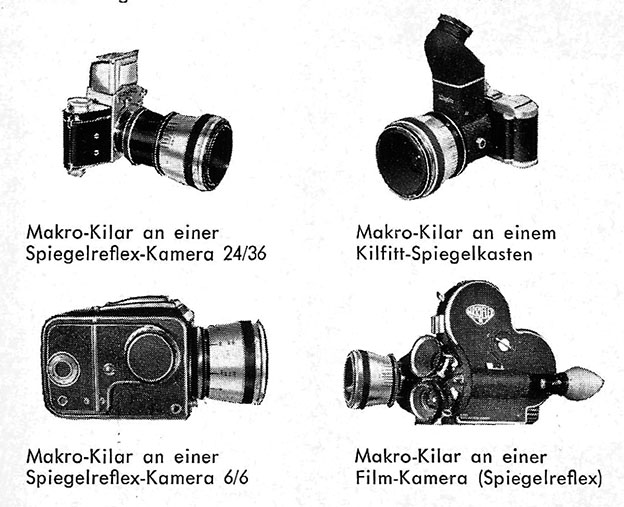
The brochure shows the 90mm Makro-Kilar
mounted on four types of cameras:
For movie cameras, it lists only the Pathex-Webo M. For 6×6 SLR cameras it lists mounts for:
|
We note that the Praktisix/Pentacon Six is
not listed in this brochure, but this is not surprising,
as the Praktisix was launched on 2nd September 1956 and
the brochure must have been produced earlier in the
year. A Praktisix mount (which also fits the
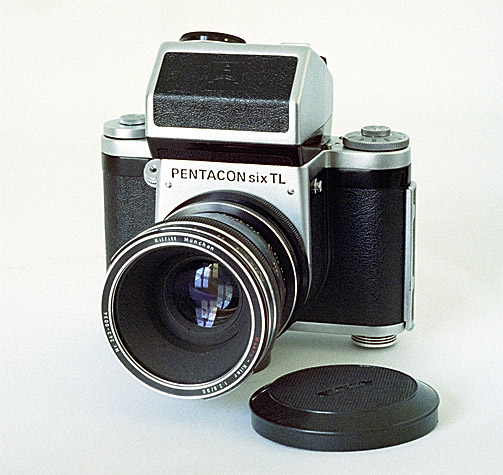
Pentacon Six) was offered by Kilfitt soon thereafter. According to the book by Patrice-Hervé Pont (see here, p. 47), the first version of this lens was produced from 1957 until 1964. A second version of the 90mm Makro-Kilar was produced in black. An example of that version is illustrated at the top of this page. Pont states that the second version of this lens was produced from 1964 until approximately 1970. The following photographs show what can be achieved with the Makro-Kilar (2nd version) at its closest focussing distance. |
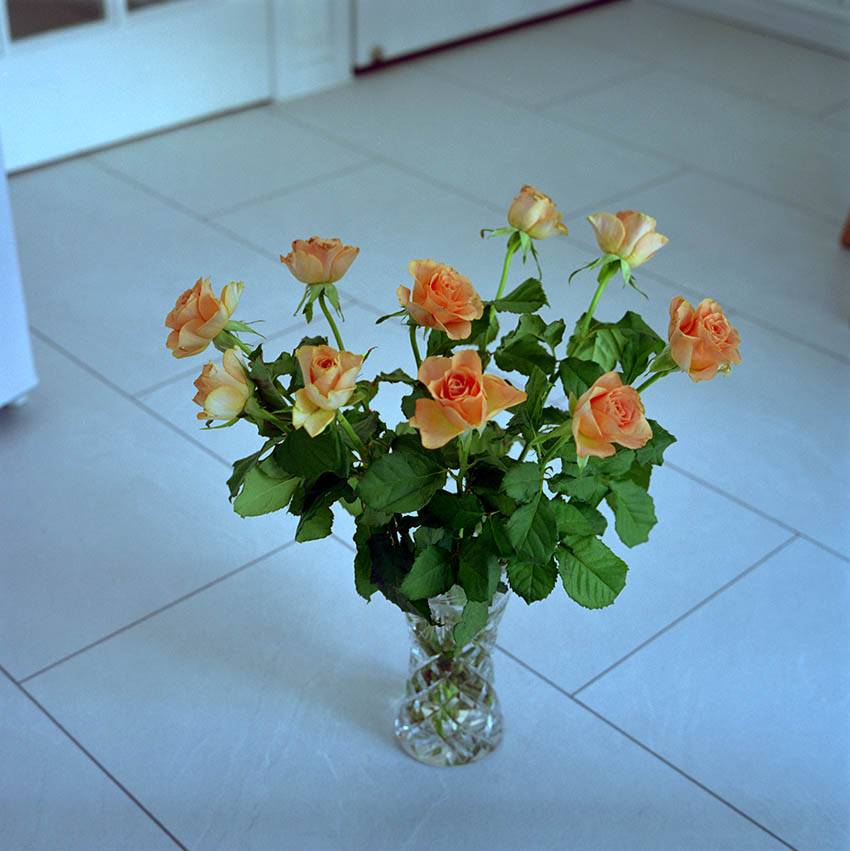
80mm Biometar at closest-focussing distance 1/4 sec f/8 |
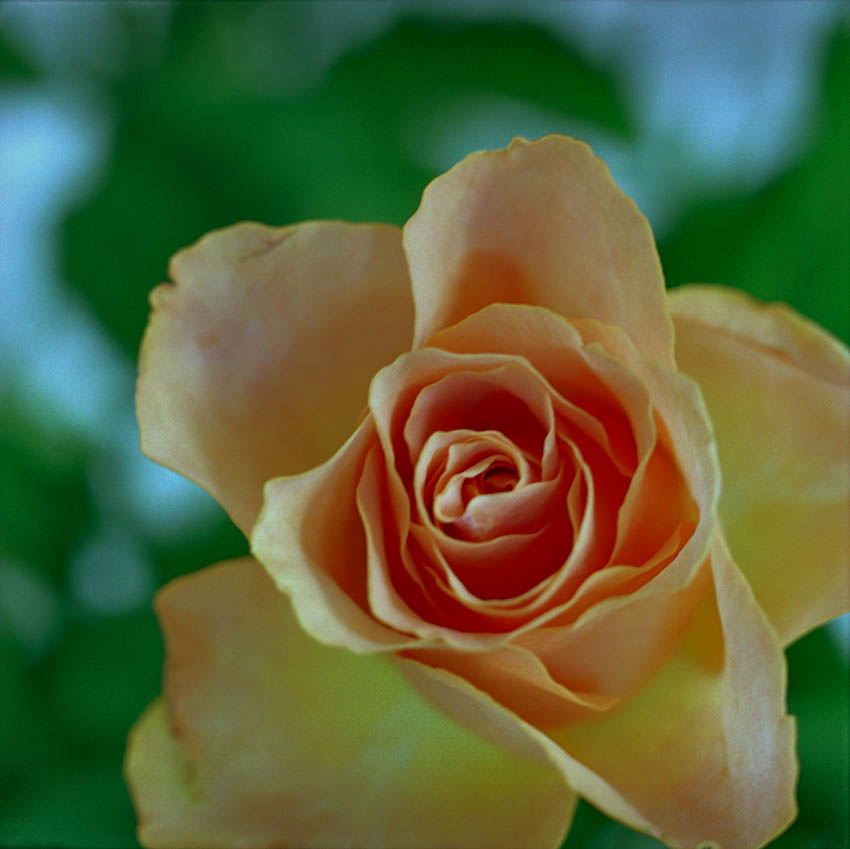
Makro-Kilar at closest-focussing distance 10 sec f/8 |
|
Camera: Pentacon Six TL
Film: Fuji PRO160NS Lighting: natural daylight
(indoors) Exposure meter: Pentacon/Zeiss metering
prism for the Pentacon Six MLU (mirror lock-up / mirror pre-release) used with both exposures Tripod: Velbon CX300 Both images scanned on an Epson Perfection V750 PRO, using VueScan software, at 6400 dpi |
The longer exposure with the
Makro-Kilar is a natural consequence of the much
greater extension of the lens, compared with the
Biometar.
The tripod (received as a gift for subscribing to a photo magazine several years ago!) is clearly not adequate for macro photography with a medium format camera, as in spite of focussing being spot-on and a total absence of any mirror-induced vibration, neither image is critically sharp (when viewed much larger than on this web page!). This is a consequence of camera movement during the exposure. A much sturdier tripod is clearly required for medium format macro photography. These images therefore can only serve to compare the closest image possible with these two lenses, not the resolution of either of them. Note the extremely shallow depth of field (the in-focus range of the object in the image) in macro photography. In consequence of this characteristic, it is common to stop down to f/16 for macro photographs (or even smaller apertures, with lenses that offer such settings). This would increase depth of field a little. At f/16 with the above lighting conditions, an exposure of 1 second would have been required with the Biometar, and an exposure of at least 40 seconds with the Makro-Kilar. Reciprocity failure I say “an exposure of at least 40 seconds” (in the above example), as the film sensitivity data stated by manufacturers is generally accurate within a range of exposure times from a few seconds up to a shortest exposure time of 1/1000 sec (or 1/2000 or 1/4000, with cameras that have these speeds). For exposures that are longer than about ten seconds, a phenomenon known as "reciprocity failure" means that the film behaves as though it were less sensitive, in consequence of which an even-longer exposure is required. At such long exposures, there can also be colour shifts -- the colour of the image will change, sometimes markedly. If you plan to do a lot of macro photography, especially if using slide (reversal) film, research "reciprocity failure" and possibly even contact the film manufacturer for further information and guidance. They may give you factors by which you should multiply the exposure, or suggest colour-correction filters that will bring the colour back to the normal characteristics of the film. Alternatively, for some subjects a suitably-placed flashgun (or two!) will enable you to avoid reciprocity failure by using the camera’s flash sync speed (approx 1/25 sec with the Pentacon Six), and it will still be possible to use a small aperture, the exact value of which will be determined by the light output and positioning of the flashgun(s). The recommended retail price of the Makro Kilar in West Germany in October 1959 and in July 1966 can be seen here. (Look for West Germany, 1959 and 1966, and then see the right-hand column.) |
As indicated on the Kilfitt introductory page
(here), the Kilfitt
company was sold to the Zoomar Corporation of America.
This apparently occurred between 1966 and 1968 (Pont, p.
15). Zoomar maintained production, in Munich, Germany,
of the range of Kilfitt lenses, but the name and logo of
Zoomar was added to the lenses, and certain other changes
were introduced. On this page, we will just look at
the 90mm Makro-Kilar.
|
|
The same lenses at maximum extension
[mk90_02.jpg] |
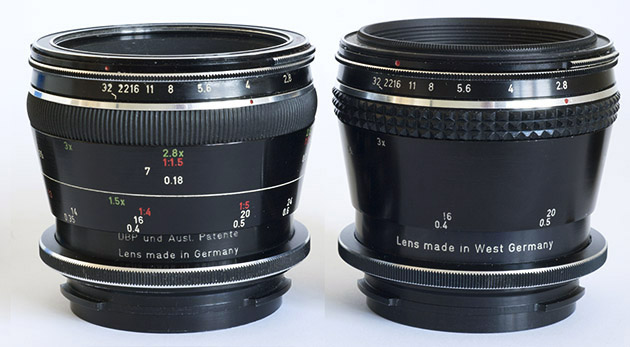
At some point, the sectors of Germany occupied by the three western powers (France, the U.K. and the U.S.A.) started to label their products “Made in West Germany”. In this particular case, the drive for the change may have come from the American company that now both owned Kilfitt and planned to export to the USA the largest possible number of products. U.S. Customs authorities had been stamping products from the Soviet-occupied sector of Germany with phrases such as “Russian occupied” for more than a decade. |
[mk90_06.jpg] |
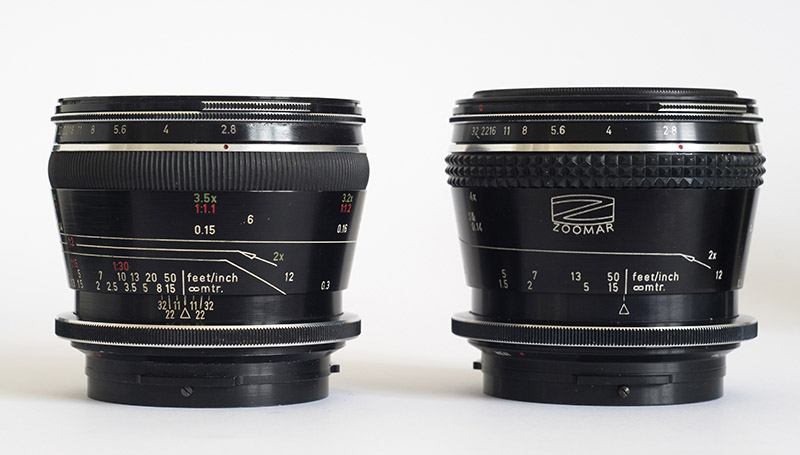
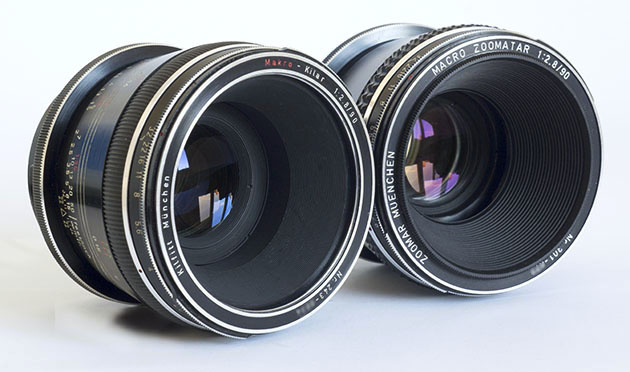
In the image to the left, we note the changes
in lettering on the lens between the Mk 2 and the Mk 3
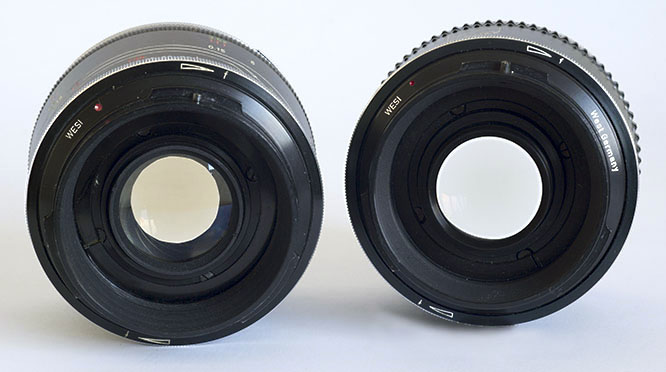
versions. Where Mk 2 has “Kilfitt München”, Mk 3 has “ZOOMAR MUENCHEN” (with a slightly Americanised spelling of “Munich”), and where Mk 2 has “Makro-Kilar”, Mk 3 has “MACRO ZOOMATAR” (with a “C” instead of a “k”). (Serial numbers have been deliberately blurred in this image, for reasons of security.) This picture shows how deeply recessed the front element is in these lenses, making a separate lens shade totally unnecessary. The coating on the Macro Zoomatar also appears to be slightly different from that on the Makro-Kilar. In the image to the right, we can see the “WESI” mount that is required for the Praktisix or the Pentacon Six. Here we see that an extra inscription has been added to the newer mount: “West Germany”. The colour of the glass in the Makro-Kilar also appears to be less bright than in the later Macro Zoomatar. |
[mk90_03.jpg] |
Using filters with the
Makro-Kilar / Macro-Zoomatar There is one further detail about the Makro-Kilar / Macro-Zoomatar that merits description: provision for the use of filters with these lenses. We saw above that Kilfitt drew attention to the fact that the deeply-recessed front element provided what they called “a permanent lens shade” – the deep front of the lens. Looking carefully at the front of the older of the two examples of the lens shown here, the Kilfitt Makro-Kilar, we note that just below the front edge of the lens there is a filter thread. This appears to have a diameter of 60mm, as far as I can see. Although I am not able to measure the pitch of the thread, I would imagine that it will be 0.75, which is the most common thread pitch for filters of this size. However, if we mount filters here, right at the front of the lens, we will lose the benefits of the “permanent lens shade”, and light from outside the image area will strike the filter from various angles and may degrade the image. We would then need to find a way to shade the filter, most probably by adding a suitable lens shade. But Kilfitt never marketed a lens shade for this lens, for they had thought of a better solution! Let us look again at the Kilfitt Makro-Kilar and the Zoomar Macro-Zoomatar illustrated above. |
|||||
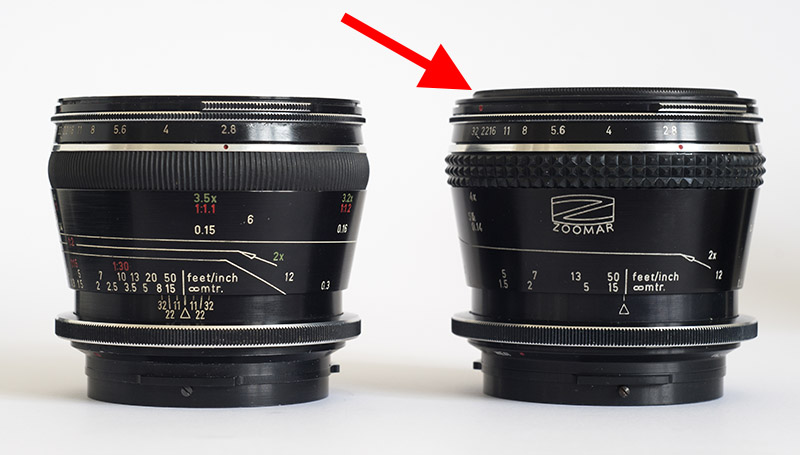
[makrok01.jpg] There is a tiny difference of detail at the top of the lenses, as portrayed in this picture. Can you spot it? After looking carefully at the two lenses, scroll down beyond the gap in the page, in order to see it. Well, here is the answer: |
|||||
[makrok01a.jpg] |
|||||
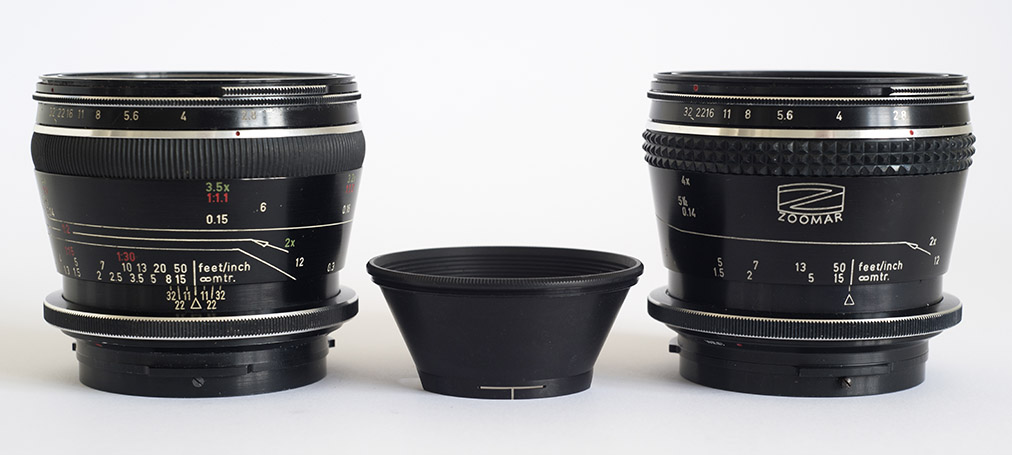
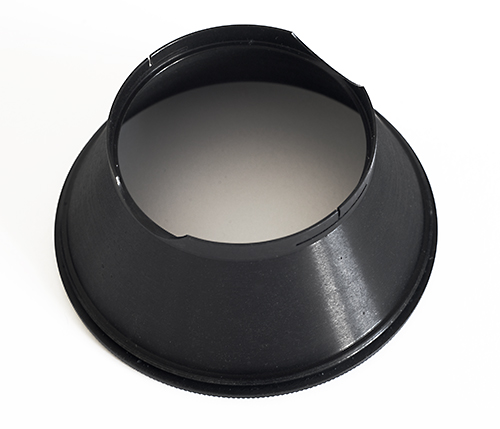
The difference? There appears to be a “ridge” at the top of the newer lens. This “ridge” has a serrated or milled edge, which can mean only one thing: it is intended to be removed! Unscrewing it, we find that it was held in place on a 60mm screw thread near the front of the lens, exactly like the one that we had noticed on the older Makro-Kilar. When we withdraw what we have unscrewed, we find that it is cone-shaped: |
|||||
[makrok02.jpg] |
|||||
In fact, it screws perfectly
into the older Makro-Kilar, too, and this lens, too, must
originally have been supplied with an equivalent cone
fitted. For some incomprehensible reason best known
to a previous owner, the cone must have been removed and
then lost. Be aware that many Makro-Kilars
and Macro-Zoomatars are sold without this important
cone! What is it for? Let us take
a closer look. |
|||||
[makrok03.jpg] |
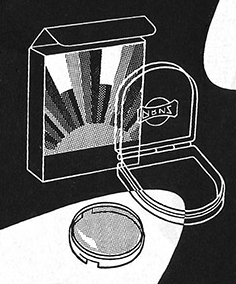
I have here placed the cone
face-down on the table. Near its front, at the
bottom of the image on the left, we can just about see the
thread used to screw it into the lens. But the back
of the cone (the top in this picture) is more
interesting. The final 5mm of the back of the cone
has parallel sides. i.e., this section is
not cone-shaped. About 3mm in from the back there is
a narrow ridge all the way round on the inside. This
ridge is designed to have an unmounted glass filter
placed on it. Slits in opposite sides of
the final 3 or 4 mm (at “North-West” and “South-East”
in this image) create prongs that can be gently squeezed,
if necessary, to hold the filter safely. The image
just above this text also clearly shows two of the
prongs. Scalloped out sections on the other two
opposing sides (at “South-West” and
“North-East” in the image on the left) enable the user to
hold the filter between finger and thumb, to push it in or
pull it out.
|
||||
[makrok04.jpg] |
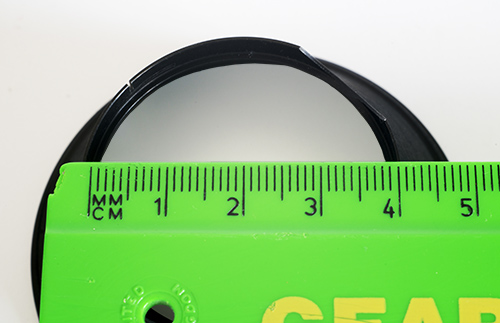
As can be seen in this image, the inside
diameter of the filter-holder section of the cone appears
to be 40 or 41mm. For the hard-pressed photographer
in the 1950s or 1960s, who had just bought an extremely
expensive lens, buying a 40mm or 41mm filter would have
signified a considerable saving, compared with the cost of
a filter in a 60mm mount. Moreover, at the time,
filters of this size were available for many cameras, and
indeed were often sold unmounted, so the photographer may
already have had a suitable filter that had been purchased
for a previous camera. A Kilfitt brochure received in June 2019 indicates that the filter size is “41mm (series VI)”. This brochure bears the code “Summary P 58”, from which I conclude that it was printed in 1958. What filter would have been most popular? At a time before colour photography was widespread, the use of a yellow filter was common, to darken the sky and bring out the contrast of the clouds. This effect could be increased substantially with an orange filter, while a red filter would render the sky almost black. (For an introduction to filters, see here.) In the 21st century, when much photography is in colour, a polarizing filter is probably the most popular. Of course, many people have a UV filter almost permanently on their lens, principally to protect the front element of the lens from damage. However, with a front element so deeply recessed as is the case with the Makro-Kilar / Macro-Zoomatar, such protection may be considered seldom necessary, unless one plans to use the lens in sand storms! Our congratulations to Heinz Kilfitt and his team on their attention to this degree of detail! No wonder the brand was so highly esteemed! |
||||
(As a “P.S”, we
will mention that with the 40mm version of the Makro-Kilar
/ Macro-Zoomatar, which was designed for use with 35mm (“full
frame”) cameras, the same filter-holding cone system was
used, although the dimensions were of course smaller, with
an unmounted filter glass of diameter 30mm being
required. As with the Medium Format lenses featured
here, many of the 40mm Makro-Kilar / Macro-Zoomatar lenses
appear to have lost their cone at some time in the
past. With the 40mm Macro-Zoomatar D that I have,
the cone does not screw into the front of the lens; it clips
into place.) |
So how does the Makro-Kilar /
Macro-Zoomatar perform in real-life situations? What
is it like “in the field”? Is that promise of ease of
use and quality of results realised “from infinity to
macro”? On a cold but bright day in early March, I loaded a roll of Fujicolor 400H into a Pentacon Six, mounted the 90mm Macro-Zoomatar onto the camera and headed for the charming Hertfordshire village of Benington. |
||
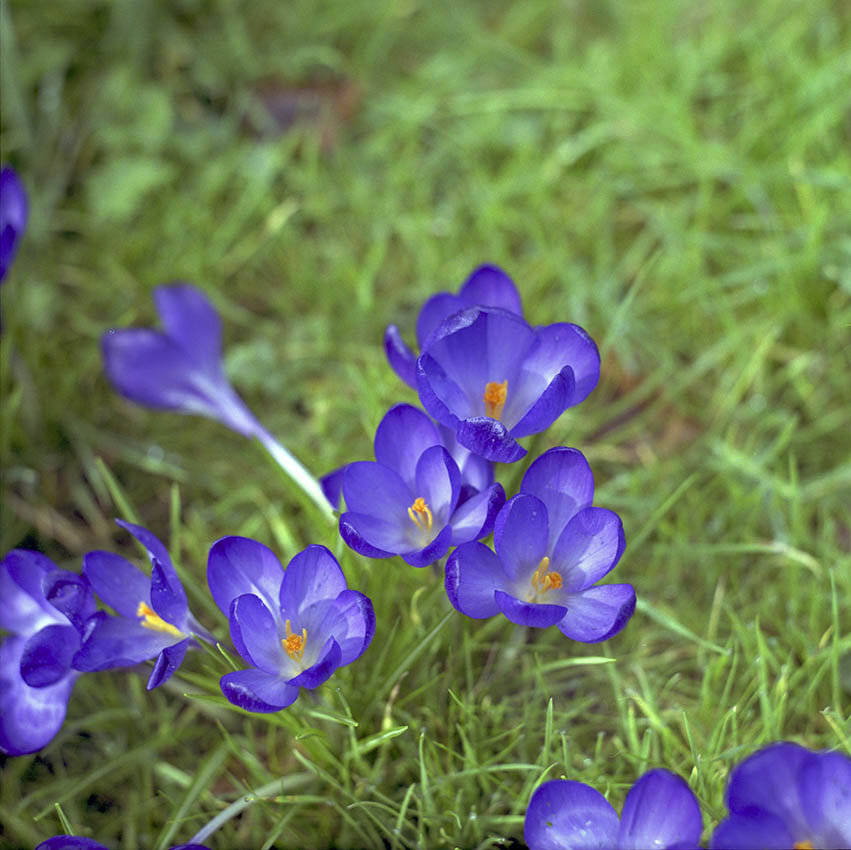
In the churchyard of St Peter's Church, Benington 90mm Macro Zoomatar 1/125 f/6.3 Focussed on 0.35 Hand-held. I know that I could have got closer if I had knelt on the wet grass. (I should have brought a small sheet of plastic!) And I could have increased the in-focus depth of field if I had used a smaller aperture – but then I would have needed to use a slower shutter speed, for which a mini tripod would have been required, and I wanted to test out Kilfitt’s claim that I could go from infinity to macro photography without the need for extra equipment. [C549_3.jpg] |
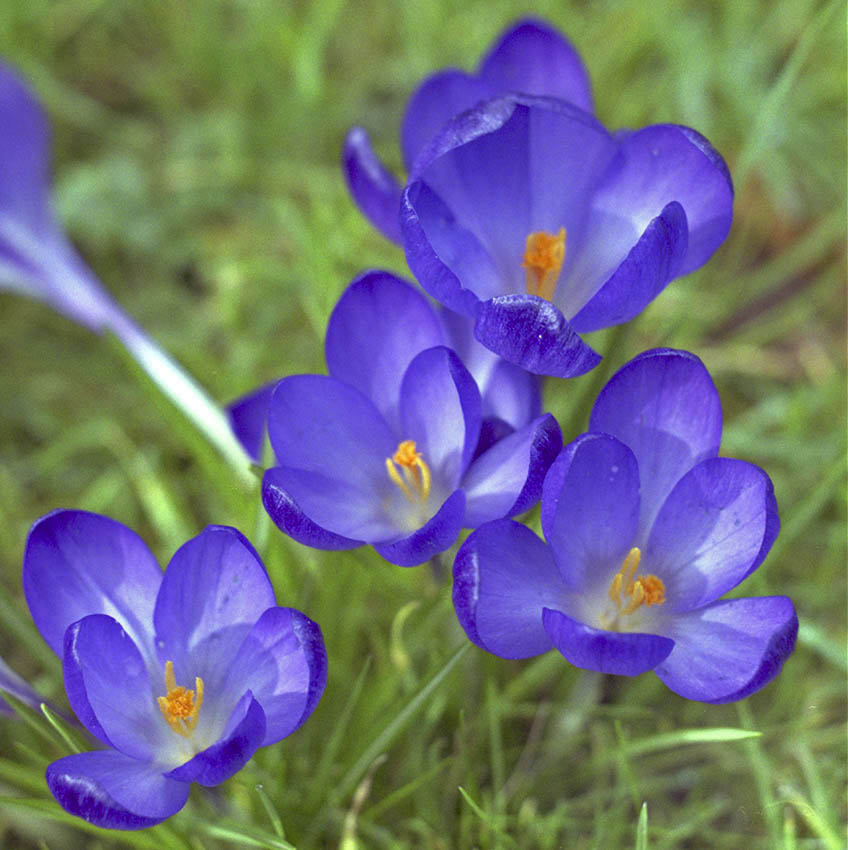
Fortunately, thanks to the generous 6×6 (2¼" square) format of the Pentacon Six, I am able to crop the image substantially to give a closer-up view and better composition. Will the grain of Fuji’s 400 ASA/ISO film become objectionable? Will the resolution of the Macro Zoomatar not be up to the job? I think that the results here show that both the film and the lens have passed the test brilliantly. It would even be possible to crop out the flower at the bottom left and still get a technically excellent result. [C549_3c_jpg] |
|
A note on Metering The Makro-Kilar / Macro-Zoomatar has an aperture pre-set mechanism, so that one can set the aperture that one has decided to use, then swing the aperture ring to fully open for composition and focussing, then swing it back down to the pre-set aperture before firing, without needing to take one’s eye from the viewfinder. I prefer to set this at a very small or even the minimum pre-set position (f/32 is available, if required), and then swing the ring to fully open for composition and focussing. Then I follow my normal procedure of using stop-down metering with the Pentacon Six metering prism. This is both fast and (as can be seen here) accurate, fully compensating for the lens extension, which of course makes necessary a longer exposure or a larger aperture than would be required at infinity focus. Squatting down as I was and using a 90mm lens, I considered it unwise to use a shutter speed slower than 1/125 sec, and the rather wide aperture required was a consequence of that. The resulting shallow depth of field is not unpleasant, in my opinion – but this has of course allowed no scope for focussing error. |
||
Using the Makro-Kilar / Macro-Zoomatar in real-life situations: infinity focus | ||
Just behind these flowers stands St Peter's Church. I stood up, stepped back a few paces, refocussed, composed, re-metered and fired. The result was this: |
||
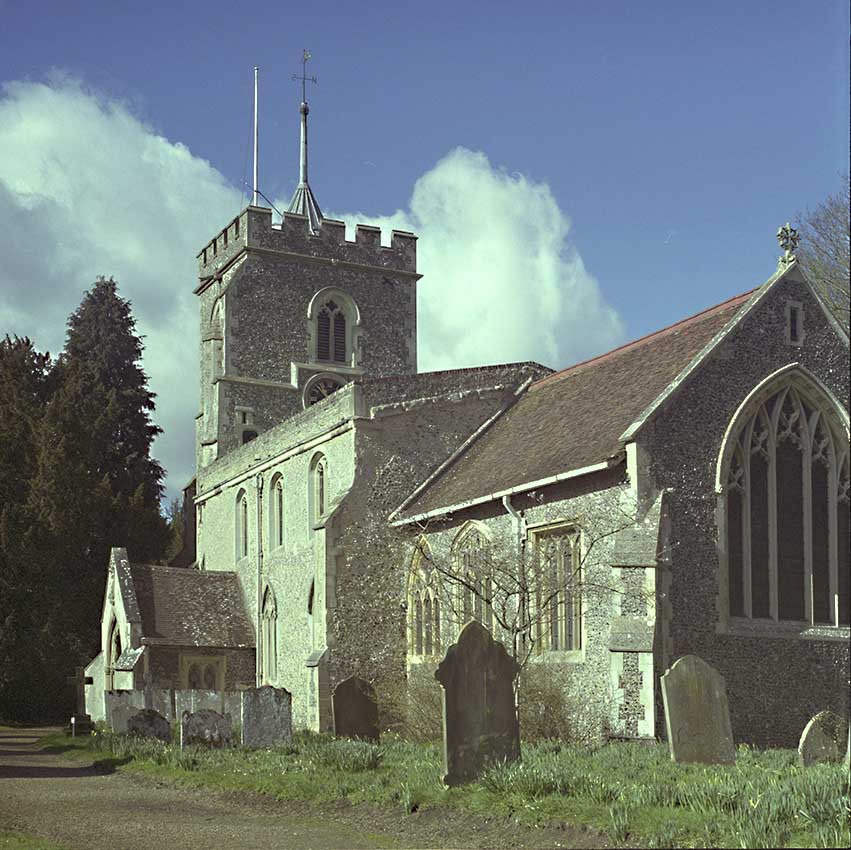
St Peter’s Church, Benington Pentacon Six, Fujicolor 400H, 90mm Macro-Zoomatar. The day was brighter than expected, so I set the slightly faster shutter speed of 1/250 sec, but with 400 ASA/ISO film in the camera, I needed to stop down to f/22. Hand-held [C549_6.jpg] |
What is the lens resolution like? This crop shows that the Macro Zoomatar’s resolution is outstanding. The limitation with the image enlarged to this degree is definitely the grain of the 400 ASA/ISO film. For such subjects I would normally have used Fujicolor 160NS film, which has much finer grain. [C549_6c.jpg] |
|
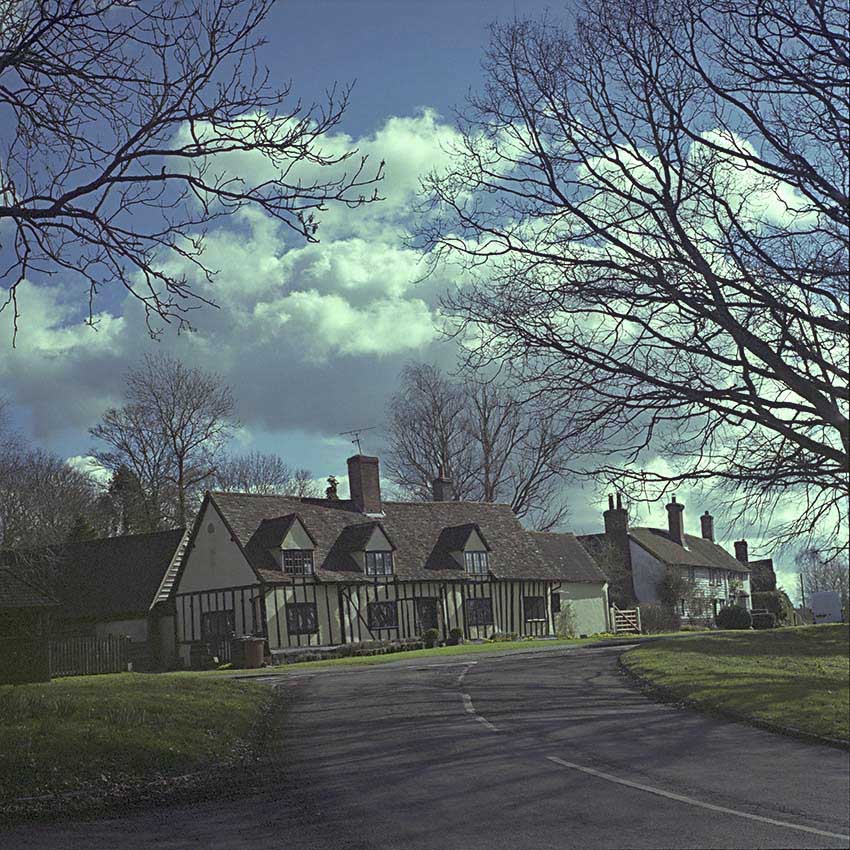
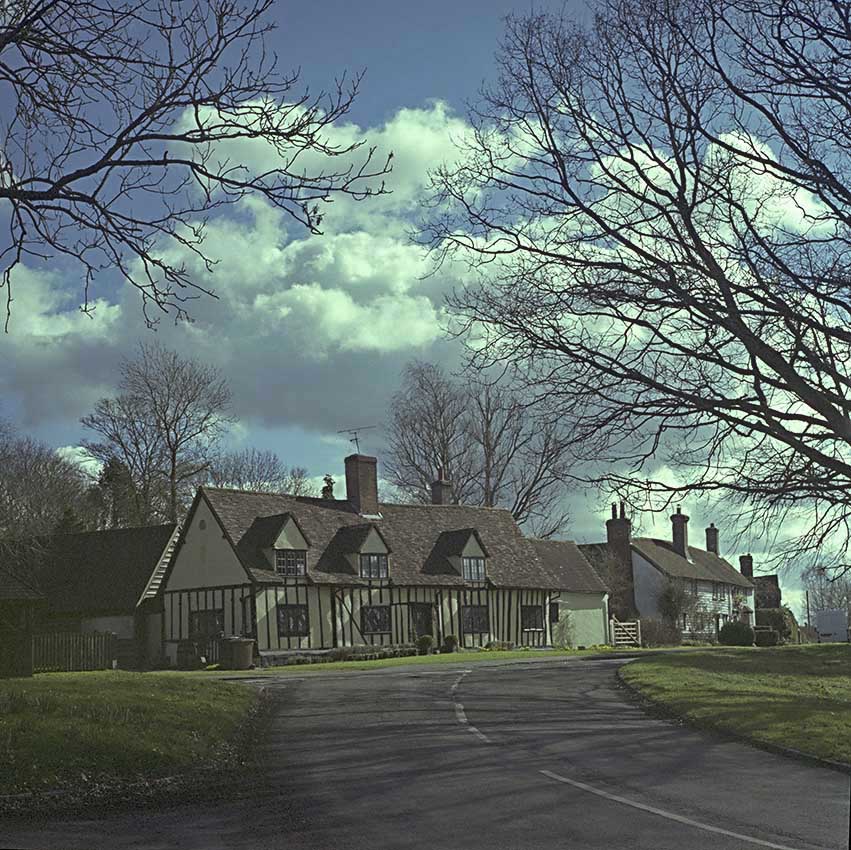
One more shot, before we end this review of the Makro Kilar / Macro Zoomatar. Stepping out of the churchyard and walking a few paces, I came to a view of part of the village. Putting into practice the statement in Kilfitt’s publicity that working with this lens is fast and simple, I chose not to change the shutter speed. I composed, focussed, turned on the meter, swung the lens aperture ring until the needle was at the indicator mark, and fired. This was the result: |
||
Pentacon Six, 90mm Macro Zoomatar, 1/250 sec, f/32, hand held. I don’t usually get images this crooked, but with the lens stopped down to f/32, it’s very difficult to see anything much in the viewfinder! Of course, working as we are with 6×6 format, we can straighten the image and crop it ... [C549_7.jpg] |
This is obviously a great improvement, but such post-shooting corrections should not be necessary (and are not possible with slides!). Perhaps this is the main reason why the Macro Zoomatar fell out of favour: in the 1970’s, cameras (including the Pentacon Six!) offered fully-automatic aperture control (frequently referred to by manufacturers as “Fully-Automatic Diaphragm” or “F.A.D.”), and that was what photographers expected from the lenses that they used. The manufacturers of the Macro Zoomatar obviously found that it was impossible to add an aperture control pin to a lens that had such an enormous range in the extension of the barrel between infinity and macro. [C549_7c.jpg] |
|
Conclusion The Makro-Kilar / Macro Zoomatar is a great lens, but perhaps not so easily usable in all situations from infinity to macro as was claimed for it. For information on using the Makro Kilar / Macro Zoomatar with the Kilfitt Multi-Kilar lens converter, and results obtained with this combination, see here. |
Next section (170-320mm Zoomar zoom Lens)
To see a detailed review of the 300mm Pan-Tele Kilar, click here.To see an introduction to the 500mm Kilfitt/Zoomar Reflectar, click here.
To go back to the beginning of the macro section, click here.
To go to the lens test section, click here.
To go back to the beginning of the Lens Data section, click below
and then choose the range of lenses that you want to read about.
Back to beginning of the Lens Data section
© TRA May 2002
Latest revision: April 2020