by TRA
How to change the Focussing Screen in the Pentacon Six
Before you
start
Make sure that you have all the components that you need.
The following screens all use the same retaining wire, clips and screws:
- the standard screen
- the rangefinder wedges screen
- the Groundglass screen with clear field and hairline cross
- the Groundglass screen with 10mm squares
- the Groundglass screen with hairline cross and 5mm graduation
- the Clear glass screen with hairline cross and 5mm graduation
The fresnel screen requires a different retaining wire, clips and screws, and these should be supplied with it.
The Rollei screen is similar in dimensions to the GDR fresnel screen. However, it requires its own set of retaining wires clips and screws.
Working environment and tools
One needs a good, clear working surface and a tiny screwdriver of the right width for the screws. A pair of tweezers is also virtually essential for holding the screws and clips in place, and a screwdriver with a magnetic tip can help to prevent the screws falling off the tip of the screwdriver. It can be helpful to have white cotton lint-free gloves, to prevent grease from one’s fingers from damaging the surface of the screen.
Remove the standard screen
Observe carefully the installation of the
existing screen, as this will help you when installing
the new screen.
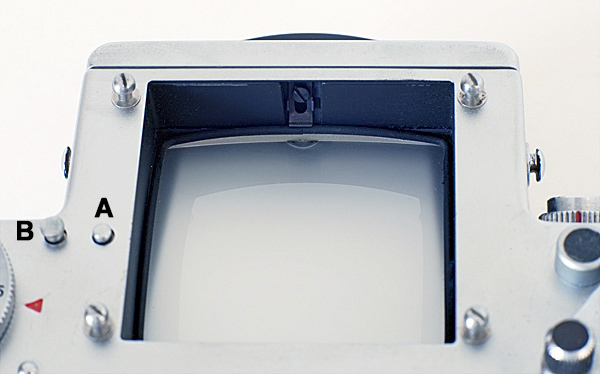 Standard screen: view towards front of camera This is from an early Pentacon Six from about 1968-69. “A” is the viewfinder locking pin and “B” is the pin release button. [stdscrn01.jpg] |
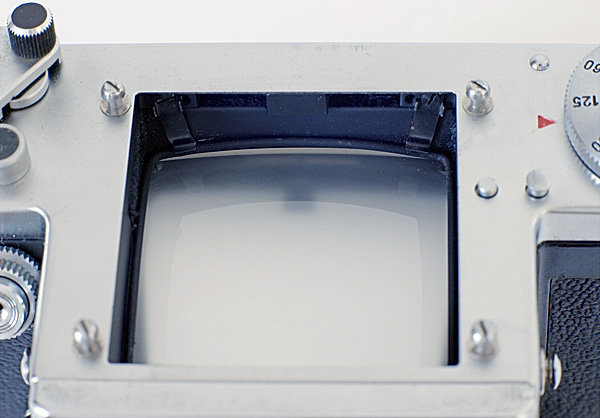 Standard screen: view towards back of camera [stdscrn02.jpg] |
Note that the flat (groundglass) surface is the underside and that the thicker (or “fatter”) edge of the screen is at the front of the camera. (I have checked this with Pentacon Six expert Tom Page.)
Remove the screws and clips. Observe carefully the orientation of the existing screen.
Tip the camera upside down so that the screen and clip fall safely onto a soft surface, preferably a hand in a lint-free cotton glove. Do not touch the surfaces of the focussing screens at any time as grease from your fingers will mark them and the surfaces, especially the bottom surface, may be damaged.
Do not drop the screen on the floor. It is made of glass and it will almost certainly shatter (don’t ask me how I know!).
Install the new screen
Install the new screen with the flat
surface down and the thicker edge in the same
orientation as the original screen (to the front
of the camera). Then insert the retaining wire and
attach the clips and screws. Note that the join in
the wire frame goes to the front of the camera and is
held in place by the front clip and screw.
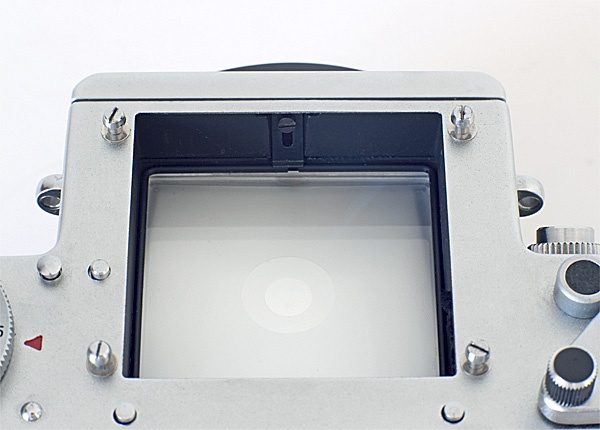 Fresnel screen: view towards front of camera [fresfrnt.jpg] |
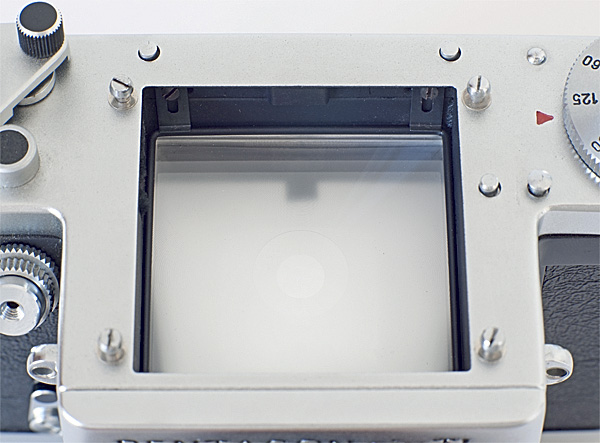 Fresnel screen: view towards back of camera [fresback.jpg] |
This image is of a late production
Pentacon Six TL probably from 1989. The two
spring-loaded “buttons” at the back of the top plate
(the bottom of the picture on the left above) serve to
hold the prism in place and take up any slack in the
height of the four posts on which it stands, so that it
does not rattle.
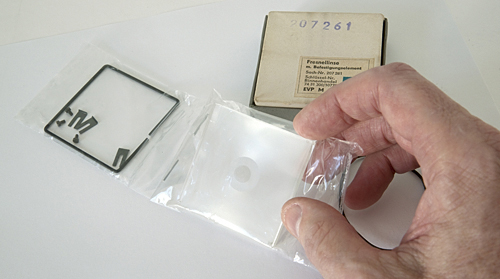 The Fresnel screen with its retaining wire, clips and screws [fresnel6.jpg] |
Note that the two surfaces of the fresnel screen are parallel to each other, so no edge is thicker than any other. The contoured surface must be installed pointing down, the shiny surface pointing up. |
To go back to the section on the focussing screens, click here.
To see a Kiev screen for the Pentacon
Six, click here.
To go back to the section on viewing aids, click here.
To choose other options, click below.
Home
© TRA First published: November
2011 Latest revision: January 2019