[chalk01.jpg]
80mm Biometer Bokeh
& Resolution
|
Just how good is the 80mm
Biometar lens? I recently received an enquiry from someone who was unhappy with the quality of the images produced by his Biometar lens. This surprised me, as I have used many of these lenses over the years, and have never been disappointed with the results from any of them. So why might someone get poor results with this lens? There can be many reasons, all of which can apply to any lens with any camera from any manufacturer. For instance:
What can cause a focussing
error? Most of these causes are unusual or even totally unheard of with the Pentacon Six, but they are theoretically possible:
At the same time, we can look at the bokeh of this lens - how it renders out-of-focus highlights. |
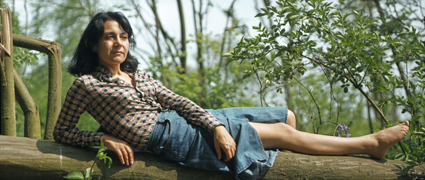
I will start with an image shot in 1982 on out-of-date Agfa CT18 reversal film. The camera was my first Pentacon Six (non-TL), which must have been manufactured in 1966 or 1967 (see here). It is reasonable to assume that the Biometar was from about the same year. It had the leather trim to the focussing ring and was single coated. This was a hand-held shot, the shutter speed was 1/500 sec and the aperture was f/3.5 (half a stop down from the maximum aperture of f/2.8).

[chalk01.jpg]
Here are some higher-resolution selections from
the same image.
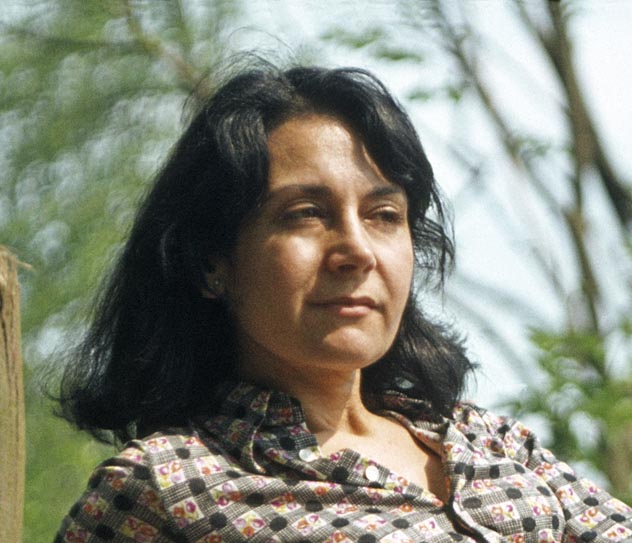 Scanning images always results in softening of the image, but no image sharpening has been applied here. [chalk02.jpg] |
Here we are looking at 25.3% of the
width of the total image.
I have chosen this crop to show the bokeh. For a portrait it is often desirable to have an extremely shallow plane of sharp focus, with everything in front of or behind that plane not only out of focus, but with a rendering of the out-of-focus highlights that does not distract the viewer's attention from where the photographer intended him or her to look. The 180mm Sonnar (see below) is usually recommended as the best portrait lens for the Pentacon Six. Its maximum aperture of f/2.8 is extremely large for a lens of this focal length with coverage for medium format. The image that we are looking at here was not composed as a head-and-shoulders portrait. However, when we crop the original image down tremendously to a tiny portion of the original frame (approximately one-sixteenth of the surface area), the results are still outstandingly good, in my opinion. Incidentally, this picture was taken
with the prevailing daylight, without the use of flash
or reflectors of any sort to reduce or control the
shadows. It demonstrates that when the lighting
conditions are right, extremely pleasing results can
be obtained without the need to carry large amounts of
accessories. |
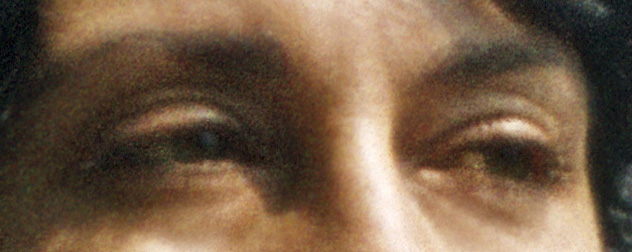 [chalk03b.jpg] |
Here - as is often done on the web! - we
have enlarged a small portion of the image far
more than we would in real life.
We would not view an image enlarged this much from anything
like close as computer users sit to
their screen.
At this degree of enlargement, it becomes clear that the point of sharpest focus is not - as it should have been! - on the eyes. Even so, the image is acceptably sharp. I have slightly over-exposed the highlights, losing a little bit of highlight detail. Slide or reversal film does of course have very little exposure lattitude, and I prefer to shoot negative film most of the time for this reason. |
 [chalk04.jpg] |
A very small amount of sharpening has
been applied to this scan and the one above, of the
eyes, to restore some of the original sharpness that I
can see in the slide.
This section of the image starts under 20% in from the left-hand edge of the frame. The resolution of the 80mm Biometar can here be seen to be outstanding, especially considering that this shows its performance only half a stop down from full aperture.. |
| In the summer of 2012 I took a picture
of a plaque outside one of the buildings of St Andrews
University. I was using one of the last Pentacon
Six TL cameras manufactured and a multi-coated 80mm
Biometar from the batch that was re-calculated in
October 1979 and manufactured in March 1989.
I deliberately wanted to throw the background out of focus, so I used the fastest shutter speed (1/1000) and the largest aperture that gave me the correct exposure. I was shooting with Fuji 160S film and - unusually for me - I didn't record the aperture, but the day was overcast and it is likely to have been between f/2.8 and f/4, the same as in the above photo. Pictorially, this is not a great photo, but it is an excellent test of lens resolution. This looks technically excellent, and there is also no noticeable colour fringeing and no rectilinear distortion (whether barrel or pin-cushion). It also shows the lens bokeh at a wide aperture. It was scanned following my usual procedure, on my Minolta Dimage Scan Multi Pro at 4800 dpi, which produced a file that at 300 pixels/inch would have printed at a size of approximately 89 cm × 89 cm. Naturally, the copy that I reproduce here is greatly-reduced and saved in jpeg format with a substantial compression. In spite of this, it is possible to see by the narrow depth of field and the out-of-focus highlights in the background that a very wide aperture was used. A small amount of sharpening was applied in the computer to compensate for the softening that is introduced by the scanning process. The image as reproduced on my monitor here is still not as sharp as the lab print that I have. Nevertheless, it does perhaps enable visitors to this website to get an impression of the quality of this lens. |
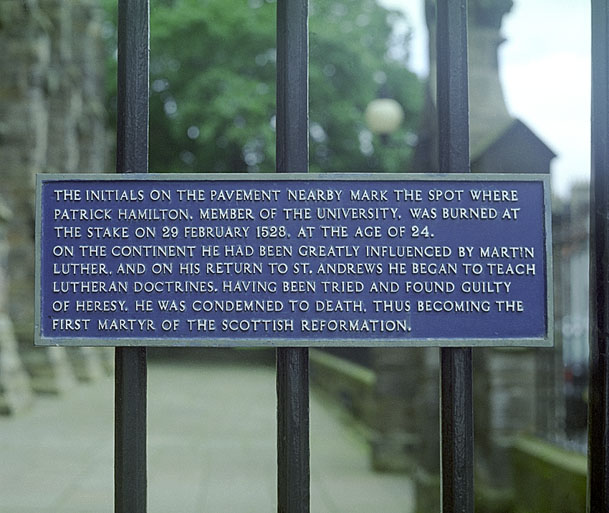 Outside St. Salvator's College, St Andrews [c505_7.jpg] |
These pictures were taken decades apart, using
Pentacon Six camera bodies and Zeiss Biometars that were
produced decades apart. They were shot as
photographs, not as "tests".
Nevertheless, in spite of other differences (for instance, the
use of different types of film), both pictures show that the
80mm Biometar is a superbly sharp lens that also produces
pleasing bokeh at wide apertures.
 The 180mm Sonnar at full aperture on Fuji 160 NS negative film [c509_19c.jpg] |
For the purposes of comparison, here is
a small section of an informal family picture taken with
the 180mm Sonnar at maximum aperture. It covers
approximately one third of the width of the frame.
It is clear that the focus was on the far eye, and at this great degree of enlargement this picture shows the extremely shallow depth of field with this lens when used at f/2.8. In practice one would be more likely to stop down to at least f/4 and more probably a minimum of f/5.6, in order to ensure that both eyes were equally in focus. |
| Hower, this was taken with low ambient light with a shutter speed of 1/125 sec, slower than would be recommended for a 180mm lens. Even so, I knew at the time that the shadows would be under-exposed by 1½ - 2 stops but wanted to get the shot anyway. At normal degrees of enlargement, the result with the whole of the frame is a perfectly acceptable - even quite pleasing - picture. |
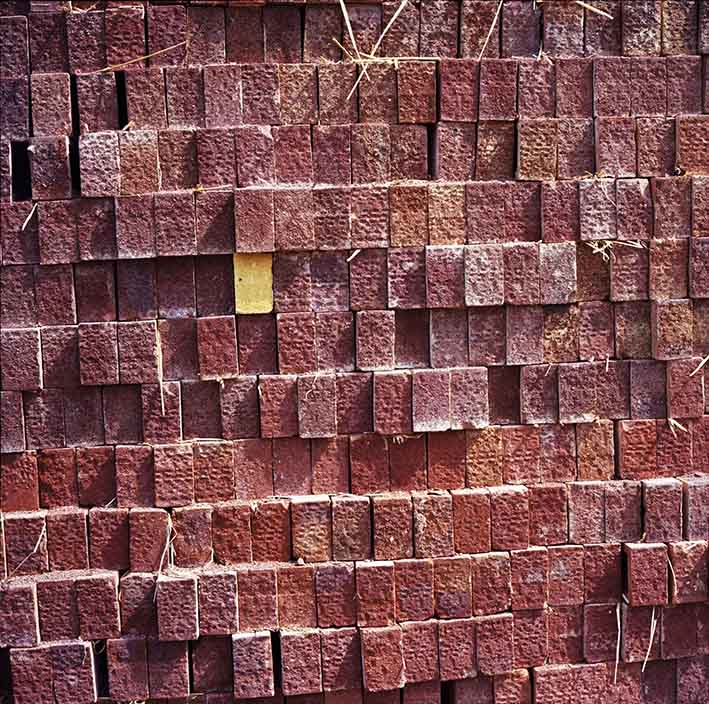
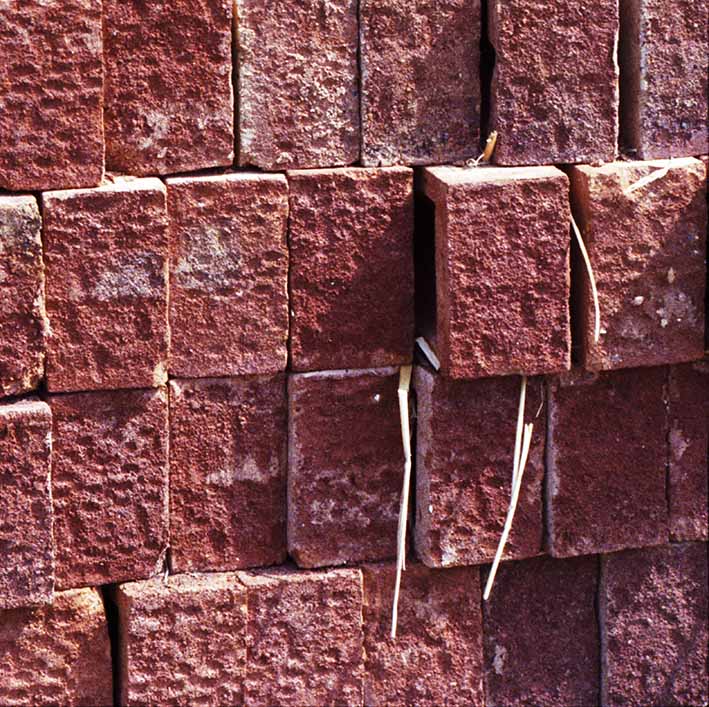
| Resolution In 1977 I bought my first Pentacon Six. It was not the "TL" version and so had probably been manufactured in 1966. It had an early, single-coated version of the 80mm Biometar lens and for the first eight or nine months I only had the waist-level finder and the standard focussing screen. Here is one of the first colour shots that I took, hand-held. It may not be "great art", but it was a great test of the resolution of the lens. Film: Kodacolor II (100 ASA/21DIN). Exposure: 1/125 f/9.5, hand-held. Of course, to make this image a reasonable size for downloading and displaying on a computer monitor, I have had to reduce the resolution massively. I scanned this negative today on an Epson Perfection V750 PRO using the SilverFast SE Plus software that was supplied with the scanner. I scanned at 300 pixels per inch (much less than the 4800 ppi maximum offered by the scanner and the software). The resultant file was about 330 MB in size, with a width of 10,585 pixels, which at 300 pixels per inch would have produced a print 89.62 cm wide. (This is slightly more than 35¼" wide, or fractionally under three feet wide.) As reproduced for this web page, the image is only 709 pixels wide. I have also used jpeg compression to reduce the file size substantially. Below it I reproduce the bottom right-hand corner of the same image, taken from the same scan. At the size scanned, this section of the picture is 3,152 pixels wide, equivalent at 300 ppi to 26.69 cm wide. I have also reduced it to 709 pixels wide and compressed the jpeg substantially. |
 [C38_1s.jpg] |
|
| The roughness is in the faces of the bricks,
not the resolution of the lens or the film, as can be
appreciated by the sharp blades of straw. Any
chromatic aberrations (such as colour fringeing) would also
have been clearly visible on the straw, if such had been
present. The result is truly outstanding. |
 [c38_1_cs.jpg] The bottom right-hand corner of the above image. |
You can learn more about the effects of different formats and lenses on depth of field here.
To go back to the introduction to the 80mm lenses, click here.
To return to the introduction to the lens data, click here.
© TRA April 2013, latest revision, August 2016