The Pentacon Six System
by TRA

How do I use the metering prism?


How-to-do-it Video Tutorials

I have made and up-loaded three videos that show you how to use the Pentacon Six metering prism, using the methods described here.  I suggest that you work through this description, clicking on the links at the appropriate points to see the videos.

 
At the bottom of this page there are instructions on how to meter with the Kiev 60 TTL prism.
Metering with the Pentacon Six TTL prism

There are three ways to meter with the Pentacon Six TTL prism:

  • stop-down metering with shutter-speed priority
  • stop-down metering with aperture priority
  • full-aperture metering.
Stop-down metering operates with the lens at working aperture.
Full-aperture metering operates with the lens at maximum (or full) aperture.

Full-aperture metering sounds more sophisticated, but as the lens aperture and the shutter speed are not connected to the meter, it does result in a slower procedure.  I therefore recommend stop-down metering.

Here is how to do it. 

Setting the film speed on the meter

Before you start, set the film speed on the meter.  To do this, lift up the middle ring (the one with the shutter speeds printed on it), and rotate it until the white triangle is pointing at the film speed.

If your Pentacon Six does not have the standard focussing screen, but the brighter Pentacon Fresnel screen or the Exakta 66 Rollei screen, align the film speed to the white dot instead of the white triangle.

Stop-down metering

Rotate the outer, metal dial until the black section is at the back of the prism, with the white stripe aligned with the white stripe behind the dial – exactly as in the same picture to the right.  For stop-down metering, whether for shutter-speed priority or for aperture priority, leave this dial permanently in this position.

For most circumstances, I prefer shutter-speed priority stop-down metering, which is the fastest way of working.


[C311-15] In this picture, the triangle is pointing at 21DIN,
which is equivalent to 100 ASA/ISO.
Shutter-speed priority stop-down metering

Now set the shutter speed that you have chosen on the camera shutter speed dial, and rotate the middle ring on the meter (the one that you lifted earlier to set the film speed), but without lifting it this time, until the same shutter speed is aligned with the two white stripes at the back of the dials (now virtually one continuous line, as in the photo above).  In the picture, both the camera and the meter are set on 1/125 sec.

If you haven’t already done so, cock the shutter, which advances the film, lowers the mirror and opens the lens to maximum aperture.

In my picture, above, the meter is turned off (the arrow is pointing at the red dot).  Now turn the meter on by rotating the switch to the right, so that the arrow points to the green dot.  (I find that I can do this with my right hand without looking at the switch or taking the camera away from my eye.)

Now we have to find the right aperture for this shutter speed.

Cup your left hand under the lens, and with your right hand hold the body, as in the picture on the right.

You will find that with a finger of the left hand (“A” in the photo here) you can press the stop-down lever on the lens, and with the thumb and forefinger of the left hand (“B” in the same photo) you can rotate the lens aperture ring.  As you do this, the meter needle in the viewfinder (and on top of the prism) will slowly move down (sideways on the top) until it aligns with the index mark half way down.  When it is there, you have correct exposure.  (The meter reads from the central area of the viewfinder, within the area marked by four curved lines.)

The forefinger of your right hand (“C” in the picture) is already resting just above the shutter release.

Fire!

Turn the meter off.
 
 
Shutter-speed priority stop-down metering video tutorial

See the tutorial on this section here.


It really is easier to do than to describe.  Once the metering is right, you can release the lens stop-down lever in order to check the focus and adjust it if necessary using the thumb and finger (“B”) that were on the aperture ring.  (The needle will swing up, showing over-exposure at full aperture, but since the lens automatically stops down to the pre-selected aperture when you press the shutter, the exposure will be correct.)  Remember to turn the meter off as soon as you have taken your picture.

Possible problems:

1) Low battery

If the meter needle only moves over a narrow range, the battery is running low.  This will not give incorrect readings, but it may be less obvious when you nearly have the right exposure.  Replace the battery with a 1.35 volt PX625, PX13 or equivalent.

2) Lenses without a stop-down lever

If you use “Russian” (i.e., Ukrainian) lenses that do not have a stop-down lever, before putting the lens on the body, after removing the standard lens look for the lever in the throat of the camera near 7 o’clock (labelled “A” in the picture on the right) and gently fold it up by rotating it through about 90 degrees.  The lens will now function all the time in stop-down mode, enabling you to use stop-down metering.  The disadvantage is that you will have a darker viewfinder image, and will need to re-open manually to maximum aperture to check and adjust focus.

3) The needle won’t align with the index point

If it is impossible to get the meter needle to reach the index point at any aperture, go for:

Aperture-priority stop-down metering.

This is how to do it:
    1.    Select your chosen aperture, set it and hold the stop-down lever on the lens.  Now we have to find the right shutter speed for this aperture.
    2.    With your right hand, rotate the black dial on the meter until the needle moves to the index point.
    3.    Release the lens stop down lever, take the camera from your eye, and see what speed is nearest to the white index line at the back of the meter.
    4.    If necessary, move the dial a fraction more until that speed is on the index mark.  Then set the same speed on the camera shutter dial.
    5.    Now return to stop-down metering as before, which may result in needing to adjust the aperture by about half a stop.

Remember that unless you are in a situation with constantly-changing lighting (e.g., sunshine and patchy clouds), one meter reading will often give you the settings for an entire session.
 
Aperture-priority stop-down metering video tutorial

See the tutorial on this section here.


Full aperture metering

Set the film speed on the camera as before and cock the shutter.

This time, rotate the large outer dial so that the f/ stop for the maximum aperture of the lens is against the index mark – the metallic-coloured strip on the black background at the back.  For the standard lens, this is f/2.8.  This dial will click into position at aperture numbers and half-stops between f/2 and f/5.6, i.e., f/2, f/2.4, f/2.8, f/3.5, f/4, f/4.5 and f/5.6.

Lenses with a maximum aperture smaller than f/5.6 are not commonly found.  There are some mirror lenses, such as the Arsenal 3M-3B f/8 mirror lens, and of course if you use the 300mm f/4 Carl Zeiss Sonnar with a 2× converter, the effective maximum aperture is f/8.  In such cases, you can set the f/8 setting against the index mark, although it will not click into place.

The purpose of the other numbers (f/11, f/16, f/22, f/32) will become clear below.

Switch on the meter.

Rotate the large black control knob (the one that doesn’t have click stops) until the meter needle aligns with the index mark in the viewfinder (or the dot in the window on the top of the metering prism). 

Here the meter dial is set for a lens with a maximum aperture of f/2.8

Now take the camera from the eye, and you will see a series of shutter speeds opposite the lens apertures on the outer dial (or near to them).  All of these combinations of shutter speed and aperture will give you the same exposure.  Choose the combination that is the most appropriate for the type of picture that you are about to take, and set the aperture on the lens and the shutter speed on the camera body.

Re-check composition and fire.

Turn the meter off.
 
Full-aperture metering video tutorial

See the tutorial on this section here.

But which combination of aperture and shutter speed is “the most appropriate”?

I have now written a page that explains this.  You can see it here.
 

Stopping stray light from entering the prism
 
If you ever use the camera on a tripod (for instance, in a studio situation), you can read from the meter needle on the top of the prism.  You should then close the “shutter” or mask on the back of the prism (arrowed in image on left), by rotating the small black button to the left of the viewfinder (arrowed in the image to the right).  This will prevent light reaching the meter through the eyepiece and possibly giving a false reading.  When you are working normally with the camera to your eye, your own eye and forehead prevent any stray light from affecting the meter.

Do not be put off by the length of this description.  Practise going through these steps with your camera, without film in it, and within a very short session you should be happy operating the meter.  Mine has given me accurate exposures for over 30 years!

Calibrating your meter

Also, you need to check how your meter works with your camera and your preferred film.  For instance, if all your shutter speeds were slightly slow, the meter would appear to give over-exposed images.  There are two solutions to this:

  • the best one is to get the shutter serviced;
  • the easier (and free!) option is to make a new index mark on the meter dial and set the film shutter speed against that mark to compensate for the slow shutter speed.
I must say that on the whole shutter speeds on the Pentacon Six are highly accurate and retain their accuracy for years.

When I am testing a new camera or meter, I first shoot a negative film.  If that is about right, I then shoot a slide film, as this has much less latitude and will show if the metering (or shutter) is slightly off.  With my camera, for saturated slides with the film I use, I set the aperture so that the meter needle is a tiny fraction below the index mark.  For negatives, I go for exactly on the index mark.


Range of meter

For an explanation of the range of readings provided by the metering prism, see here.

Metering with Kiev 60 TTL prism

You may choose to use the Kiev 60 TTL prism on the Pentacon Six, via the Baierfoto adapter (details here).  Or of course, you may use it on a Kiev 60.  With either camera, stop down metering is the quickest way to work.

If you put a Kiev 60 TTL prism on a Pentacon Six, you will have to calibrate it for the focussing screen in the camera body.  If you buy a Kiev 60 TTL prism from Rolf-Dieter Baier with his adapter, tell him which focussing screen you have (standard, fresnel, Rollei), and he will calibrate the prism for you.

Note that all Carl Zeiss Jena lenses have a stop-down lever, and pressing this lever to meter the light is the 
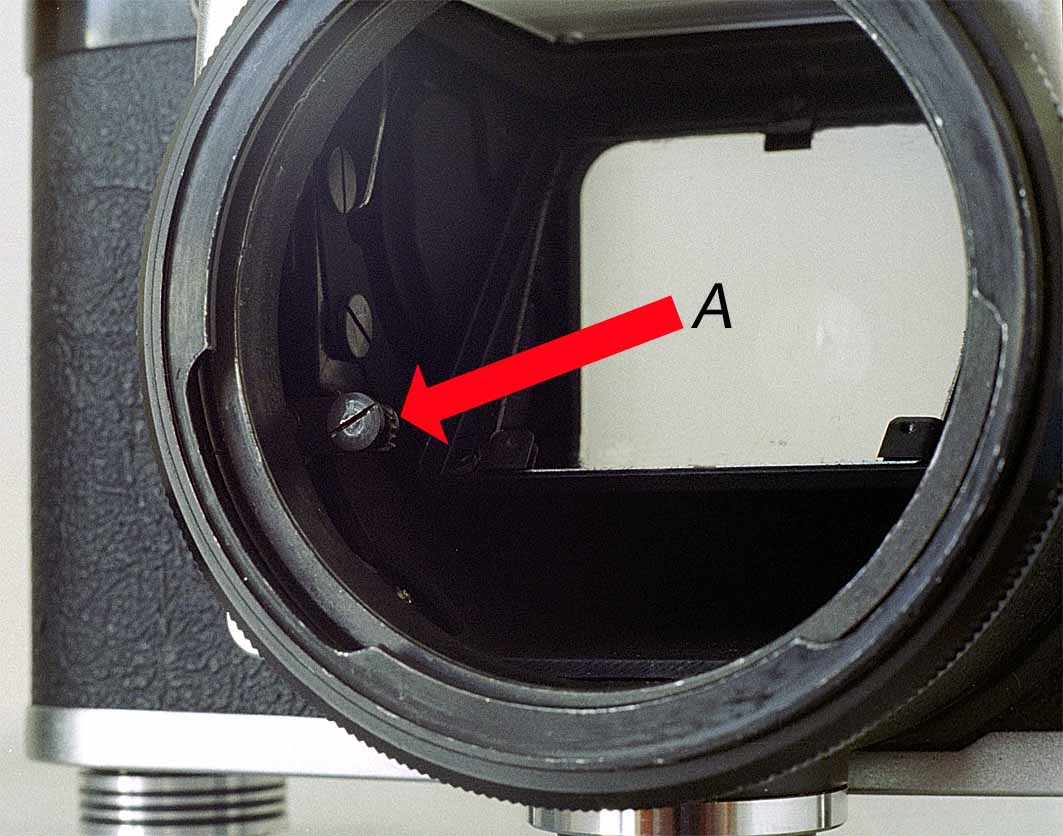
best method.  Some Ukrainian lenses do not have a stop-down lever, but you can use them for stop-down metering on a Pentacon Six (by swinging up the aperture lever in the camera throat) or on the Kiev 60, which has a stop-down lever on the camera body.  If you use a Ukrainian lens without a stop-down lever on a Kiev 88-6 or 88CM, stop-down metering is not possible, as this body does not have a stop-down lever.

This is what to do.

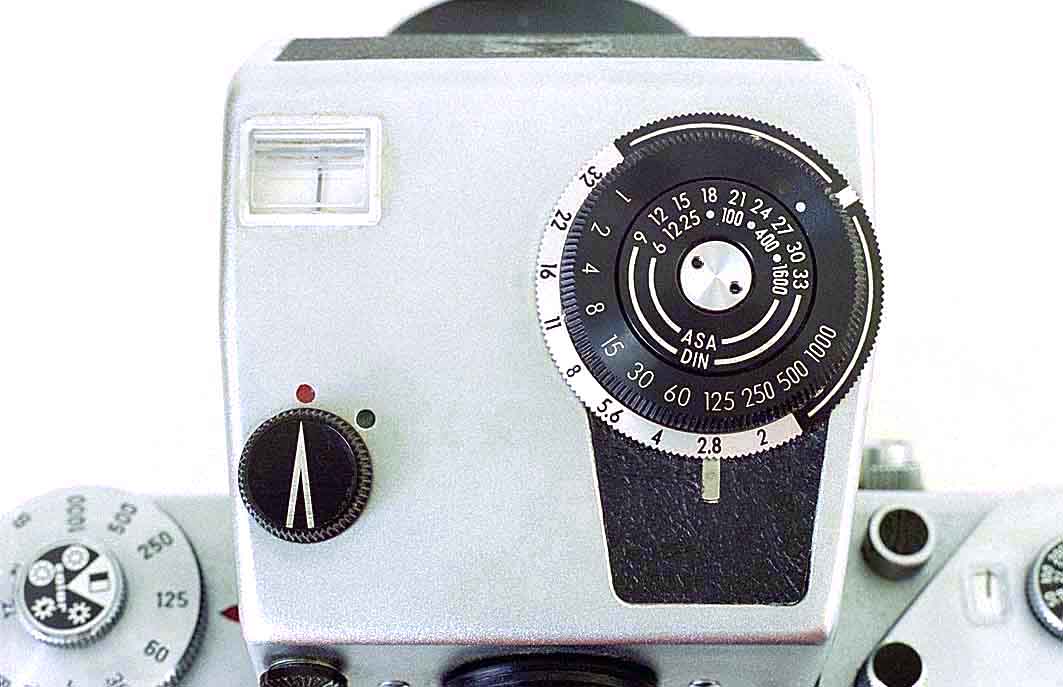
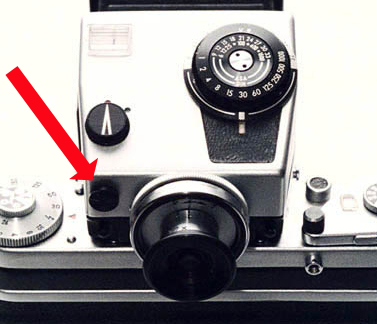
Set the film speed on the meter dial by rotating the centre (black) dial.
(Ignore the middle metal ring, which shows apertures and is only needed for full aperture metering, which is very slow).
Set the shutter speed on the camera, and set the same speed on the meter, by rotating the outer dial to line up with the red triangle.  Make sure that you do not accidentally touch this dial afterwards (with your sleeve, for instance), as it could change the setting.
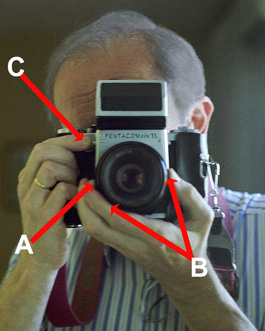
Put the camera to your eye and compose and focus.  Hold the camera with your left hand under the lens/body and with your right hand near the shutter release button.
Turn on the meter with your right hand.
Press the stop-down lever on the Kiev 60 body with a finger of your right hand and use a finger and the thumb of the left hand to change the aperture.  (Or depress the stop-down lever on the lens if it has one.)
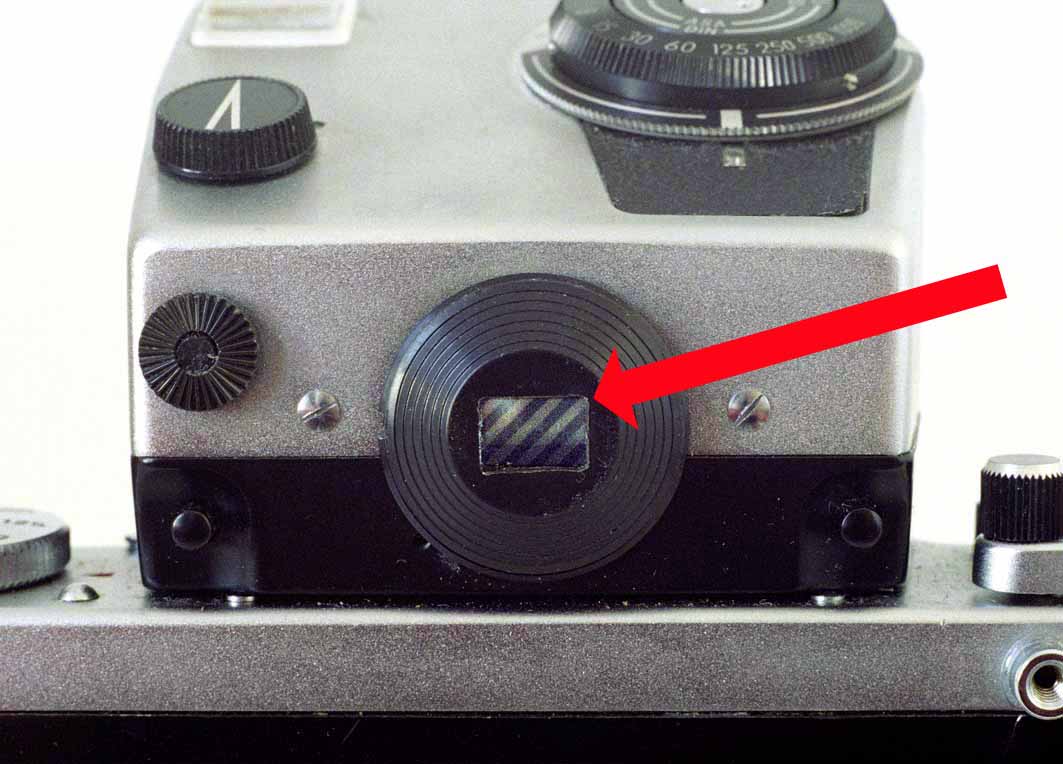
When you reach the right aperture, both lights in the viewfinder will light up.
Fire!
It really is very easy and fast.

If no aperture setting gives you the correct exposure, change the shutter speed on the body and the prism again, and repeat the process.
If the object you are photographing is moving a lot, you can release the stop-down lever and re-check focus.  In most situations the light will not change and you will not need to re-check exposure.

You may wish to practise this procedure without film in the camera, until you are confident.  It will give you more accurate metering than using the full-aperture method, which is also very slow.

To go back to the Frequently-asked Questions front page, click here.

To return to the instructions front page, click here.

To contact me, click here.

Home

© TRA December 2005, Revised December 2012