A comparative test by TRA Results
of tests with a Tilt Lens
|
Three factors reduce the
depth of field (the area of acceptable sharpness) of a
lens:
Test 1: coins and
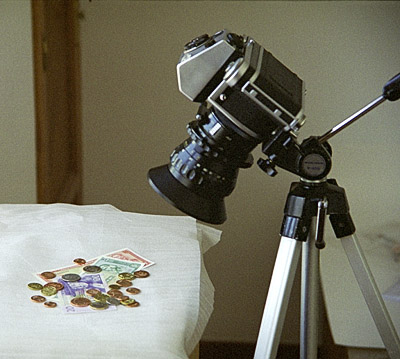
notes Here is the set-up for the first test.
|
[C471-25A.jpg] |
The first shot is with zero
tilt and zero shift. Because the subject is at
approximately 45° to the camera back and we are working at
maximum aperture, the area of sharp focus is extremely
shallow. As with all lenses, the sharpness decreases
gradually in front of and behind the area of sharpest
focus, which in this photograph is right in the middle of
the photograph. What is considered acceptable
sharpness is principally dependent on two factors:
That is because there is of course another factor in the first two test shots here: they have been shot at maximum aperture, to enable the effect of tilting the lens to become obvious to the maximum. No-one would normally shoot an image such as this one at maximum aperture. In fact, the aperture that gives the sharpest image for the lens would normally be used. This is normally between f/8 and f/16, depending on the lens. With any lens, at maximum aperture there is a marked decrease in sharpness away from the centre of the image area, and this is inevitably obvious with this image, too, if we look to the left and right of the in-focus plane. Note in particular the lack of sharpness of the right-hand part of the red banknote. Incidentally, the fall-of in brightness at the bottom of the image is a consequence of the set-up and the ambient lighting, as will be observed from the top picture on this page. |
Zero tilt, zero shift, maximum aperture: 1/125 f/3.5 [C472-14/15] |
When the lens is tilted down,
the image moves up in the viewfinder and so it is
necessary to change the angle of the camera on the
tripod. It is also necessary to re-focus.
In this image, even though the lens is still at its maximum aperture of f/3.5, the tilt has increased the depth of field tremendously, but much more in front of the point of focus than behind it. I focussed on the central area of the blue banknote, just below the lady’s chin. I need to re-try, with the focus set further back. Naturally, the fall-off in resolution towards the edges of the image on each side of the area of acceptable focus has not been changed. But note that the degree of vignetting that occurs when the lens is fully tilted is massive. I need to re-run this test, adding an upward shift to see if the vignetting can be eliminated. This where a tilt and shift lens should score over a lens that only offers a tilt facility. |
Full tilt, zero shift, maximum aperture: 1/125 f/3.5 [C472-16] |
It is of course in any case
not normal to shoot “still-life” or close-up pictures at
full aperture – or most other pictures, either, unless
differential focus is important. Here I have stopped
down the lens to a more normal aperture for such a
subject. This has, as expected, sharpened up the
image across the full width of the frame, and has of
course likewise extended the zone of acceptable focus
further back (and further forward, though that was not
needed), bringing the rear-most coins into acceptably
sharp focus. This sharpening of the edges of the
image and increase in depth of field at smaller apertures
is of course a normal feature of all lenses. As is
to be expected, the smaller aperture has also sharpened up
the boundary of the vignetted area.
As a result of running these tests, I would recommend using the magnifier head (scroll down) on the camera, or the angle finder on the prism, as both of these give a magnified image than facilitates the evaluation of the area of sharpest focus. I do not recommend the use of the “focussing telescope” (scroll down) for use with tilt lenses, as it only magnifies the central area of the image. |
Full tilt, zero shift, smaller aperture: ¼ sec f/16 [C472-17/18] |
The quality achievable can be appreciated in this larger version of the final picture in the series, which has been rotated slightly. With a natural crop that suits the composition, the vignetting disappears. |
Test 2:
food photography |
Full tilt, zero shift 8 sec and a slightly larger aperture: f/11 Again, a crop appropriate to the subject matter has eliminated the vignetting completely. I clearly need to focus further back when using the tilt feature, or to adjust the tilt angle more accurately. [C472-13] |
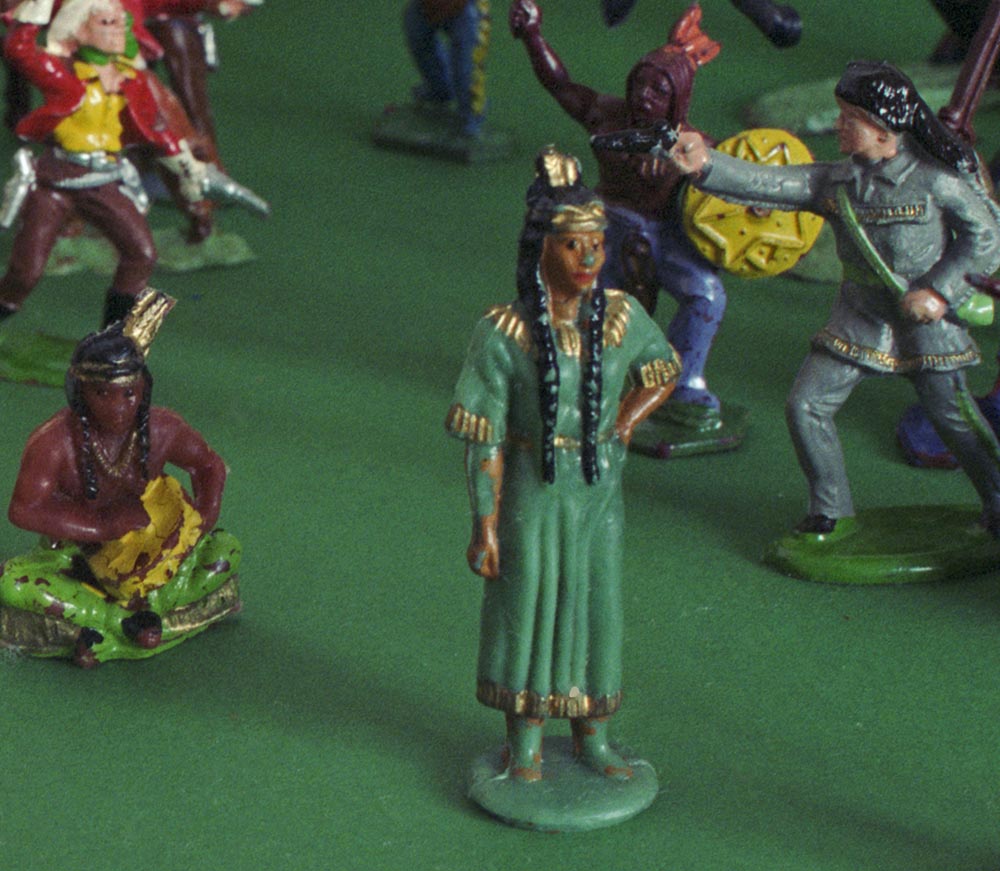
Test 3: Toys In 2019 I took some pictures of some small toys. The standing adult figures in this scene are a little over 2" (5+ cm) tall. For these tests I had Fuji NPH PRO400H film in a Pentacon Six. The lens was the same Hartblei 45mm Super-Rotator lens as above and I did of course use a tripod (on this occasion the Benro tripod described here). This lens focusses very close, and here it was at its closest focus setting. No extension tubes or other close-up accessories were used. The exposure for both shots was 1 second at f/22, using the camera’s Delayed Action lever to avoid any camera movement that might have been caused by my finger on the shutter release button. Light was daylight from a window to the right. We here show the full width of the negative, although the top and bottom of the frame have been cropped to suit the composition. Printing at 300 pixels per inch, the print would be over 88 cm wide, and it would be easy to print larger than this, by selecting a slightly lower number of pixels per inch, without this being obvious to the viewer. |
||
Zero shift, zero tilt [C573_9cZs.jpg] |
Zero shift, maximum tilt [C573_7cFs.jpg] |
|
As I tilted the lens down, this
slightly changed the composition and the angle of the camera
was changed slightly to compensate. However, the
tripod was not moved. At the size on this page, the difference between the two images may not be very obvious, even if you are viewing this on a large monitor. Clicking on the images gives access to a larger version of each image. With some browsers, clicking a second time enlarges the image further. However, we show some detailed sections of the image larger below. |
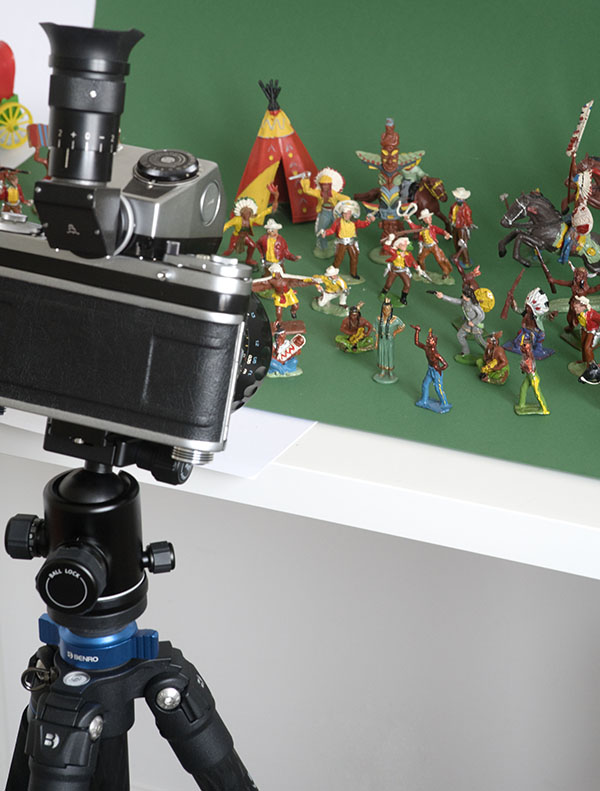
Conclusion These side-by-side images do indeed confirm the significant increase in depth of field when using a tilt lens for subjects that are in a plane that is different from the angle of the film plane. This is particularly useful in macro work and what is sometimes called “tabletop work”, where depth of field is usually very shallow, although it also applies to other types of photography. As we have seen in the page on view cameras (here), even lenses with a much longer focal length (and therefore less depth of field!) can be used tilted, on “technical bellows”. Set-up for the toy pictures To the right we can see the set-up used for these toy pictures, which gives an idea of the distance of the Pentacon Six from the subject. Interestingly, for this shot a 100mm Pentacon lens in M42 EDC mount for a Praktica 35mm camera was used, the 6-element Meyer-Optik Görlitz lens that previously had the name “Orestor”. For this photo it was mounted via an adapter onto a “full frame” digital camera. The aperture was between f/9.5 and f/11 and the camera was hand-held. Even though the ISO was set high at 1600, the lighting required a shutter speed of 1/30 second, which was not fast enough to guarantee critical sharpness with a hand-held lens of this focal length. |
[SR_c&i_08.jpg] |
To go on to the next section, click below.
Next section (Introduction to Macro
photography)
To go back to the beginning of the lens data section, click here.
To go on to Schneider macro lenses, click below.
Macro lenses
To go back to the beginning of the lens tests, click below and
then choose the focal length that you want to read about.
Back to beginning of lens tests
© TRA September 2009
Latest revision: November 2019