by TRA
Depth of Field
I have given an introduction to Depth of Field here. There I
explain why the depth of field is so immense with mobile
phones and most small digital cameras that differential
focus is not possible. In other words,
everything will be sharp, regardless
whether or not this is desirable. Objects in the
surroundings or in the background may be so detailed
that they distract the viewer’s attention from the
subject chosen by the photographer.
Control of what is in focus and what is out of focus
within the image only begins to become possible to some
extent with cameras that have a film or sensor format of
24×36mm (now commonly referred to as “full
frame”). Most “35mm” cameras had/have this
format. However, real control of
focus with such cameras is often only possible with
longer-than-standard lenses, for instance, with 90mm or
100mm lenses, or longer, on a full-frame 35mm camera.
For reasons explained on the above page, control of in-focus and out-of-focus zones within the images first becomes easy to achieve with medium format cameras such as the Pentacon Six. On that page I also stated:
|
The zone of sharp focus is
usually called “depth of field”.
The three rules are:
Therefore, if the photographer
wishes to control the areas that are in focus in
his/her images,
|
One area where the depth of field is especially shallow (narrow, thin) is in macro photography, where the lens is obviously very close to the subject.
| This page demonstrates the depth of field that can be obtained with the Pentacon Six, using its standard, 80mm Biometar lens on the shortest of the extension tubes available for the camera, the 10mm tube. You can find information on that tube here. |
For all macro photography, the camera needs to be mounted on a tripod, and the focussing slide (see here) is extremely helpful to enable the camera to be moved fractionally backwards or forwards without moving the tripod and so disturbing the composition. For these tests I also used the angle finder (see here) to assist me in focussing and to enable me to view the focussing screen from a comfortable angle.
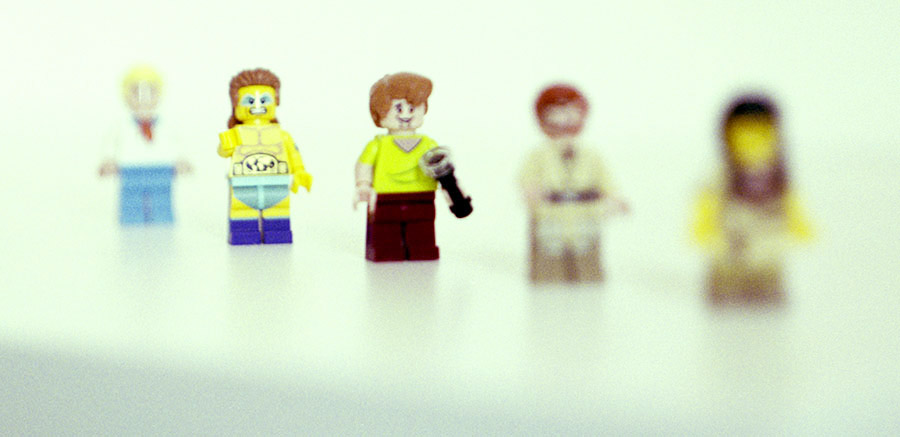
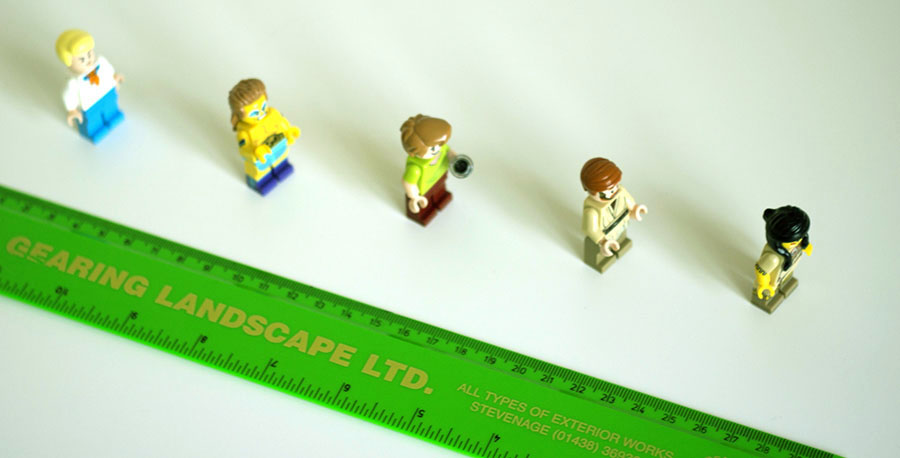 For these pictures I chose five, small Lego figures. This grab shot was taken hand-held with a digital camera using a 50mm Carl Zeiss Jena Tessar lens at a wide aperture, and it is not sharp throughout, but it does show the setup used. Lighting was from natural daylight entering a window to the right, and the camera was also positioned to the right, low down, just above the surface of the table on which the figures were standing. |
 |
All of these pictures were taken with
a Pentacon Six TL with the 80mm Biometar lens
mounted on the 10mm tube. The film was
Fujicolor PRO400H. A slower-speed film (for
instance, 160 ISO) would have yielded images with
finer grain, but this was the film that I had in the
camera at the time. Obviously, with
slower-speed film I would have needed to give longer
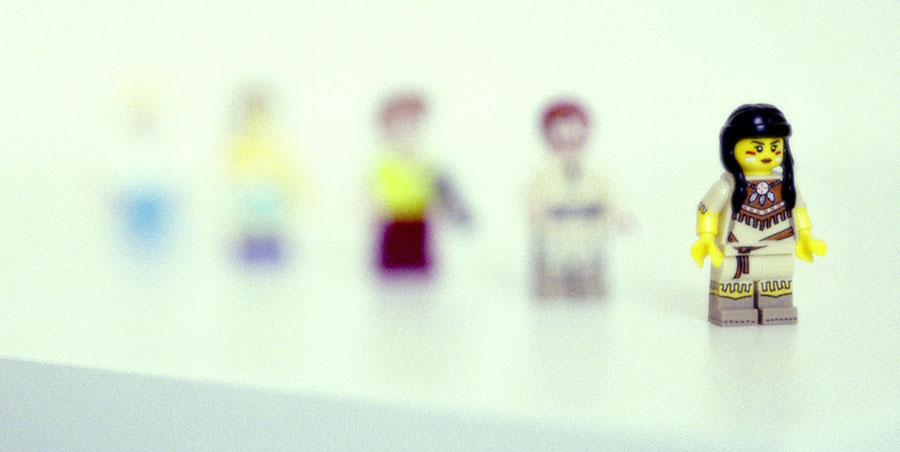
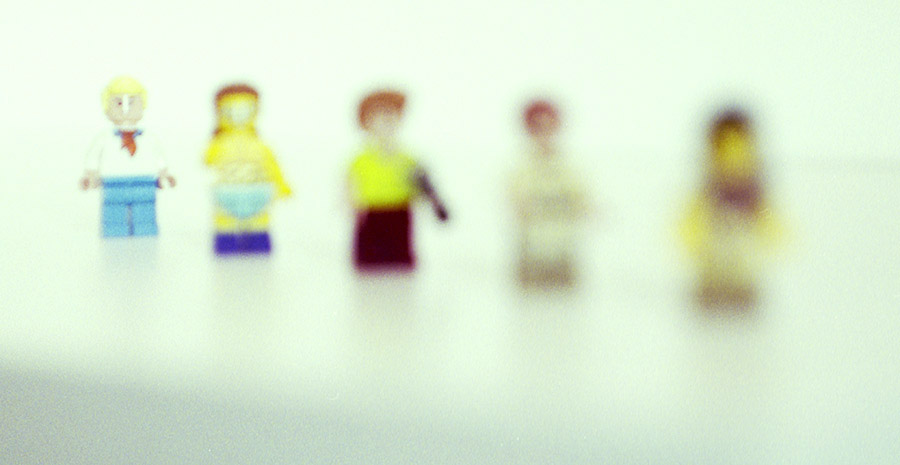
exposures. The width on the film of the images as cropped here is approximately 37mm, or 70% of the total width of the film frame. If I had moved closer to fill the frame better, the depth of field would have been even shallower. Biometar on its maximum aperture of f/2.8 Shutter speed 1/30 sec Tripod No cable release, no MLU Focussed on 1st figure from the right. (Using a cable release is normally to be preferred for macro photography, but with a steady tripod and 1/30 sec I was confident that I could release the shutter gently and not move the camera during the exposure.) Note the extremely shallow depth of field when this 80mm lens is used at its maximum aperture with the 10mm tube. [C549_10_1st_fig_m.jpg] |
||
 |
Focussed on the second figure from
the right Other settings as in previous picture. [C549_12_2nd_fig_m.jpg] |
||
 |
Focussed on middle figure. Changing focus changes the size of the subject on the film, something that must always happen, since the further the lens moves forward, away from the film (as when focussing on closer objects), the larger the image that is projected by the lens onto the film. In most normal photography, the differences are so tiny as not to be observable, but in macro photography, such differences immediately become clear in the viewfinder. [C549_13_3rd_fig_m.jpg] |
||
 |
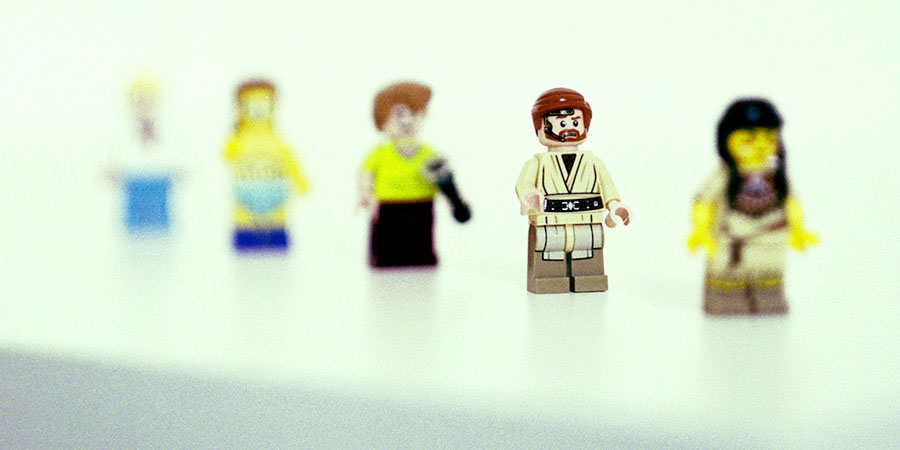
Focussed (approximately!) on 4th
figure from the right. In fact, focus is probably a little too far forward, a consequence of trying to work too fast. Macro photography requires patience and time – and unchanging lighting conditions, if possible! [C549_15_4th_fig_m.jpg] |
||
 |
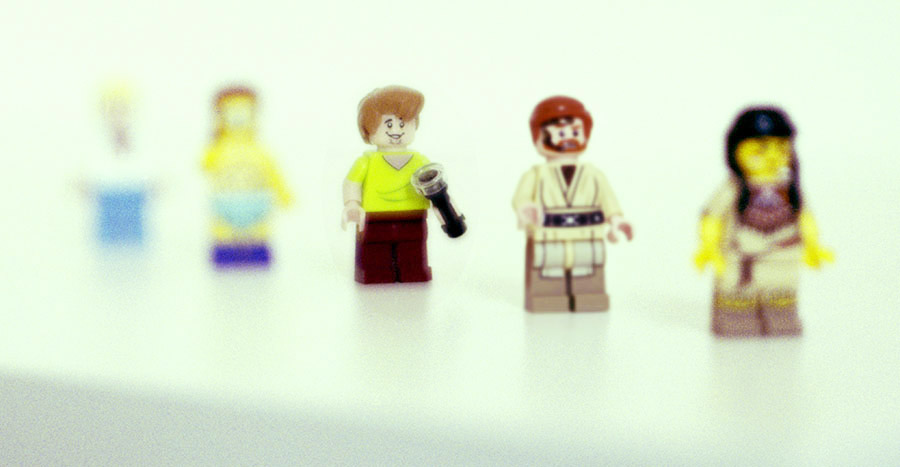
Focussed – supposedly! – on far-left
figure, although again focus is slightly out.
This does of course demonstrate why it is extremely
unwise to shoot at maxium aperture when doing macro
photography, since – even with perfect focus! –
depth of field is extremely shallow. Stopping down the lens (any lens) has many advantages:
[C549_16_5th_fig_m.jpg] |
||
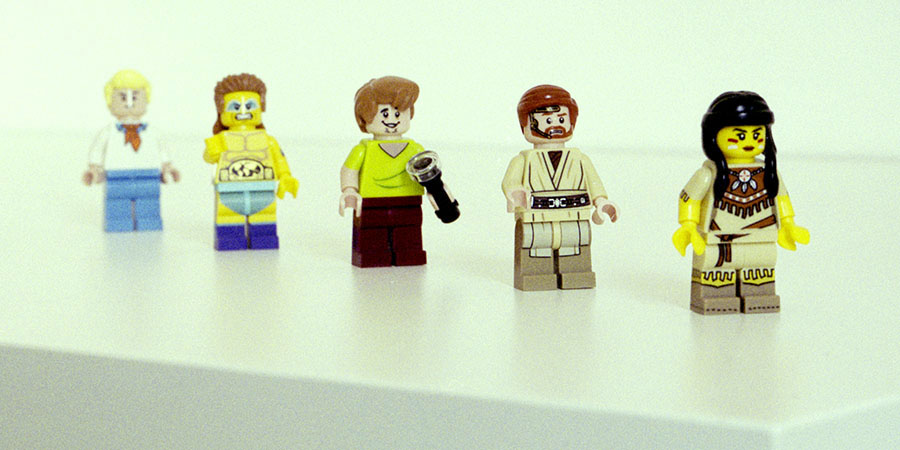 |
Stopping down to f/16 has massively
increased the depth of field (to a depth of about 20
centimetres or 8 inches), although this is not quite
enough to encompass the full distance from the
nearest figure to the one farthest away. As the smaller aperture lets much less light pass to the film, I have had to increase the exposure time to 1 second, and have of course therefore used a cable release, to prevent the transmission of any movement from my body (breathing! heartbeat!) to the camera. The depth of field extends both forward of and behind the point of sharpest focus and as the lens is stopped down, the increase in focus is greater behind the point focussed upon than in front of it. For this reason, in this image I have not focussed on the middle figure but somewhere between it and the image to the right of it in this picture (the second figure from the right). The increased depth of field now enables one to perceive (slightly out of focus) the front edges of the table and the point where the back of the table reaches the wall. [C549_17-18_2nd-3rd_f16_m.jpg] |
||
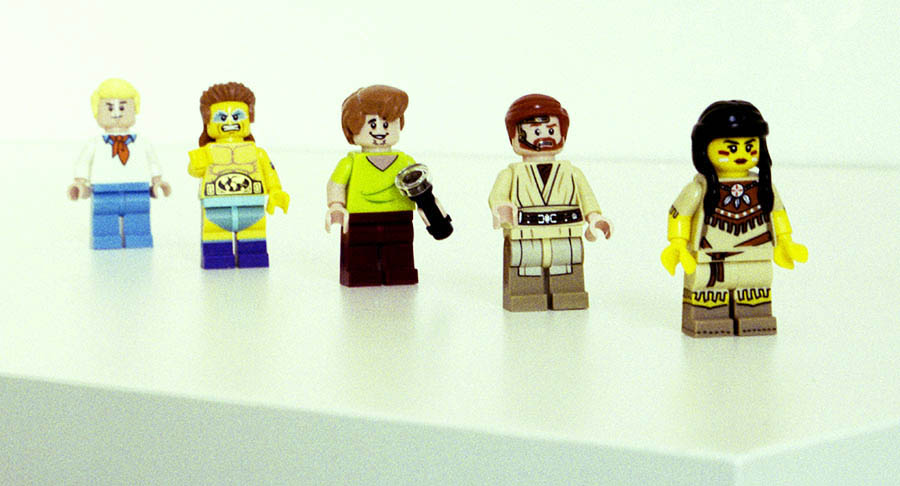 |
Here, without changing the point of
focus, I have stopped the lens down to its minimum
aperture of f/22, and this has increased the depth
of field and brought the farthest figure (the one on
the extreme left in the image) into sharp focus. Naturally, I have had to double the exposure time (to 2 seconds), to compensate for the halving of the light intensity caused by stopping down the lens from f/16 to f/22. Cable release used, of course. [C549_19_2nd-3rd_f22_m.jpg]
|
For more on this subject, see the pages
on this website on
To choose other options, click below.
Home
© TRA First published: April 2017