by TRA
Pentacon Six Lenses
The
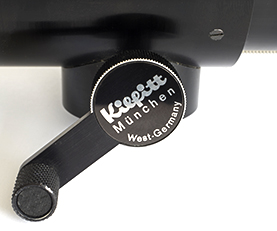
Kilfitt Multi-Kilar converter
| This report is long, but is, I believe, worth reading, as it contains information that I have not found anywhere on the internet nor in any other publication, but have only discovered gradually over years of detective work and searching worldwide for suitable adapters and lenses. |
The Kilfitt
Multi-Kilar Converter
[Multi_Kilar_01.jpg]
The Kilfitt
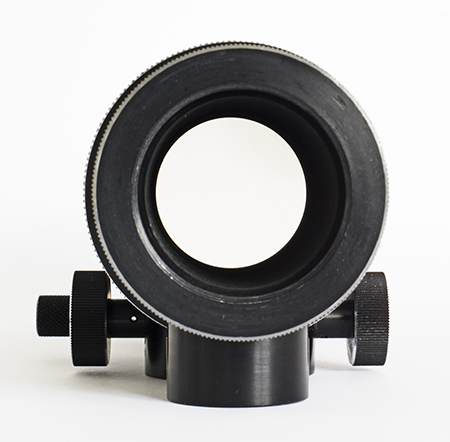
Multi-Kilar is a lens converter, as in “2×
converter”, etc., but it is much more than that!
| “It’s a converter,
Jim, but not as we know it!”
1 It looks unlike
any 2× converter that you have probably seen:
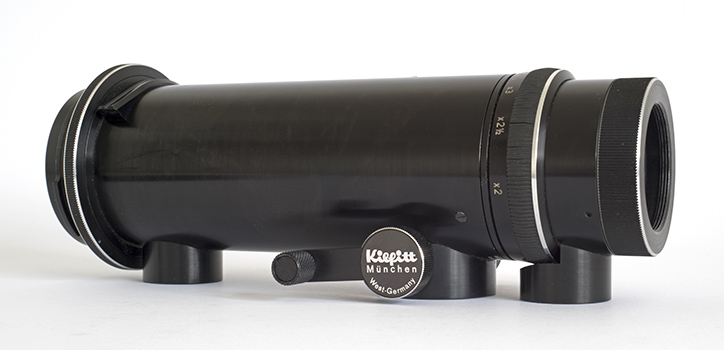 [Multi_Kilar_02.jpg] According to Pont’s book (here), Kilfitt announced the Multi-Kilar in 1959. Do not expect it to connect to any lens that is not from Kilfitt, and it won’t even connect to all of them. Before we can use it, we need various connectors, depending on which camera we wish to use, and which lenses. These connectors are now generally extremely hard to find. ( 1Star Trek fans may recognise an allusion to a phrase attributed to Mr Spock – at least, in the 1987 hit song by the British band The Firm, “Star Trekkin’ Across the Universe”.) |
| |
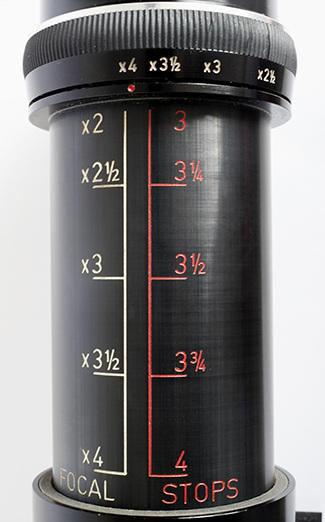
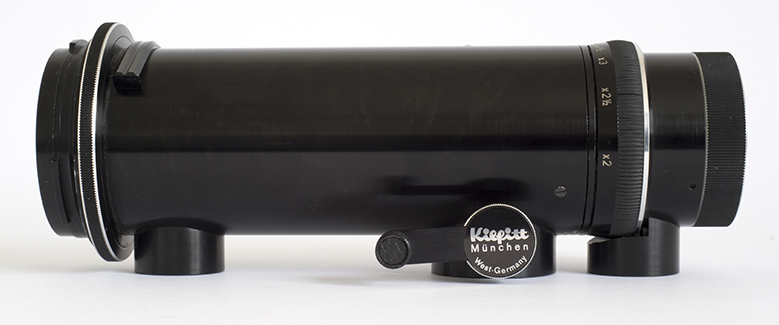 [Multi_Kilar_03.jpg] The Multi-Kilar is a tube that is 711/16" / 197mm long – in its unextended form! |
 [Multi_Kilar_04.jpg] Extended, it is 1011/16" / 270mm long to the rear flange of the mount locking ring. It is in fact a variable or zoom converter covering the range from 2× to a whole four times (4×) the focal length of the unconverted lens. |
|
|
 [Multi_Kilar_05.jpg] |
| Heinz Kilfitt was keen to provide a
filter drawer near the back of his lenses, when
possible. A small gelatin filter of one’s
choice could be placed in this removable drawer,
which was then re-inserted into the barrel of
the lens. The Multi-Kilar has just such a
filter drawer, and here we see several views of
it. (Readers should beware of used Kilfitt
lenses for which the filter drawer has been
lost, leaving a large gap in the barrel of the
lens, through which so much light will enter
that the lens will be unusable unless the
opening is covered.) |
|||||
 [Multi_Kilar_07.jpg] |
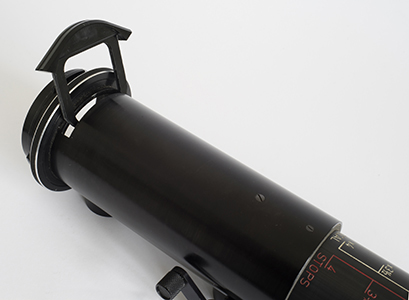
Here we can see the
filter drawer partially raised. It will come
out completely for the filter to be fitted into
it. The large gap left in the barrel when it
is removed is easy to see in this picture. |
 [Multi_Kilar_08.jpg] |
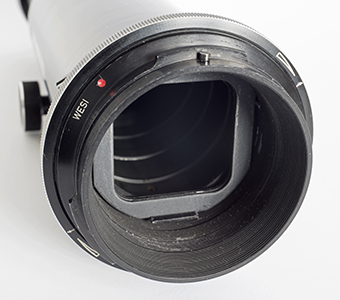
This close-up rear
view shows the Multi-Kilar with a “WESI” camera
mount and the filter drawer in place (although it
does not currently have a filter gelatin in it). |
 [Multi_Kilar_09.jpg] |
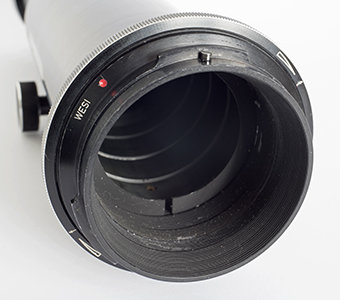
Here the filter
drawer has been removed, for comparison
purposes. As already explained, the drawer
must be replaced (with or without a filter) before
the lens can be used. |
Using the Multi-Kilar
| The Multi-Kilar has to be mounted between
the camera body and the lens. Kilfitt made
his lenses available for the widest-possible
range of 35mm and Medium Format cameras of his
day, and therefore most lenses have an
interchangeable camera mount on the back.
The Multi-Kilar does of course need a camera
mount on the back, but – depending on the
lens that one wishes to use with it – it may
also need a mount on the front. |
|||
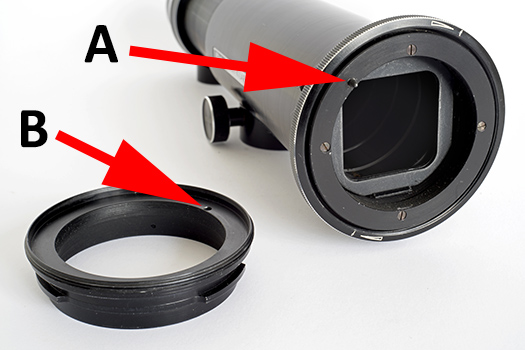 [Multi_Kilar_10.jpg] |
Here we can see the
rear of this Multi-Kilar, this time with the WESI
camera mount removed. We note that on this
particular example the WE base is screwed to the
converter with four screws. I do not know if
some Kilfitt lenses had the WE base permanently
mounted on the lens. We do not need to
remove these screws. The WESI mount has a Praktisix / Pentacon Six mount on the back and a 70mm thread on the front (Pont, page 38). A captive locking ring on WE base on the Multi-Kilar itself will engage with this thread. First, align the spike/pin in the WE base that is on the Multi-Kilar (marked “A” in this photo) with the circular slot in the WESI (marked “B”), then turn the ring to hold the mount firmly into place. |
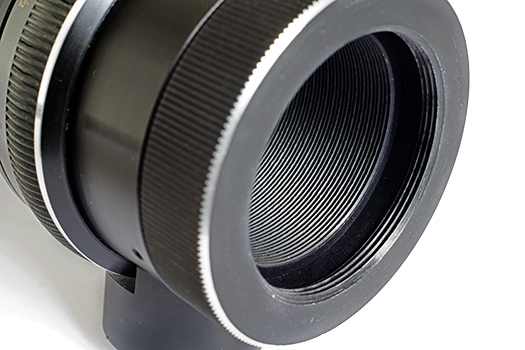 [Multi_Kilar_12.jpg] |
The front of the
Multi-Kilar (at least, this one) has a 39mm
Leica-compatible screw thread socket. |
Kilfitt
Codes
You may recall (from here) that Pont
reports three different types of bases on the rear of
Kilfitt lenses:
- KI
- AN
- WE
(in chronological order of their introduction).
A Kilfitt
expert tells me that to understand the codes for
Kilfitt adapters, it is helpful to imagine that you
have the lens to the left and the camera to the
right. So if you have a lens that has a WE
base and you want to connect it to a Praktisix or
Pentacon Six, for which the Kilfitt code is SI, the
adapter that you will need is called a WESI.
This technique for understanding Kilfitt codes works
with most Kilfitt mounts, but a few of the component
codes were combined in the opposite order!
In our case, at the camera end we want to mount the
Multi-Kilar onto a Pentacon Six, and the rear of
this Multi-Kilar has a WE base, so we can achieve
this easily with a Kilfitt WESI mount.
That was the easy bit. We can now mount the
Multi-Kilar onto the camera. The other end is
far more complicated.
“KI”
lenses
| Pont refers to the “KI” code as being
“like Kilar”. I am going to guess
something different. As far as I can see
from the extremely limited numbers of Kilfitt
lenses that I have handled, the “KI” lenses were
destined for cameras that used 35mm film.
This was a film format that was designed for the
cinema (“KINO” in German). We recall that
the first 35mm SLR was from Exakta in Dresden
and because of the film it used, it was called
the KINE Exakta. So I surmise that “KI”
may have stood for “KINE”, or at least have been
inspired by this naming history. Kilfitt’s
early lenses were advertised for the 35mm Exakta
cameras, as well as for other brands. |
||
| We should also bear
in mind that in the early 1950s, the other major
market for Kilfitt was 35mm non-reflex cameras,
principally the Leica. Focussing long lenses
accurately with a non-reflex camera was difficult,
and in the 1930s Zeiss had designed a mirror box
for the Contax that went between the camera body
and long lenses. This essentially converted
the rangefinder camera into a
“single-lens-reflex”, although only for use with
long lenses that had been manufactured with a
short back, to allow space for a mirror box.
Leica produced similar mirror boxes, and so did
Novoflex. In the 1950s, Kilfitt manufactured such mirror boxes, and lenses that screwed into the front of them. With Leica being the main market for these lenses and mirror boxes, Kilfitt put a 39mm Leica male screw mount on the rear of the box and a 39mm Leica female screw mount on the front of the mirror box. (Naturally, if one mounted a standard Leica lens onto the front of this box, the lens would not focus to infinity, but might be usable for extreme macro work, another area where non-reflex cameras could only work with extreme difficulty (both for focussing and framing). The Kilfitt mirror boxes were called “Spiegelkasten”. (We need to know this later!) The image to the right reproduces a Kilfitt mirror box. Pressing the lever down raised the mirror and the end of the lever then pressed down onto the camera shutter button to fire the shutter. Pont shows four different types of mirror boxes from Kilfitt, with names such as “Kilarflex”, “Repriskop” and “Kilarskop”. For those wishing to know more about Kilfitt, Pont’s book is an essential source. Pont states that “KI” lenses covered 35mm format only (24mm × 36mm), not “6 × 6” format. However, if a lens that was designed to cover 35mm format is mounted on bellows (for macro work) or on a 2× converter, the image that is enlarged in either of these ways may well cover 6×6 format. We shall see. Now let us return to our Multi-Kilar. At the front it has a 39mm Leica female screw mount. It may be that if we screw into the front of the Multi-Kilar some of Kilfitt’s long lenses with the “KI” Leica thread mount, they will work! Here, I will try it with the 150mm f/3.5 Kilfitt Tele-Kilar in 39mm mount, which I risked buying, without knowing if it would be compatible. |
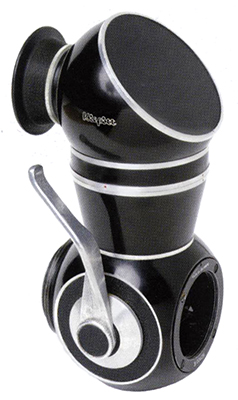 [kmbox.jpg] From Pont, page 88 |
|
150mm
f/3.5 Kilfitt Tele-Kilar
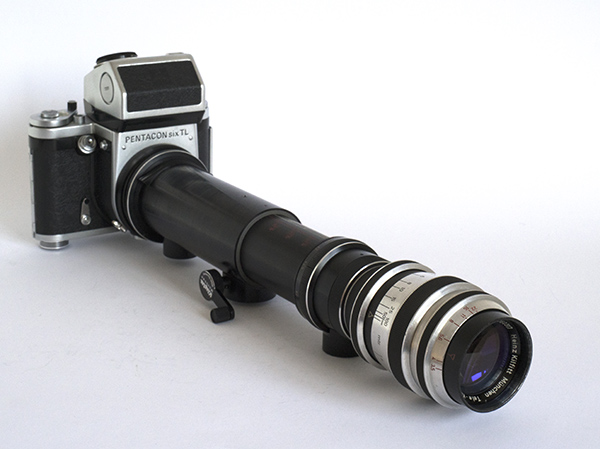 [MK_w_150_01.jpg]
|
This
lens screws directly into the 39mm socket on the
front of the Multi-Kilar. We then need to
mount this onto an extremely sturdy tripod, and
to add a Pentacon Six on the back. The
result? Perfect infinity focus! And
in the viewfinder we seem to have coverage of
the whole of the 6 × 6 format with the minimum 2
× converter setting. The actual coverage
is clear from the test shots reproduced below.
|
“Oh,
there is just one other thing ...”
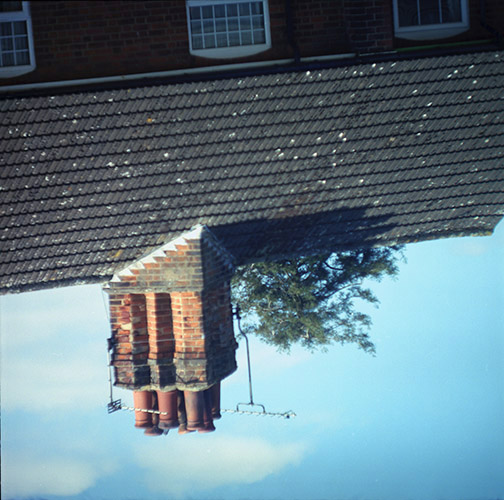 A Multi-Kilar image as seen in the viewfinder [C567_4_MacZm_MK3or.jpg] |
As we look through the
viewfinder, we find that using the Multi-Kilar is not
for the faint-hearted: with our reflex camera and
pentaprism, the image is upside-down! That can’t
be changed. That’s the way it is. When we
get the prints (or scan the film), we just need to
turn them through 180 degrees. Problem
solved! But at the shooting stage, it takes some
getting used to, and may account for the
fact that when taking this picture I failed to
notice that the subject was not exactly vertical.
300mm
f/5.6 Kilfitt Tele-Kilar
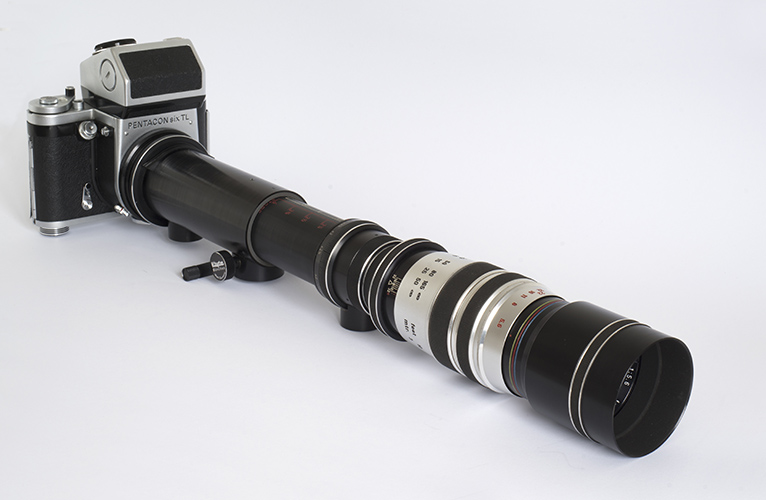 The 300mm
Tele-Kilar mounted on the Multi-Kilar, with the
“Rezwi” extension ring in place between the two
components
[MK_w_300_01.jpg] |
I
recently managed to buy the 300mm Tele-Kilar
with M39 mount. Would it focus to infinity
with the Pentacon Six when mounted on the
Multi-Kilar, and totally cover the format?
The vendor was not likely to know the answer to
this question, so I took another risk and bought
it. When I screwed it into the front of the Multi-Kilar on my Pentacon Six, I was surprised and disappointed! No infinity focus! I turned the focussing ring on the Tele-Kilar, and when the barrel was extended about 15mm, I suddenly got infinity focus! So it works, but the close-focussing potential is extremely reduced. I went back to the 150mm Tele-Kilar, above, and found that on its back there was an extension ring that I could remove. It bore the name “Rezwi”.
|
| I checked in Pont’s
book. He says (in French, of course), that
the REZWI is “a 39/39 ring 14.5mm thick giving to
recent Kilfitt reflex boxes (see above) the same
mounting distance between the lens and the film
plane as the old reflex boxes.” (p. 101)
Nothing there about the Multi-Kilar, but that is
another place where it is invaluable. Using the 150mm and 300mm Tele-Kilars on 35mm cameras I recently bought a box of assorted Kilfitt accessories. Among them I found an adapter that had a 39mm female thread labelled “KIL” on the front and a 42mm male thread labelled “PA” on the back. I screwed my 150mm Tele-Kilar into the front and mounted a Praktica VLC2 35mm camera on the back. Infinity focus? Impossible, at any setting! I looked at the lens, and saw that there was a ring at the back that I could remove. I unscrewed it and found that it bore the name “Rezwi”. I then mounted the lens back on the M39-M42 adapter, without the “Rezwi”. Result? Perfect infinity focus on the 35mm camera! Checking with the 300mm Tele-Kilar, I got the same result: with the “Rezwi” between the lens and the 35mm camera, infinity focus was impossible, without it, infinity focus was achieved with the lens set on the infinity position. The rule is: Add the “Rezwi” to obtain infinity focus with these lenses on the Multi-Kilar; Remove the “Rezwi” to obtain infinity focus with these lenses on a 35mm camera, via the Kilfitt M39-M42 adapter. |
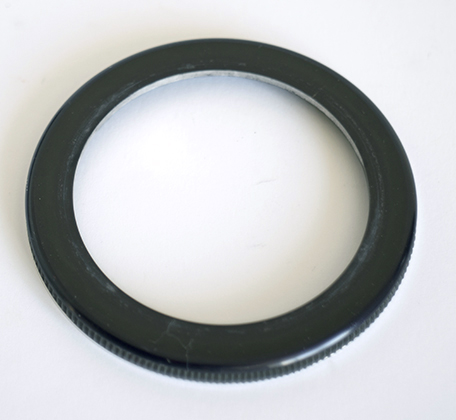
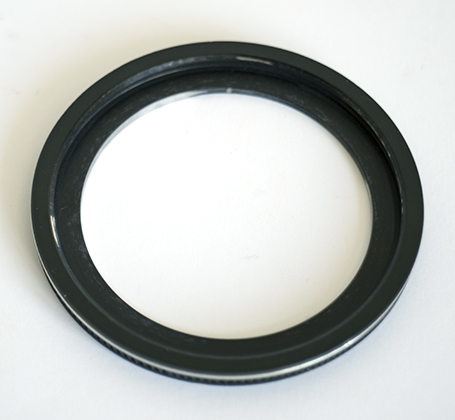
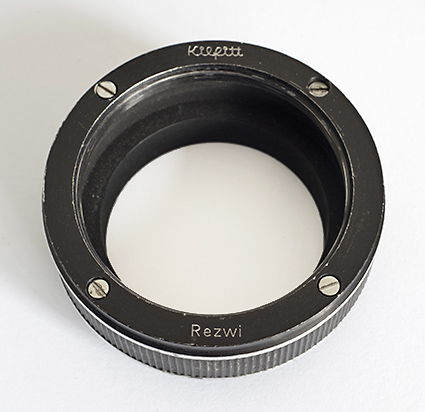 The Rezwi extension ring. In German, the word “zwischen” means “between” and Germans use the term “Zwischenringe” for what we in English normally call “extension tubes”. [rezwi_01.jpg] |
| Here are
pictures of these two lenses on a 35mm (“full
frame”) camera, via the Kilfitt M39-M42 adapter. |
||
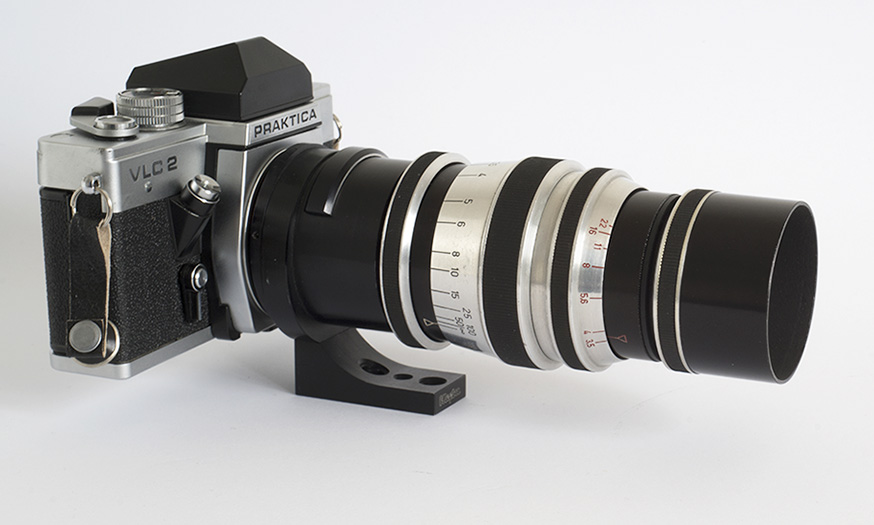 [k150_M42.jpg] |
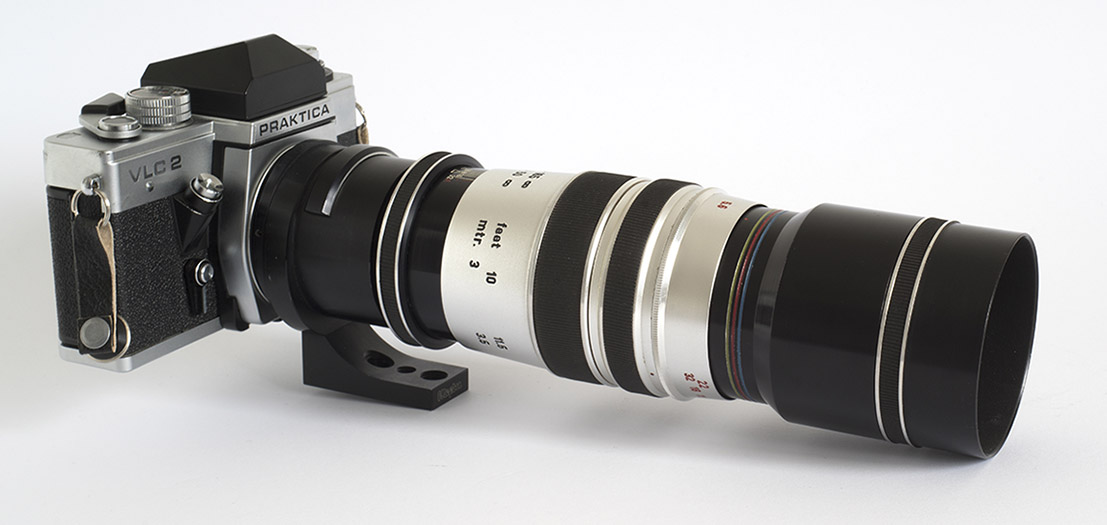 [k300_M42.jpg] |
|
We can see that the 39mm-M42 Kilfitt adapter has the following features:
- a tripod foot with ¼" and 3/8" sockets
- a filter drawer for gelatine filters.
Note that we have removed the “Rezwi” extension ring before mounting these lenses onto the M39-M42 Kilfitt adapter.
“AN” lenses
Now let’s try to connect
a lens with an AN mount system to the
Multi-Kilar. This is not so straight-forward.
| The “AN” lens that we
have is the fabulous Pan-Tele Kilar, which is
reported on here.
It came to us with the mount for the Pentacon
Six. I thought that the mount should be
called “ANSI”, but my one is marked “ANSIX” on an
inner surface. Pont says that the ANSIX is
the adapter for PANTE/Praktisix. “PANTE” is
the code for the 300mm f/4 Pan Tele Kilar with AN
base. To remove this mount from the base,
one unscrews a large retaining ring. Unlike
with the WE base, the AN mount has the ring as
part of the mount, so it comes off with the mount,
instead of staying on the lens. Now we need something to connect an AN base to a 39mm Leica mount socket. We might guess “ANKI”, based on our guesses about “KI”, above, but we would be wrong. “ANKI” does not appear to be a Kilfitt code. But as the 39mm socket was used on the front of the Kilfitt mirror box (SPIegelkasten), the mount is called “ANSPI”.
|
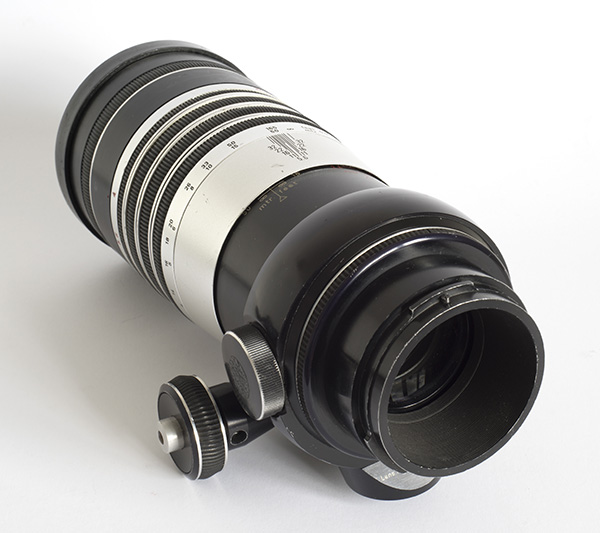 The Pan Tele Kilar with its ANSIX mount [PTK_w_ANSIX.jpg] |
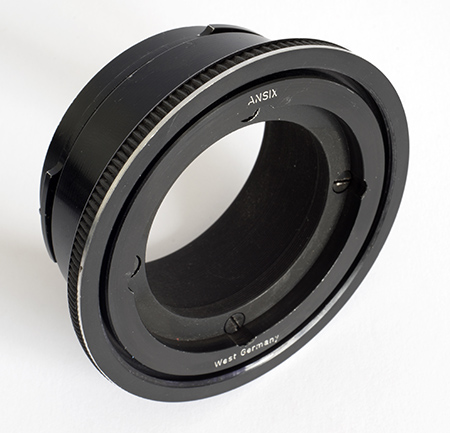 The ANSIX camera mount unscrewed from the back of the Pan Tele Kilar [ANSIX_3_qutr.jpg] |
|||
So we need to locate
an ANSPI (or a suitable combination of two other
adapters). The ANSPI was the first of these
that we found.
|
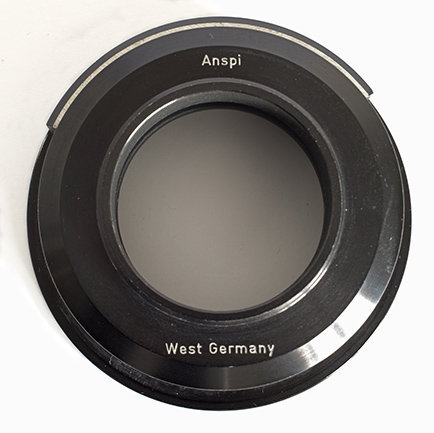 From the back we can see the light trap at the top of the filter drawer. [ANSPI_back.jpg] |
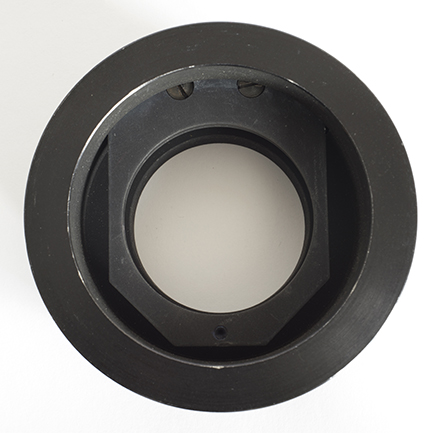 From the front we get a partial view of the filter holder. [ANSPI_front.jpg] |
| Present the ANSPI to
the AN base. It fits perfectly. But
there is a problem. The locking ring was
part of the ANSIX mount, and the ANSPI is supplied
without a locking ring. “Easy!” you say. “Remove the locking ring from the ANSIX.” No, it is not easy. The ring is captive to the ANSIX mount. Someone has tried to remove a screw within the ANSIX to disassemble the mount, but has only succeeded in damaging the screw head. We need to find a fairly WIDE screw driver with a FINE blade, to proceed firmly, and to make sure that nothing slips. After a struggle, we remove four screws with slightly rusty threads that have probably not been turned since the ANSIX was assembled in the Kilfitt factory more than sixty years ago. The front and the back of the ANSIX come apart. Now we can retrieve the locking ring.
|
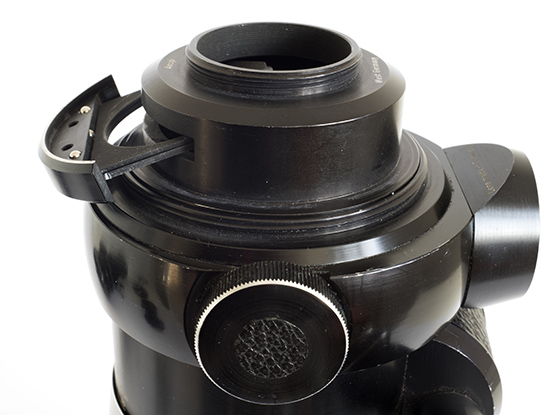 The ANSPI sitting on top of the AN base on the Pan Tele Kilar. We have here partially pulled out the filter drawer that is in the mount. [PTK_w_ANSPI_presented.jpg] |
||||
| We will not be swapping over these adapters in the field. Either we will take out the Pan-Tele Kilar with the ANSIX mount and use it directly on the Pentacon Six, as in the past, OR we will swap the ANSIX mount for the ANSPI mount before we set out, and use the Pan-Tele Kilar only on the Multi-Kilar. (Of course, if we could find an ANWE, which converts the AN base to a WE base, we could leave that on the Pan-Tele Kilar and easily swap between a WESI back for the Pentacon Six or a WEKI back for the Pan-Tele Kilar, even out in the field.) | |||||
To
our surprise, the ANSIX locking ring fits the
ANSPI perfectly – once we have removed the
filter drawer that is built into it. We
now present the ANSPI to the back of the
Pan-Tele-Kilar, turn the locking ring and then
re-insert the filter drawer, without which light
would get into the mount, seriously degrading
the image.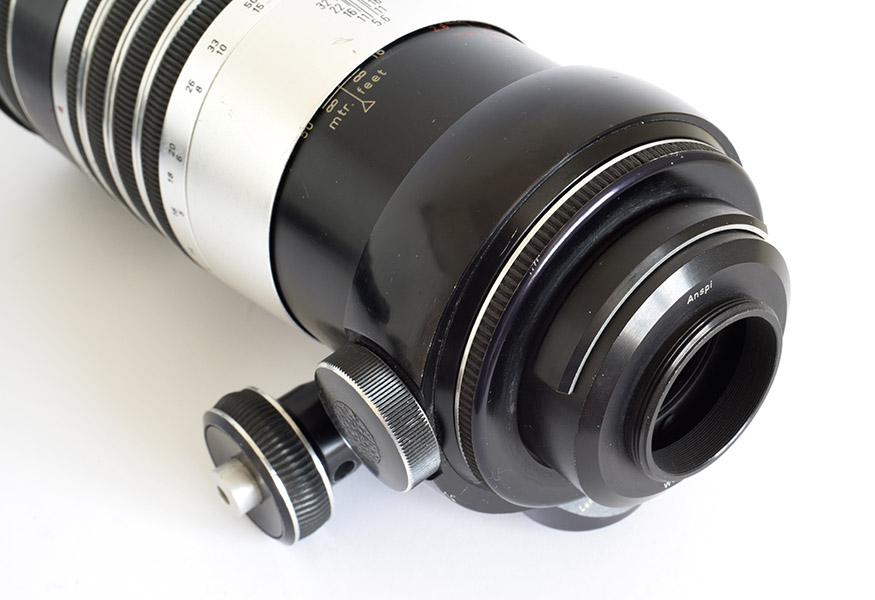 [PTK_w_ANSPI_mounted.jpg] |
|
Now we screw the rear
of the ANSPI into the front of the
Multi-Kilar. Another perfect fit!
There is no locating pin system with the AN mount,
so we may need to slacken off the locking ring
slightly and re-align the Pan Tele Kilar to get
the focussing scales and aperture register index
to the top of the lens, then re-tighten.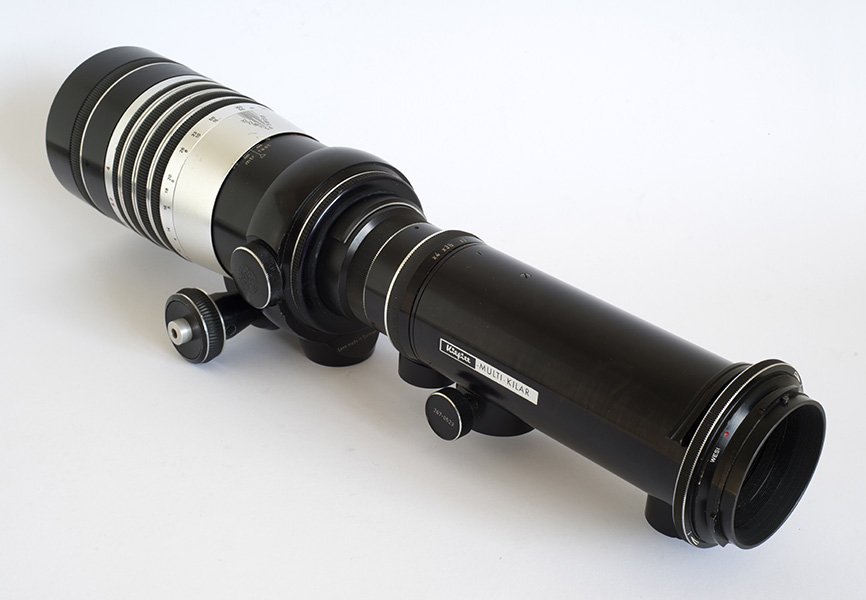 [PTK_on_Multi_Kilar.jpg] |
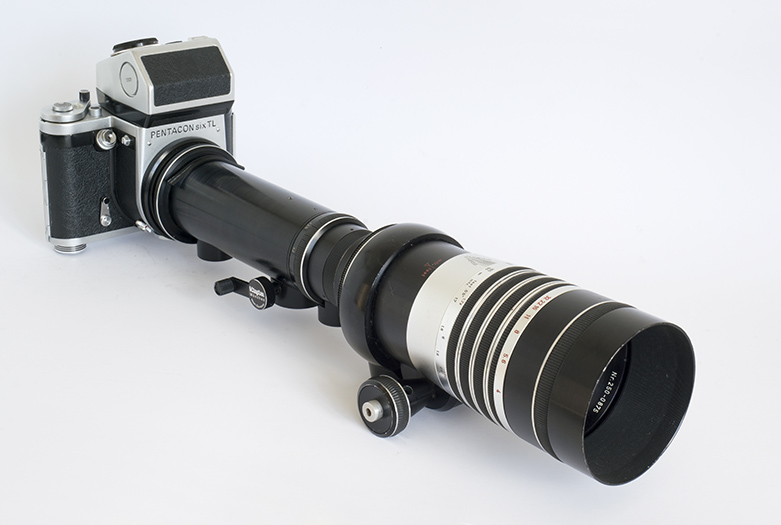 Pan Tele Kilar
and Multi-Kilar mounted onto a Pentacon Six
[PTK_MK_P6_01.jpg] |
Now we can put our
Pentacon Six back onto the Multi-Kilar and mount
everything onto an exceptionally sturdy tripod –
my luggage scales give the total weight of this
combination as 2.7 kg, which an internet converter
indicates is 5 lb 15¼ oz – and that is without a
camera! When we add a Pentacon Six with
metering prism (and at the moment no film
loaded!), the same scales indicate a total weight
of 4.3 kg, equivalent to 9 lb 7.678 oz, according
to the same internet source. You won’t be
walking around with this hung around your
neck! In fact, Kilfitt recommends the use of
TWO tripods, which is fine if one is photographing
something that is not moving – or perhaps birds or
squirrels visiting a feeding table.
This is facilitated by the presence of
THREE tripod mount points on the converter, and
of course also a tripod mount on the Pan Tele
Kilar.
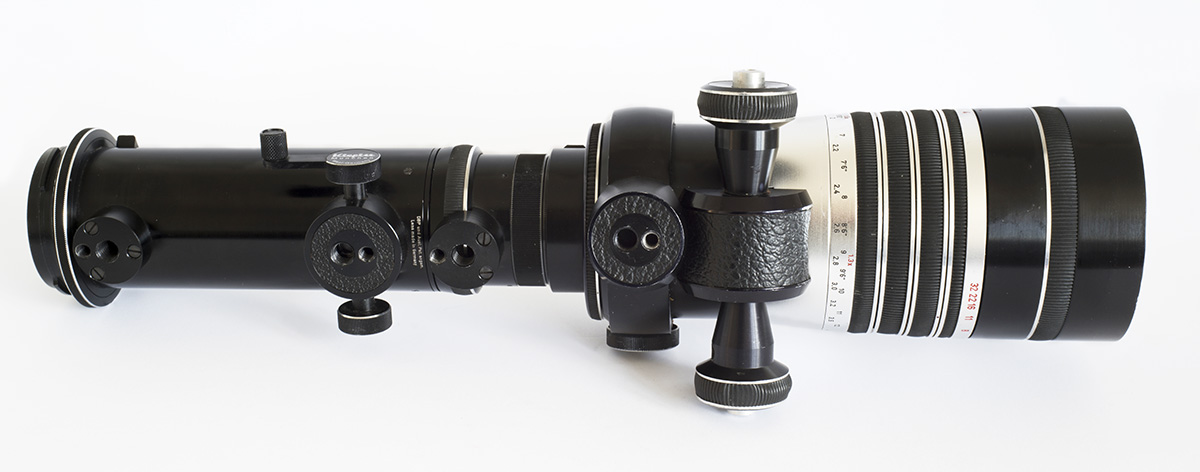
There are four ¼" tripod sockets and four 3/8" sockets. [PTK_on_Multi-Kilar_base.jpg] |
| In fact,
with the Multi-Kilar set at 4× conversion and the
Pan Tele Kilar at maximum extension for closest
focus, the total length (without a camera!) is
approximately 600 mm or 24 inches. One can
readily see why a tripod is essential. |
||
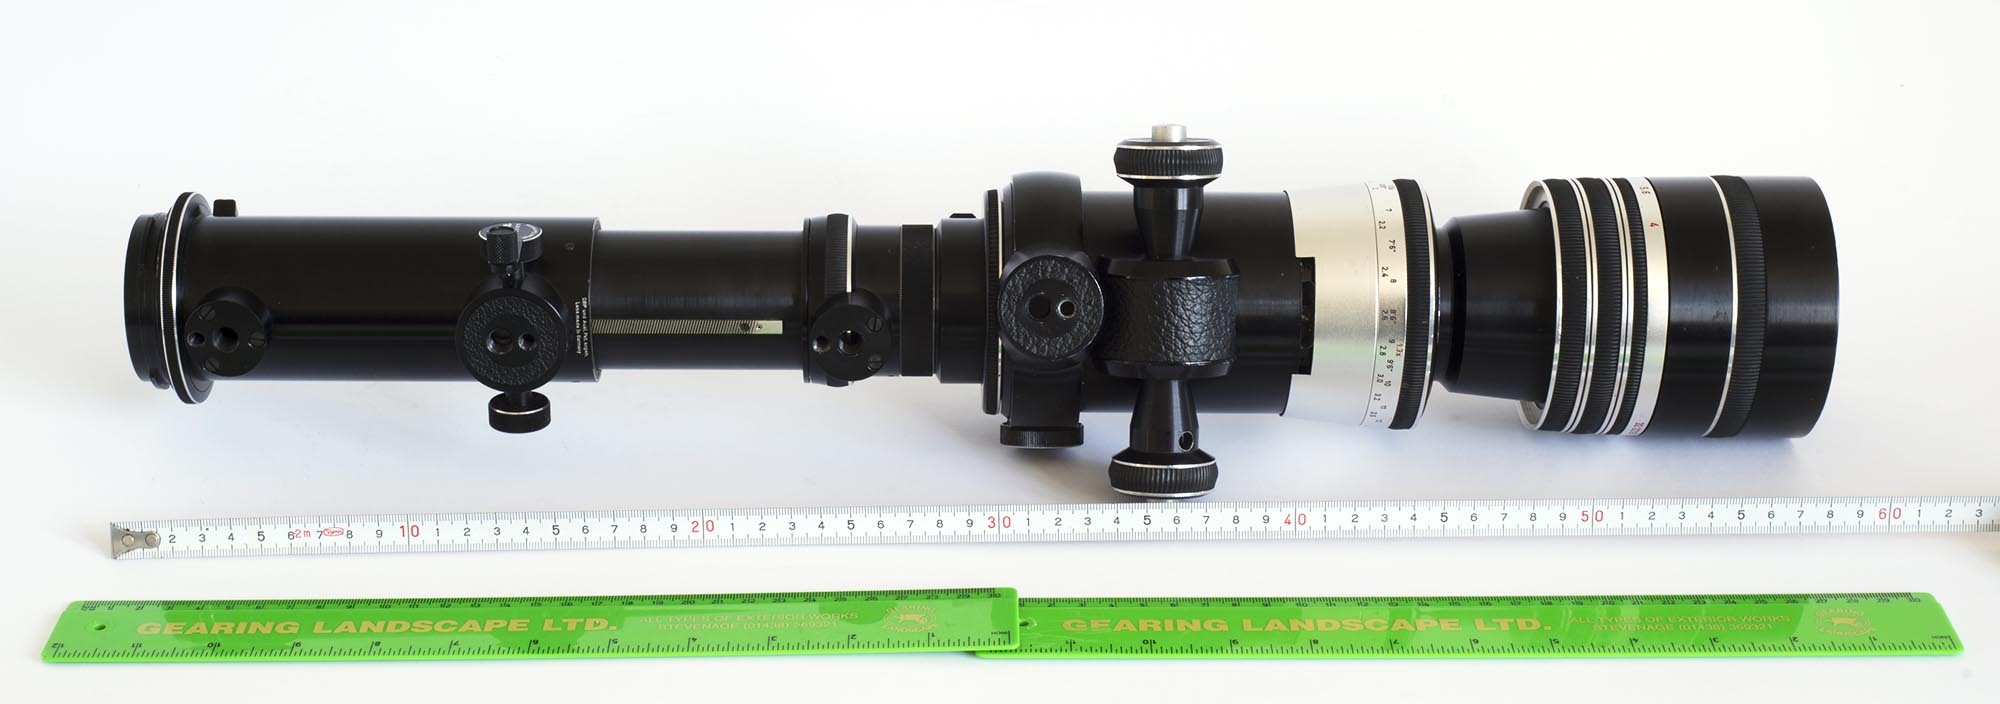 [PTK_on_Multi_Kilar_size.jpg] |
||
| One can
also readily understand why some of the most
important purchasers of Kilfitt and Zoomar lenses
were the Disney organisation and the U.S.
Military. Disney is reported to have used
Kilfitt lenses when filming wildlife documentaries
for U.S. television in the 1950s and 60s.
Disney and the U.S. military were clearly not
concerned by the size and weight of these
super-powerful lenses, and would of course have
used them on a tripod, possibly in a wildlife
photographic hide or other concealed site in the
case of military use. In either situation,
the users were prepared to spend hours or even
days set up and ready for when the right event
occurred. This is not the situation of most
amateur users of this equipment. |
||
With the 300mm Pan-Tele-Kilar and the Multi-Kilar, we can easily achieve the following focal lengths:
| Lens | Converter factor | Resultant focal length |
| 300mm Pan-Tele-Kilar | [with no converter] | 300mm |
| 2 × | 600mm | |
| 2½ × | 750mm | |
| 3 × | 900mm | |
| 3½ × | 1050mm | |
| 4 × | 1200mm |
“WE” lenses
| “WE” was the last of
the connector systems developed by Kilfitt.
We have described it above, since the rear of our
Multi-Kilar has a WE base. But can we mount lenses with a WE base onto the FRONT of the Multi-Kilar? The diameter of a Pentacon Six lens mount is much greater than the diameter of the 39mm hole in the front of the Multi-Kilar. In any case, if we present an 80mm Biometar lens to the front of the Multi-Kilar, we discover that infinity focus is not possible, because we cannot get the Biometar far enough back. What about the 90mm Kilfitt Makro-Kilar / Macro-Zoomatar? This has a WE base and we have a WESI adapter on that base, for direct mounting onto the Pentacon Six, and that works perfectly. To get the Makro-Kilar far enough back to enable infinity focus when it is on the Multi-Kilar, we will obviously need to remove the WESI adapter, but what will we put in its place? Perhaps there is a “WESPI”, by analogy with the ANSPI. It turns out that a “WESPI” adapter is reported. Pont says that it was an adapter for mounting the SPOSO onto Kilfitt mirror boxes. So what is a “SPOSO”? It turns out to be the WE version of the 600mm f/5.6 Sport Fern Kilar / Sport Zoomatar. These mount adapters need much more than the correct connector on each surface: they need to be the right THICKNESS to provide infinity focus, so this is probably not the right one for this lens. In any case, we haven’t got a WESPI, so we can’t try it out. Fortunately, a Kilfitt expert in Germany has told me that the correct adapter to mount the 90mm Makro Kilar / Macro Zoomatar is a WEKI – so there is that “KI” that I suspected of being derived from the 35mm format “KINE” cameras. |
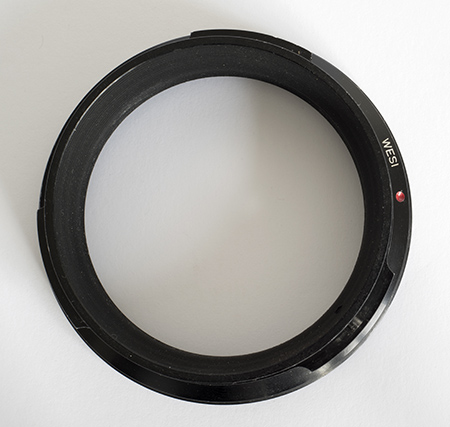 The WESI camera mount removed from the WE base on the lens. [WESI_01.jpg] |
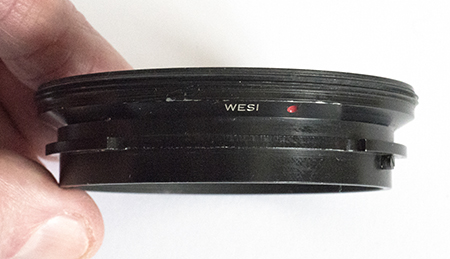 This image gives an idea of the thickness of the WESI camera mount. [WESI_side.jpg] |
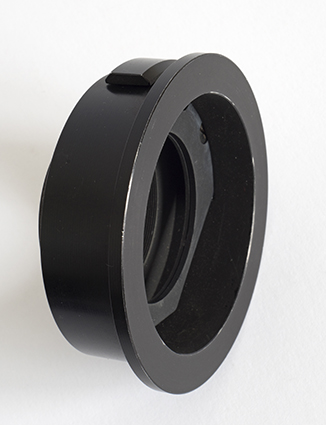
| As expected, the WEKI is an extremely slim disk. Its front edge has the filter thread for the locking ring on the WE base, and its rear end has the 39mm “Leica” male screw thread. Attach the WEKI to the Makro-Kilar / Macro-Zoomatar. The WEKI has five deep indentations on its front surface, so that the spike or pin in the WE base can be located in whichever indentation gets the lens correctly aligned with the focussing scale and the aperture index at the top. Clever detail! | 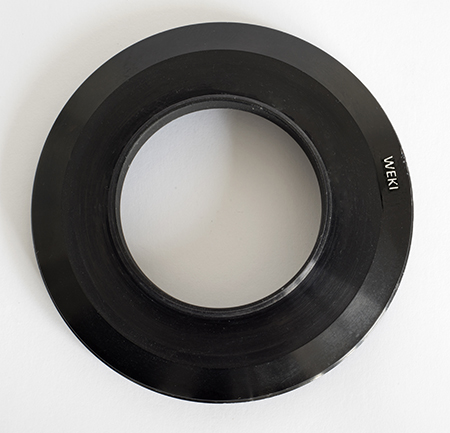 This ring came without a name on it. I have added a label. [WEKI_back.jpg] |
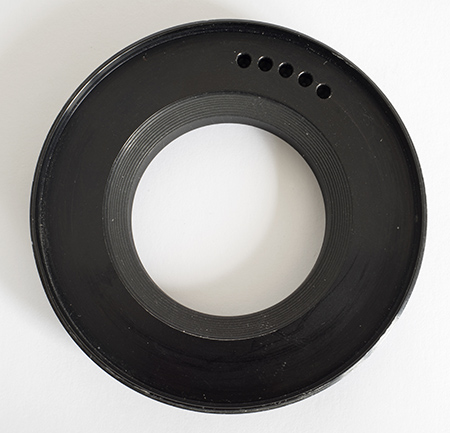 Note locating points to facilitate alignment. [WEKI_front.jpg] |
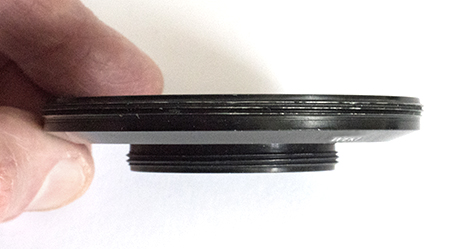 The WEKI is
clearly much slimmer than the WESI.
[WEKI_side.jpg] |
| Next, screw the rear
end of the WEKI to the front of the Multi-Kilar. Add the 90mm Makro Kilar / Macro Zoomatar, and it works! Infinity focus (and closer) is available. |
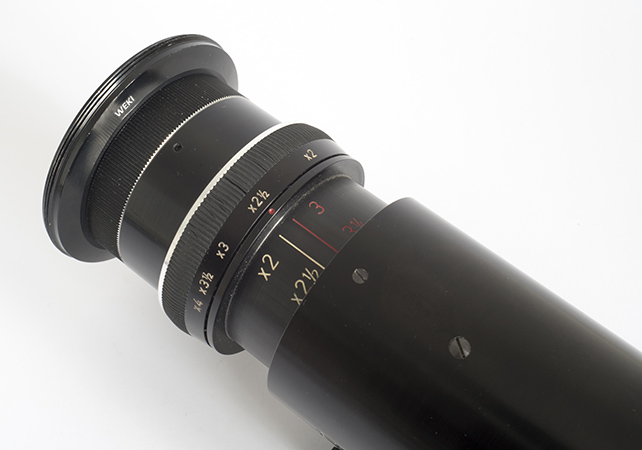 WEKI adapter screwed into front of Multi-Kilar ... [MK_w_WEKI.jpg] |
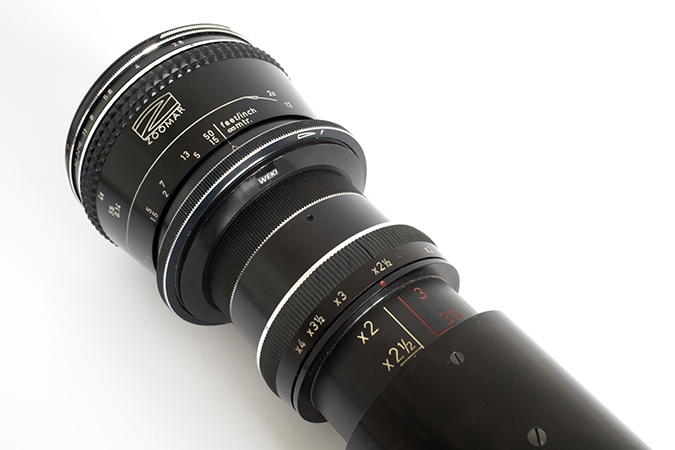 ... and with the Macro Zoomatar attached [MK_w_WEKI_&_Macro_Zmtr.jpg] |
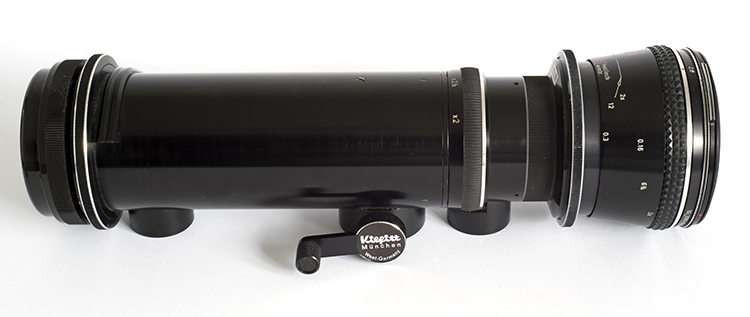 The Macro
Zoomatar mounted on the Multi-Kilar, via the
WEKI ring
[Macro_Zmtr_MK_P6.jpg]
|
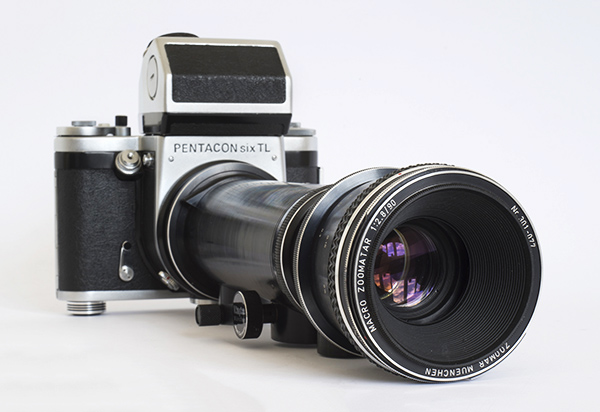 All ready to go!
[Macro_Zmtr_MK_p6.jpg] |
So
with the 90mm Makro-Kilar / Macro-Zoomatar, we
can easily achieve the following focal
lengths:
|
Summary
To use the Multi-Kilar, the following options are available:
| Lens
Type |
Adapter |
Multi-Kilar |
|||||
| Kilfitt
M39 lens |
+ | REZWI |
+ |
Multi-Kilar |
|||
| Kilfitt
AN lens |
+ | ANSPI |
+ | Multi-Kilar | |||
|
Or Kilfitt AN lens minus mount |
+ | ANWE |
+ | WEKI |
+ | Multi-Kilar | |
|
Or Kilfitt AN lens minus mount |
+ | ANSIC |
+ | MUZWI |
+ | Multi-Kilar | This one not
checked! |
| Kilfitt
WE lens |
+ | WEKI |
+ | Multi-Kilar | |||
Now to check on the quality. We know that the Makro-Kilar / Macro-Zoomatar is superb, and so is the Pan-Tele Kilar, but we have not previously used the 150mm or 300mm Tele-Kilar.
Test results
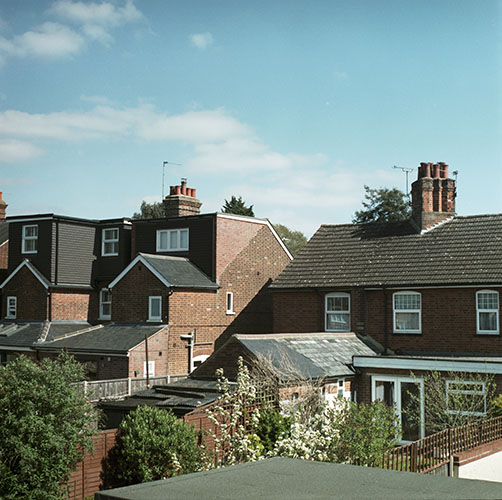
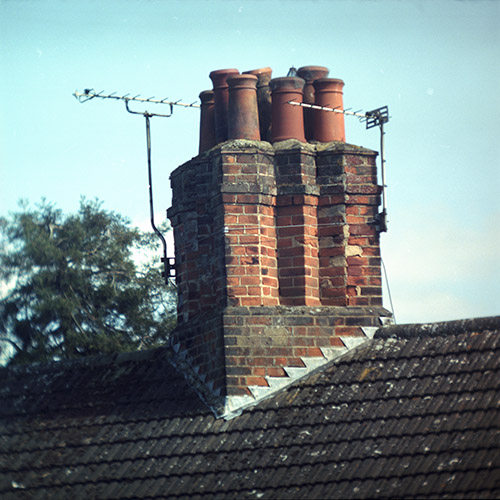
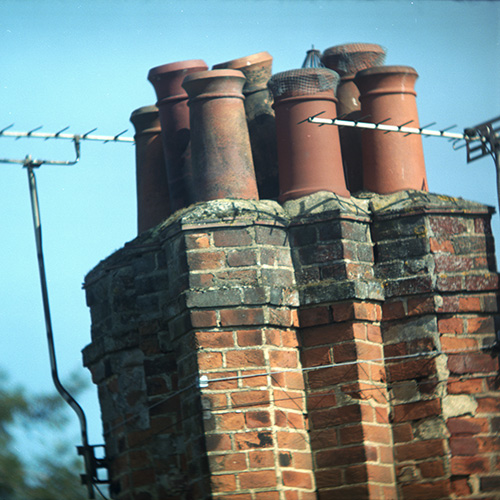
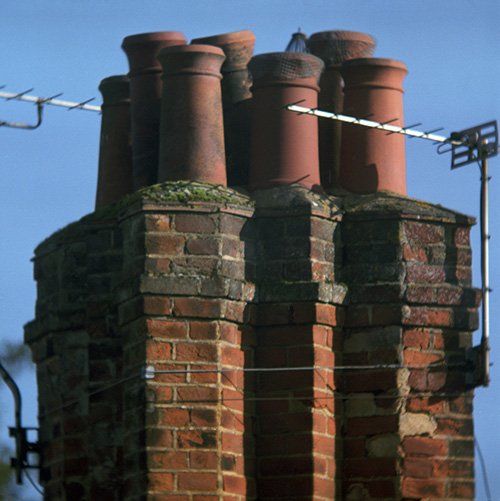
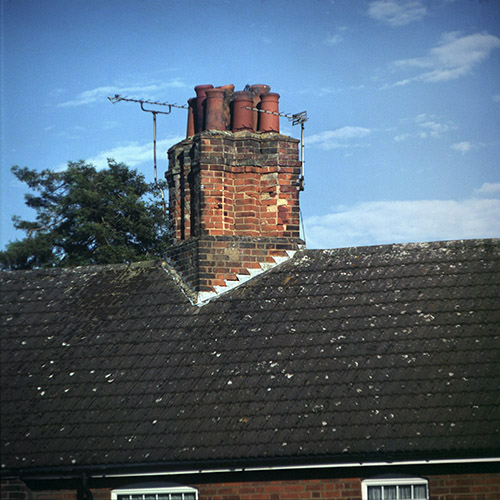
Most of the test pictures in the first three columns were taken on two different dates, 9 days apart in April 2019, at approximately the same time of day. However, this does account for some slight differences of lighting, colour and shadows between some pictures. Further tests were taken in on various dates in July 2019, and the tests for the 300mm Tele-Kilar were made in November 2020. Pentacon Six TL used for all shots. Metering with Pentacon Six TTL metering pentaprism. Fuji PRO 400H film used. Click on the images in this section to see them larger. With most browsers, a second click on the enlarged image will enlarge it still more.
| For the purpose of comparison, here is a
picture taken from the same position, using the
500mm Pentacon (Meyer-Optik Orestegor) lens “Made
in Germany” (see here) |
 |
| Focal
length: 500mm 1/250 f/11 [C568_13_Pentacon.jpg] |
The first shot in this series of test pictures (C567_1-2_MacZm.jpg) was hand-held. All of the others were taken with the lens mounted on a tripod. For film C567 (see the frame identifier under the description for each picture), the Benro Mach3 TMA28C tripod was used, with legs fully extended, centre column down and the legs braced against heavy objects. For film C568 and film C570, the Berlebach UNI 14 tripod was used. In all cases except the hand-held shot, the Arca-Swiss B1-G Aspherical Ball Head was used. See details of the Benro tripod here. See details of the Berlebach tripod and the Arca-Swiss B1-G Ball Head, see here. Naturally, the direction of the light source, including the height of the sun in the sky, and its intensity, varied from one occasion to another, although I chose situations where the lighting was as similar as possible.
Comments and Conclusions
First, it is necessary to make two general comments:
- In all cases where the Multi-Kilar converter was used, the shutter speeds that were needed in order to get a correct or nearly-correct exposure were incredibly slow, much slower than would normally be recommended for these long focal lengths – even when using a tripod. For instance, for a 1000mm lens, a shutter speed of 1/1000 sec would be recommended, but here with an effective 1200mm lens we used 1/60 sec!
- Every lens converter “gobbles up” light, and the greater the power of the converter, the more light is lost. To get adequate exposure, on several occasions we had to use the 150mm Tele-Kilar and the 300mm Pan-Tele Kilar at wider-than normal apertures and on one occasion the Macro Zoomatar was used at f/5.6. (Most lenses generally give of their best at f/8 or f/11.)
| Multi-Kilar
setting |
90mm Macro Zoomatar |
150mm Tele-Kilar |
300mm Pan-Tele Kilar |
300mm Tele-Kilar |
| Lens used on
its own without the Multi-Kilar |
Focal length: 90mm I don’t often use this macro lens at or near its infinity setting, but it does an excellent job here, too! Sharp, great resolution and no chromatic aberrations. 1/125 f/22 |
(It is not possible to use this lens on the Pentacon Six without the Multi-Kilar.) | Focal
length: 300mm So this is what the fuss is all about with this lens! What superb results! This was on the tripod, but the lens could have been used hand-held at this shutter speed. 1/250 f/11 |
(It is not possible to use this lens on the Pentacon Six without the Multi-Kilar.) |
2× |
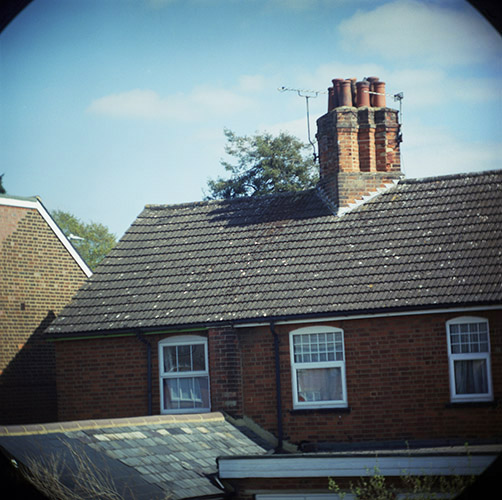
Resultant focal length: 180mm Very obvious vignetting in the top corners, but the image is still sharp and clear. We might get away with this if we were shooting an animal against a dark background, but not against a bright sky. (The vignetting is also present at the bottom of the frame, but less obvious because of the darker subject detail there.) 1/125 f/8 |
Resultant
focal length: 300mm Again, the same vignetting with the Multi-Kilar at the 2× setting. The image is sharpest in the centre but softer nearer the edges. A smaller aperture would probably have solved this, but at the cost of using a slower shutter speed. 1/125 f/6.3 |
Resultant
focal length: 600mm So this makes it “full house”: unacceptable vignetting of the image when the Multi-Kilar is at the 2× setting with all lenses tested. In the case of the 90mm Macro Zoomatar and the 300mm Pan-Tele Kilar, the vignetting is obviously not caused by the main lens, which fully covers the 6×6 format without vignetting when used without the Multi-Kilar. But when used with the Multi-Kilar, the image is still sharp, even with the widish aperture and slow shutter speed. 1/125 f/6.3 |
Resultant
focal length: 600mm As regards coverage, this is the best result with the Multi-Kilar, with a tiny amount of clearly-defined vignetting in the corners. On the lab prints, less than 1mm of this could be seen in the top left corner. The fact that we see a little more here probably indicates that I scanned beyond the intended image-forming area of the camera. An excellent result! 1/60 f/9.5 |
2.5× |
Resultant
focal length: 225mm This image is disappointing, even although it was shot on a cloudier day, which makes comparisons harder. The hard corner vignetting at the 2× setting is gone, but there is clearly some fall-off in image brightness towards the corners. It is also not as sharp as I would have expected. I was using a new lightmeter, and perhaps I have under-exposed the negative. 1/250 f/9.5 |
Resultant
focal length: 375mm This reveals that when the Multi-Kilar is set to 2.5×, the vignetting seen at 2× magnification disappears. Using the 150mm Tele-Kilar with the Multi-Kilar at 2.5× magnification results in sharp images that ably cover the full 6×6 format. 1/125 f/11 |
Resultant
focal length:750mm Again, the Multi-Kilar causes no vignetting when it is used at the 2.5× setting, this time with the Pan-Tele Kilar. As we would expect with this lens, the image is sharp, even when used with the Multi-Kilar, a fact confirmed at other magnifications. 1/250 f/8 |
Resultant
focal length:750mm Another extremely sharp result! The 300mm Tele-Kilar and the Multi-Kilar are clearly capable of superb image sharpness. For the tests with this lens, I used very slow shutter speeds, trusting that the Berlebach tripod and Arca-Swiss B1-G head would hold the set-up rock steady, and they have not let me down – even though I did not use the camera’s mirror pre-release mechanism! 1/60 f/9.5 |
3× |
Resultant
focal length: 270mm With the Multi-Kilar at the 3× setting, there is no more vignetting. This image is not as sharp as I would have liked, perhaps because of the slower than desirable shutter speed. 1/125 f/8 |
Resultant
focal length: 450mm A lovely, sharp image from the 150mm Tele-Kilar with the Multi-Kilar, in spite of the relatively large aperture used. 1/125 f/5.6 (Under-exposed 1 stop) |
Resultant
focal length: 900mm What a fantastic result! Sharp, contrasty and clear, in spite of the largish aperture and the slow shutter speed for the effective focal length. The depth of field is inevitably shallow. 1/125 f/5.6 |
Resultant
focal length: 900mm At normal degrees of enlargement, this is very satisfactory, but massive enlargement reveals that there is slightly less sharpness than in the previous image. This I put down to fractional focussing error. 1/60 f/8 (½ stop under-exposed) |
3.5× |
Resultant
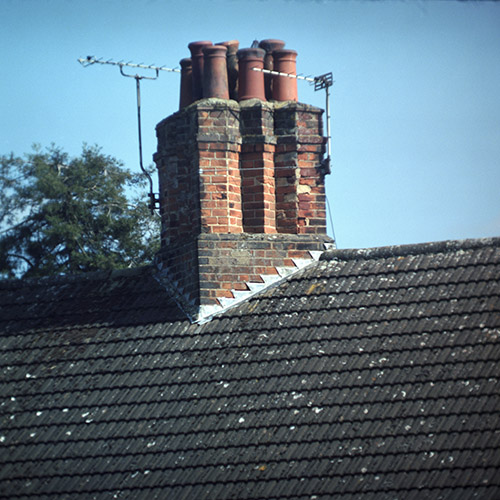
focal length: 315mm This image is acceptably sharp at normal degrees of enlargement, while not matching results with the Pan-Tele Kilar. However, an advisable minimum shutter speed would have been 1/500 sec and here we have used 1/250 sec, so that could be a factor. 1/250 f/8 |
Resultant
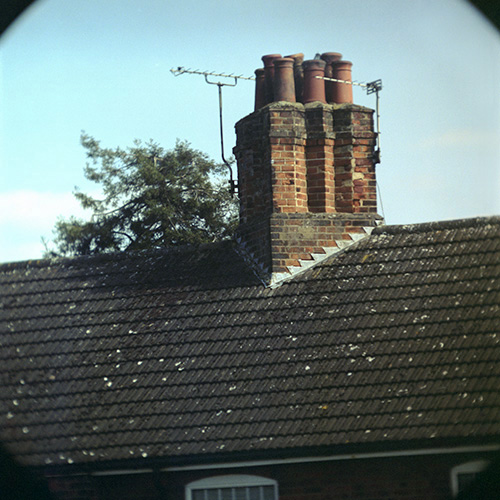
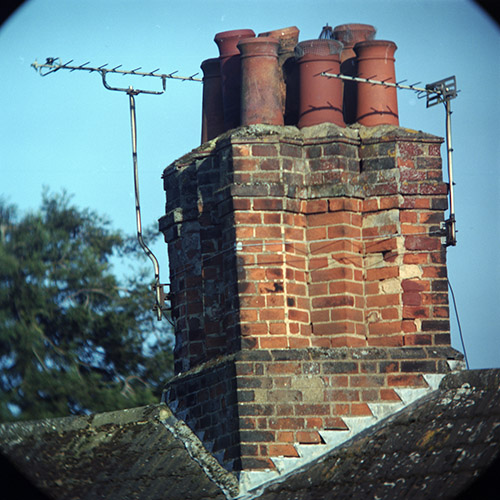
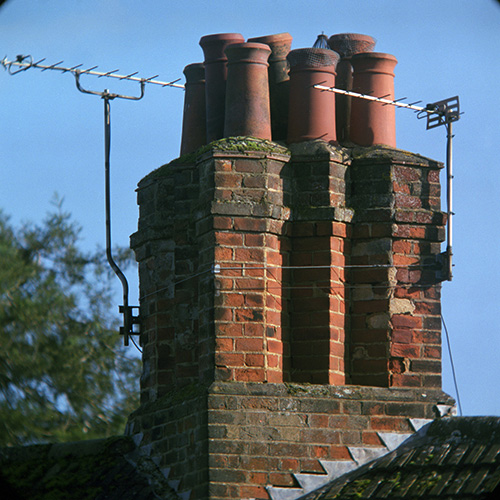
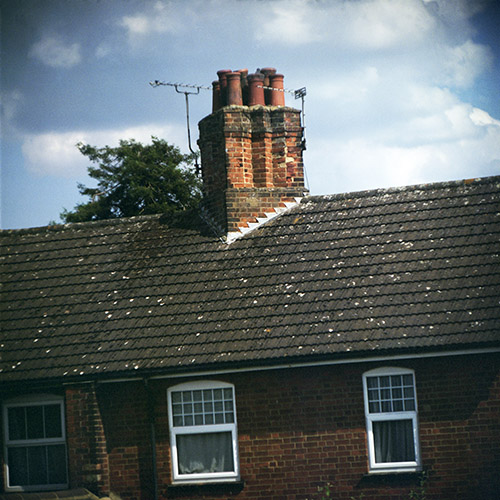
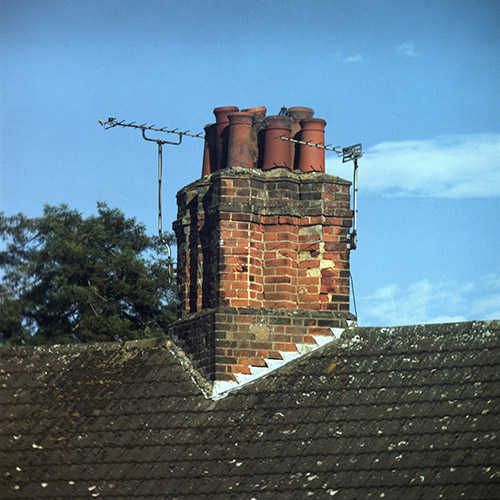
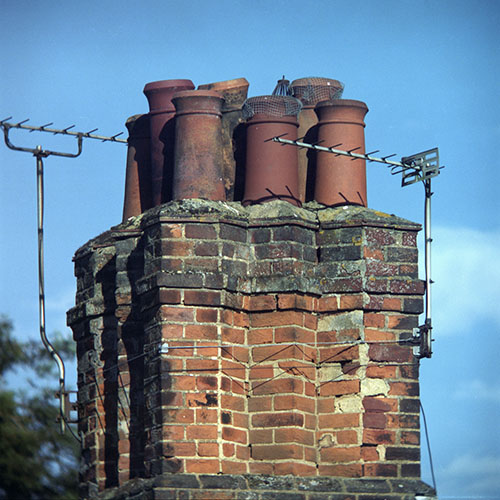
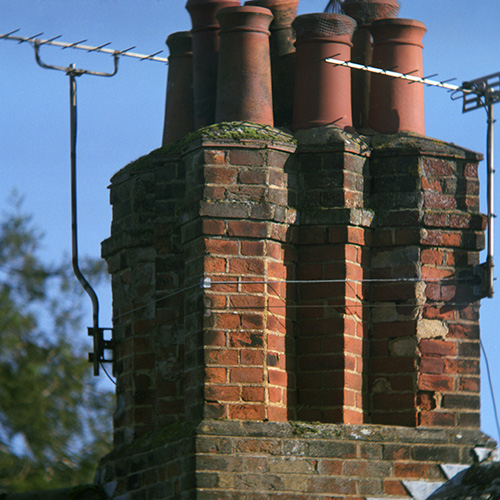
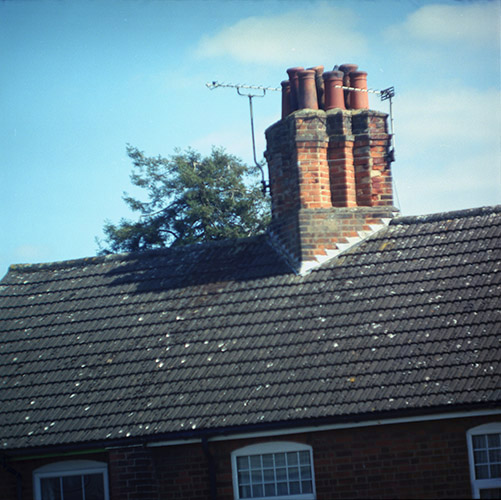
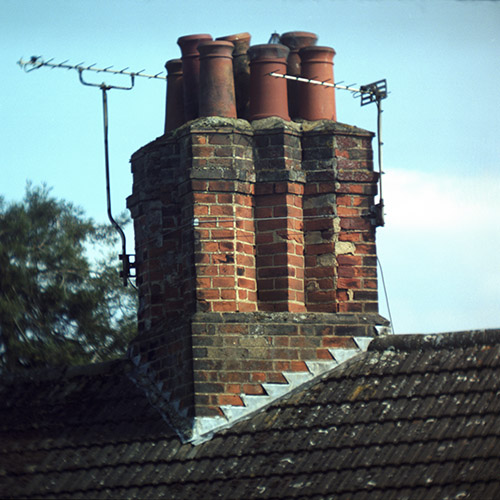
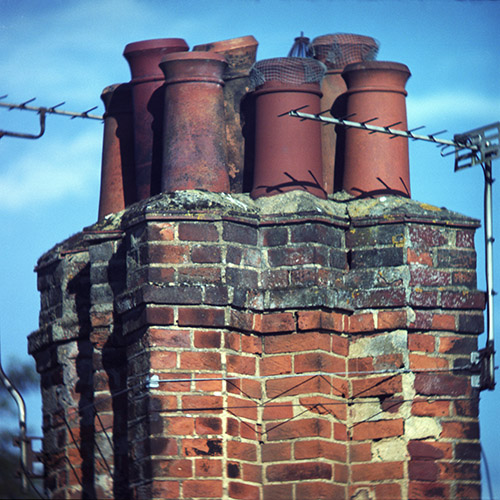
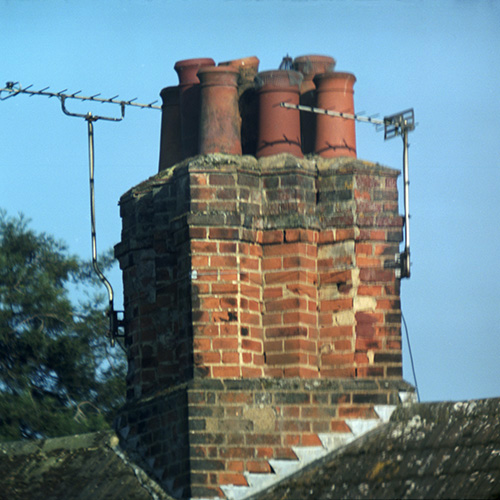
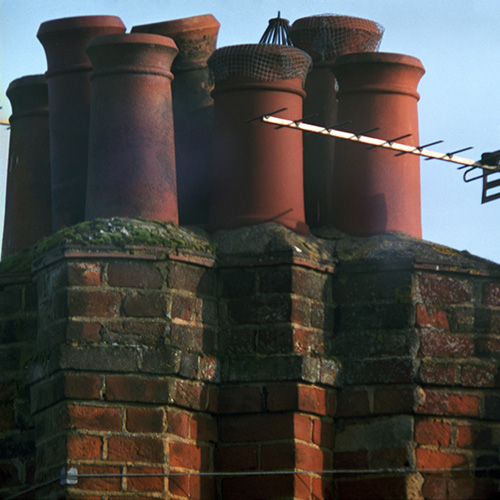
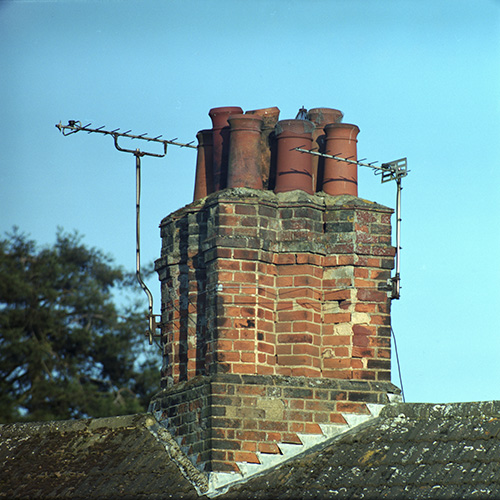
focal length: 525mm The bricks are sharp, but the chimney pots and the roof tiles are less sharp (and of course the depth of field is very shallow). If only we could have shot with the lens at f/8, but using a shutter speed of 1/30 sec to compensate would be asking for trouble (camera movement during the exposure, even when using a tripod). 1/60 f/5.6 |
Resultant focal length: 1050mm Another sharp image, as we would expect. However, we observe the fully-to-be-expected shallow depth of field at this focal length with such a wide aperture, and the rear television aerial is not as sharp as the rest of the image. To extend the depth of field, we would need to use a smaller aperture. 1/250 f/5.6 |
Resultant focal length: 1050mm Again less sharp than desired. With the camera quite high on a big tripod, I didn’t use the angle finder, or magnifier head, both of which can help with focussing, so I should have used the flip-up magnifying attachment, which magnifies the central area of the focussing screen 2.7×. 1/60 f/6.3 |
4× |
Resultant
focal length: 360mm The bricks are sharp, with a reduction in sharpness away from the centre. Again, a smaller aperture would probably have solved this. 1/60 f/5.6 |
Resultant
focal length: 600mm This is not as sharp as I would have liked, but I believe that the cause has been the slow shutter speed. No wonder Kilfitt recommend the use of two tripods with the Multi-Kilar! 1/60 f/6.3 |
Resultant
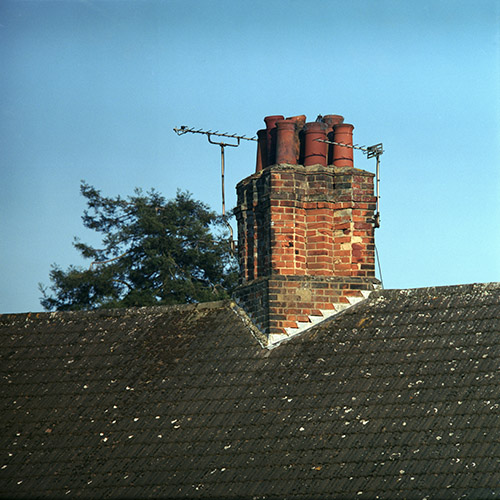
focal length: 1200mm Another superb result from the Pan-Tele Kilar with the Multi-Kilar! What a great lens! Compare with the first image in this series (with the 90mm Macro Zoomatar) to see just how much this combination brings a small detail in close. 1/60 f/5.6 (2/3 stop under-exposed) |
Resultant
focal length: 1200mm Good sharpness, but there is some flare in the top half of the image, especially noticeable on the left-hand side. The source of this is a mystery. This image needs re-shooting. 1/30 f/6.3 |
| The
500mm Pentacon (Meyer-Optik Orestegor) lens “Made
in Germany” |
| Focal
length: 500mm The Meyer-Optik Orestegor lenses (300mm and 500mm) deliver superb results – and using them, one does not have an upside-down image in the viewfinder, nor do we need to use a converter that “eats up” the light. They do not bear the name “Zeiss” (and they don’t have an automatic aperture), but they do deliver outstanding results easily. (See further results with the 500mm “Pentacon” lens here and here.) 1/250 f/11 |
Conclusion? The Multi-Kilar can deliver superb results, at least with magnifications between 3× and 4×, and also at 2× with the 300mm Tele-Kilar. It is also the only converter in the Pentacon Six mount that offers these magnifications. However, in most lighting situations, film with a speed of at least 400 ASA / 27 DIN is required, and (subject to other characteristics of the film, such as grain), a faster film would be preferable, to enable the use of smaller apertures and faster shutter speeds. All four prime lenses used with the Multi-Kilar in these tests have also shown that they are capable of superb results.
To go on to the next lens data section,
click below.
Novoflex lenses
To go to the beginning of the lenses section, click here.
To go to back to the data on Kilfitt lenses, click here.
To choose other options, click below.
Home
© TRA March 2019 Latest revision:
March 2023
